Set Review ➟ 42110 Technic Land Rover Defender: Part 3
After examining the images and video of the Land Rover defender that were provided with the press release and discussing the highlights of our interview with Milan Reindl, the designer of the set, it is time to move on to building the actual set.
As mentioned previously, while this set is complex enough to be counted as a “supercar” (despite the fact that it’s a 4x4 and not a race car), it does not fit in the same category as the Porsche 911 GT3 RS (#42056) or the Bugatti Chiron (#42083) because it does not come with “premium packaging”. The box, while certainly nice, is pretty standard and quite similar to the traditional LEGO Technic range.

Inside the box you will find a second box. Again, this is no surprise. LEGO has used this technique before to ensure the outer box does not sag due to the parts bags accumulating in the bottom part of the box.

The manual and sticker sheet are also included inside this second box. We have already analysed the sticker sheet in the second part of this review but we will come back to the stickers later

As usual this year, the building instructions have a QR code on the cover that provides access to the PDF building instructions. Since we wrote this review before the set was officially available the QR code didn’t work yet and so we have not been able to test it.

The rear axle build starts out in a rather predictable way for this kind of vehicle. While complex, the build is quite easy. You only need to be careful about not to push the Dark Grey links (or “Track Rods”) too far over the red axle with tow ball as that will lock up the suspension of the car. The same is true for all gears, axles and other mechanical linkages in this set. It pays to take your time to make sure that nothing is put on so tight that it does not spin freely.

The gearbox certainly is the centrepiece in this build. The orange gear shifter that was introduced with the Bugatti Chiron is also used in this set. The difference in this case is that only 1 gear shifter is used. And where the structure of the gearbox in the Chiron used a lot of angled beams, this model relies on a combination of Cross Blocks and Pin Connectors of various types.


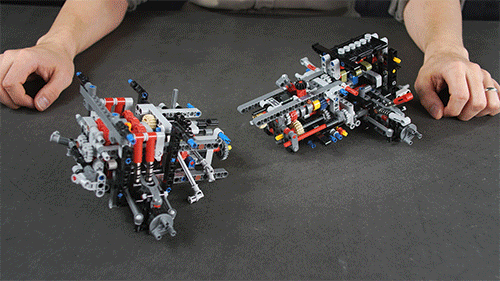
Another major difference is the use of the old type differential (in red) as a centre diff to make this model truly 4WD. The gear shifter mechanism uses a silicone band and a stop to ensure the gearbox won’t go from fourth to first gear or vice versa (you can still make this happen but it requires forcing the mechanism). You can see how the gearbox changes gears in the animation below.


The front axle assembly also holds a few surprises. We already mentioned the use of 2 different shock absorbers (in the rear axle all shock absorbers are of the same type), one red (stiffer) and one grey. Other innovations in the model include a working steering wheel and Hand of God (HOG). The universal joint (cardan) in the centre of the image will eventually lead to the steering wheel inside the model. At the back it connects to a Tan 20t gear that meshes with a Dark Grey 24t gear on an 8L axle with stop. This axle will later be pushed through to the centre of the model and connect to the HOG.

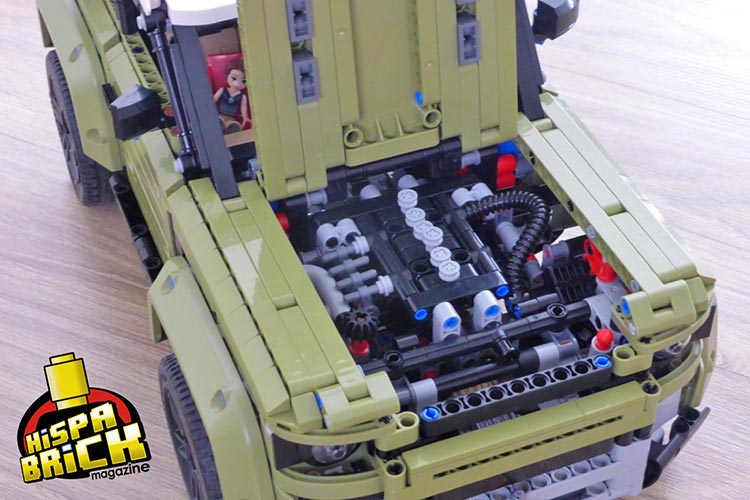
Another thing that was mentioned in the second part of this review is the way the engine is built. Instead of using the traditional engine block elements a different solution was applied that keeps the engine in scale with the rest of the model. Each option has its trade-offs. A 6-cylinder inline engine together with the traditional 90º offset of elements in LEGO constructions means that engine is still 4-stroke. This results in the cylinders moving in a cycle of 2-2-1-1.
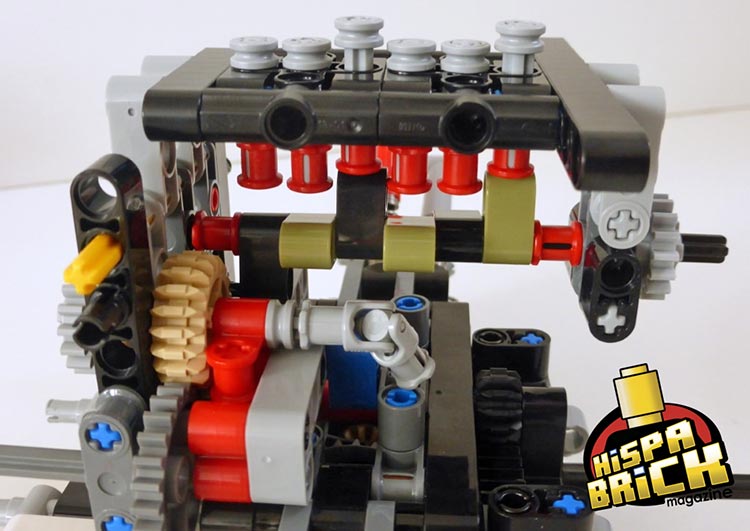
Right behind the front axle you build the gear selector assembly which contains 2 levers and a rotating axle One of the levers engages the engine either in Drive or Reverse. Reverse bypasses the gearbox and so is a single speed.
The second selector engages either High or Low gear. You can see the Blue 20t Clutch gear meshing with a 16t gear (providing a gear ratio of 1:1.25) and on the other side the opposite configuration of Red 16t Clutch gear and Tan 20t gear (with a gear ratio of 1.25:1 or 1:0.8)


Once you put both elements together it is time for the next stage

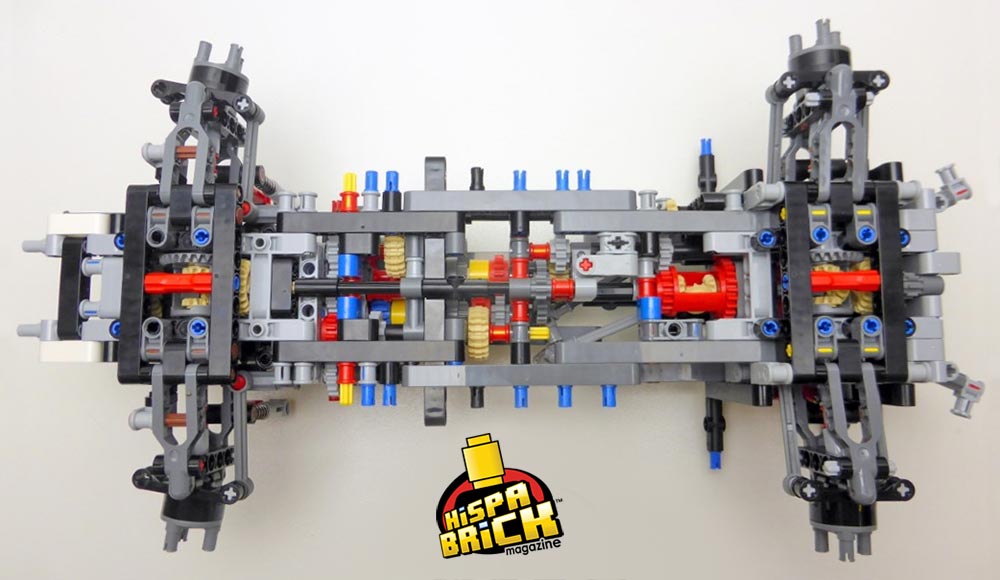
Another reason why the 42110 Land Rover Defender feels like a “supercar” is the way the model is built. Just like in the 42083 Bugatti Chiron the rear and front axles are built separately and the joined together (in the Bugatti Chiron this was labelled as “the marriage”), aligning several transmission axles to connect functions in the back and front.

After connecting both sides you still need to connect the two universal joints to the yellow and red axles that they align to. The connection is easy to make, but even so the instructions include a special QR code at this point that links to a short video showing how to make the connection.

After this you add some reinforcements and additional gears, as well as the interior steering wheel and then you move on to the front of the vehicle to lock the suspension into place and start building the winch mechanism.


There are no real surprises here, other than the light grey cross blocks on the lower wishbone to limit the travel of the front axle suspension.

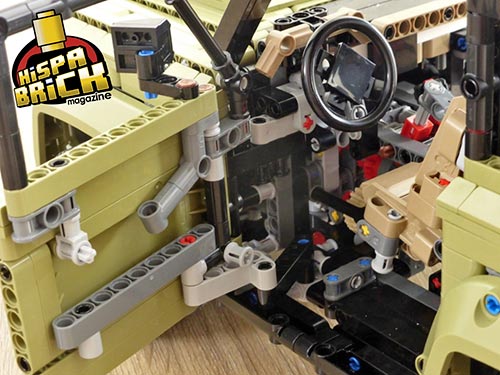
Most of the mechanical part of the car is now finished. (We’ll get back to the rear door in a moment) and we start adding details to the interior of the car.

You can see I forgot to connect the universal joints before placing the front seats. This meant I had to remove the pillar that holds up the chair to be able to access this part, but it was corrected quite easily.
What may stand out most in the following image is the large black 11x7 frame, but look carefully at the front part of that frame and you will see another curious detail of the set: it comes with a rear-view mirror!
Behind the driver seat you can also see the pillar that will connect to the HOG on the roof. Rather than placing it in the centre, the HOG is located right behind the driver’s seat. If you look carefully you can also see the silicone band that provides the stepping function for the gearbox. This means that while the chassis cannot be separated from the body of the car, you can see almost all of what is going on inside the model after finishing it.

The last mechanism in the set (not counting the hinges on doors, boxes and ladder) is located inside the rear door.

The beam behind the back seats prevents the door from going in too far. Opening the rear door also provide a good view of another part of the gearbox.


The large white roof doesn’t appear entirely uniform under strong artificial light, but I haven’t really noticed the colour difference in normal conditions.


This concludes the rear part of the Land Rover. The front still needs some work though. First you finish the winch assemble

After that it’s mainly connecting beams and pins to finish the hood which doesn’t really make for interesting pictures. So, at this point I will highlight a few other things I noticed as well.
First of all, the colour of elements in the instruction booklet doesn’t come very close to the colour o the actual elements. You may not notice this much when looking for black, white or grey elements, but the green in this set is really off:
Fortunately, the colour difference does not lead to any confusion so it really is of very minor importance.
Secondly, combining Technic elements (like beams) and System elements (standard bricks) requires some kind of interface. Traditionally Technic sets use half pins for this purpose. In this set ales with stud are also used in a practical way. The use of “flick missile” pins is less frequent. The connection made with these elements is very solid and so also very hard to take apart.

In order to achieve the rounded shape of the front, in addition to the brick built central bulge, there are subtle differences in height between the wheel arches and the hood.

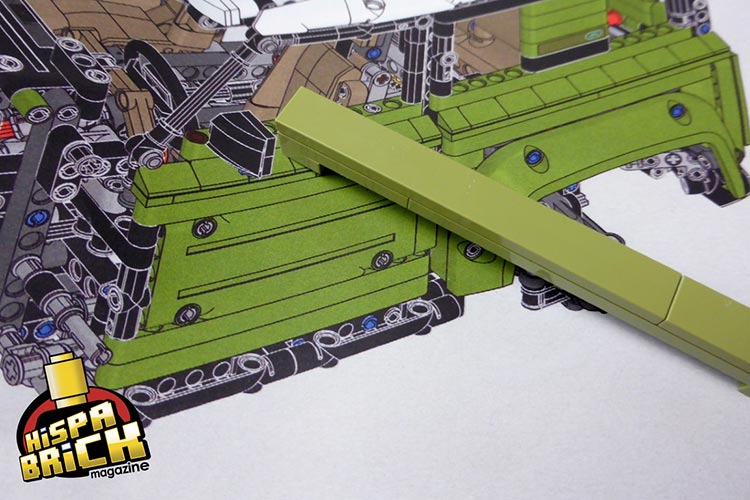
Now back to the suspension, because this detail although small, really stood out to me.
The suspension on the model is really good and it feels really bouncy. Additionally, the car has a small angle of attack, meaning the front is slightly lower than the back. This is achieved by the use of mixed shock absorbers at the front. The effect is very small, but you can see it very clearly in the next picture:

Conclusions
The 42110 Land Rover is a great build and the gear box and is a pleasure to watch. So many gears of course also have a drawback: backlash. If you want to see the engine move you will have to drive for a considerable distance before all the accumulated backlash is resolved and the pistons start moving. When they do it is a nice sight though.
You may have noticed I have not applied a single sticker to the set. In hindsight I am not entirely convinced this was a good idea. In some places it doesn’t really matter to me, like on the inside of the doors compare the official picture form the press release to our picture without stickers:

The steering wheel and GPS display might look better with a sticker though. Those stickers are easy enough to apply. Applying the ones in the door would require disassembling the door to gain access to the panel first.
Another almost compulsory set of stickers is related to the headlights. Again, some disassembly is required to apply them.

However, overall the remaining stickers are not really necessary to make the model look really good.
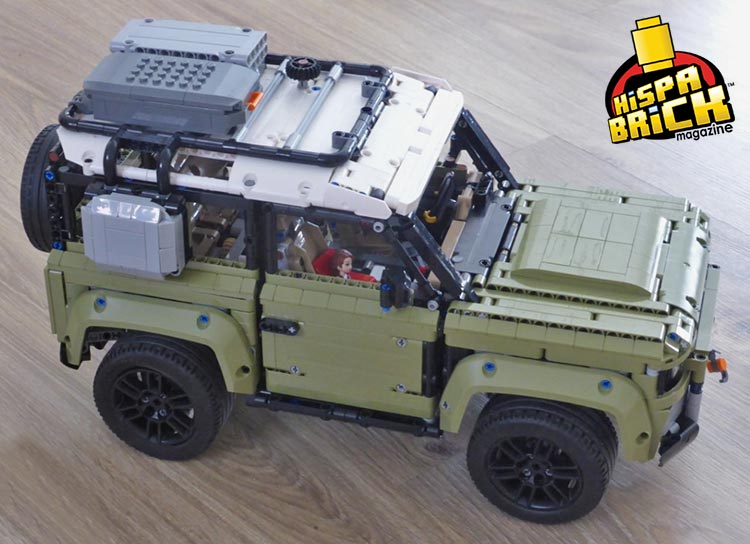
If you took a good look at that picture you must have noticed the car now has occupants:

Not quite Technic fig size and the minidoll is also too small for a child. But who cares, this is LEGO, and imagination is everything!
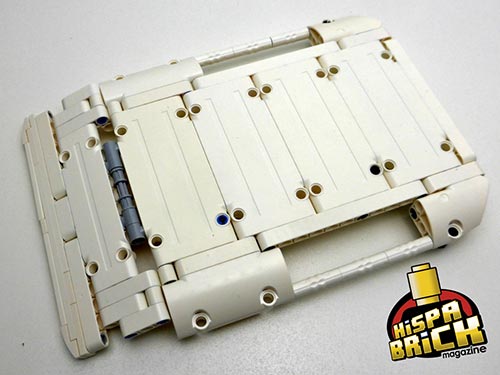
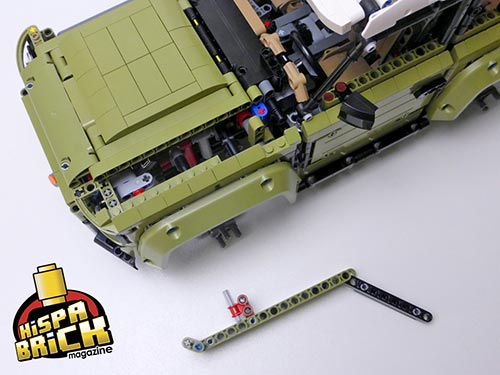
Last but not least, a look at the bottom of the model:

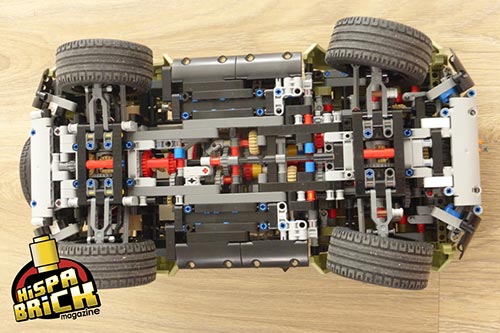
The steering on the Land Rover Defender has a very reasonable turning radius which makes t fun to drive around with it. The suspencion is also pleasantly bouncy. This makes this set not just fun to build and check out its inner workings, but also fun to play with!

8158


