42056 LEGO Technic Porsche 911 GT3 RS
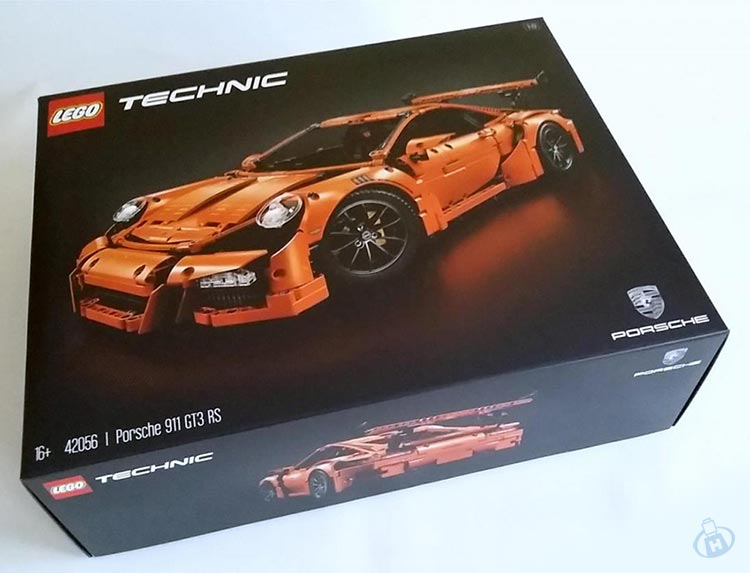
Set number: 42056
Set name: Porsche 911 GT3 RS
# of parts: 2704
The growing size of the Technic flagships appears to be an unstoppable trend. The LEGO Technic Porsche 911 GT3 RS completely obliterates all previous records for size and sets the bar almost 50% higher than the previous model. In a couple of months even that record will be history, but until then I can boast I have the largest official Technic set ever.
Size is important, but there are other factors that make this set special. The first of these is the fact that, after models licensed with Mercedes and Ferrari, LEGO has teamed up with new partner for a licensed Technic set. And in doing so LEGO has also changed something in the concept of this set. In addition to advertising it as the Ultimate LEGO Technic set, LEGO has made several references to the fact that this set is the beginning of a new LEGO Technic series. What exactly that means remains to be seen. Some have speculated this to mean there will be several Porsche vehicles, other that this is the start of a new series of licensed Super Cars, and still others that this new series is about a new user experience when it comes to Technic models. We hope to be able to tell you more about this soon, but for now, let’s concentrate on what this set offers that makes it Ultimate and extrapolate from there.
Ultimate
To emphasize the fact this is an “ultimate” set, LEGO has made a number of interesting and unconventional moves. When the set was first shown on toy fairs the model was black and covered in camouflage stickers to hide as much as possible about its shape and functions. Of course that didn’t deter the hardcore LEGO Technic fans and soon different solutions and ideas were proposed and often discarded regarding the looks and the functions of the model. Whether intended or not, this move started a lot of speculations with the resulting hype and the model has received more attention on AFOL forums and blogs than any of the other models that were presented.
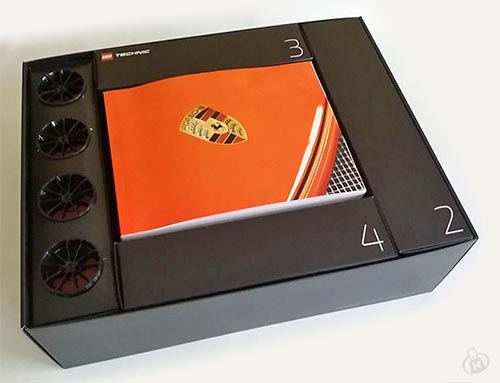
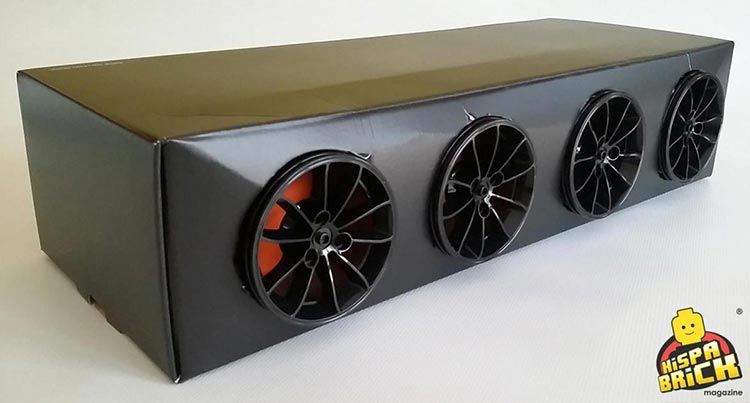
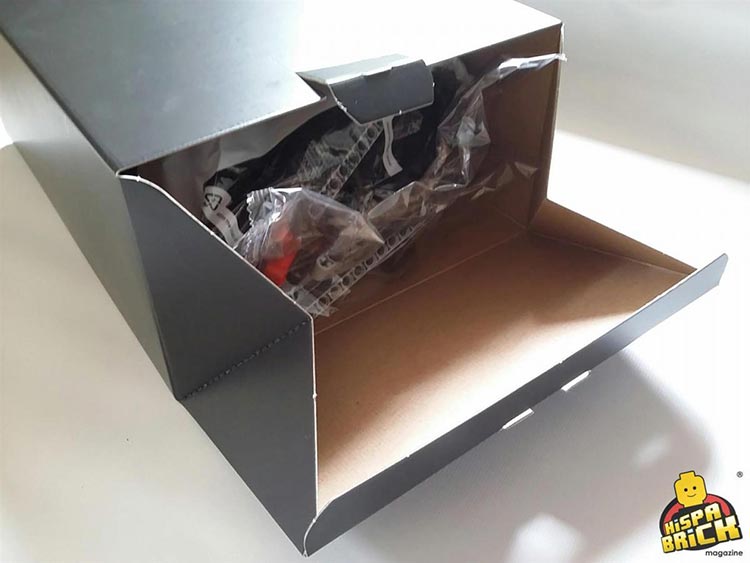
LEGO has also made a lot of effort to make make the set feel special from the very moment you receive the box. Each box is packaged separately and the beautiful black box that contains the 42056 LEGO Technic Porsche 911 GT3 RS feels deceptively small and makes very little noise when handled—an indication of how tightly packed everything is in this set. Rather than use the typical box we see for “normal” Technic sets, LEGO has designed a special box to gift-wrap the set:
The presentation is certainly spectacular and a lot of attention has been paid to small details. Four seals hold the lid in place and after cutting these through they can be gently peeled off the lid and base without damaging it.
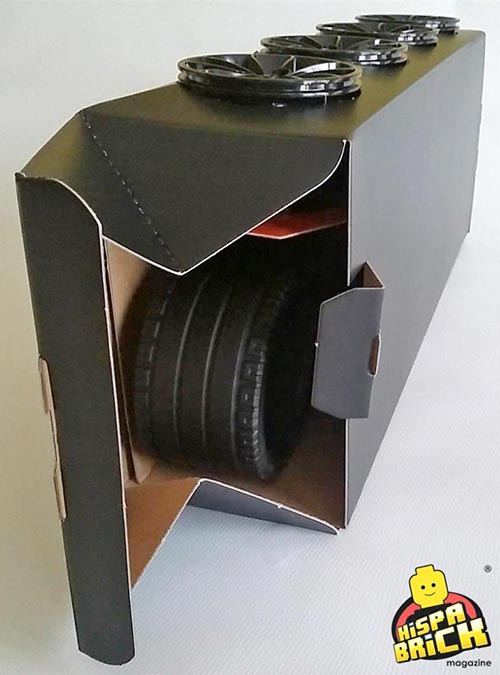
After taking off the lid you can see the streamlined shape of the Porsche 911 printed in glossy black on the matt background of the box on the short sides of the base and “911 GT3 RS” in the bottom right of the long sides.
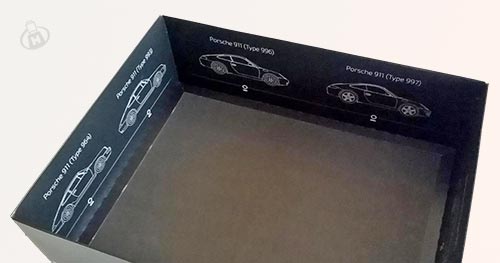
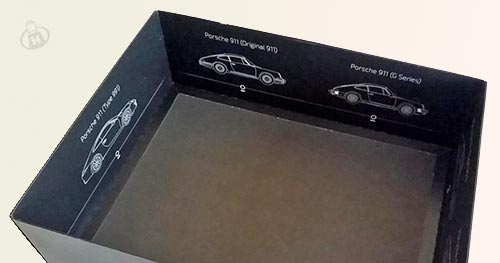
The inside of the lid shows a historic overview of the different versions of the Porsche 911, from 1963 to 2011.
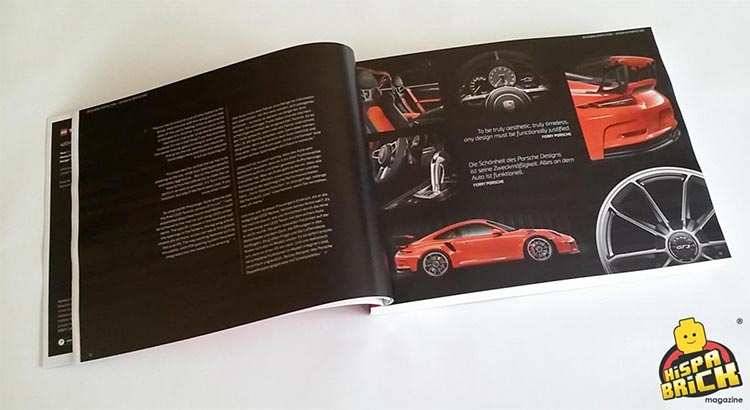
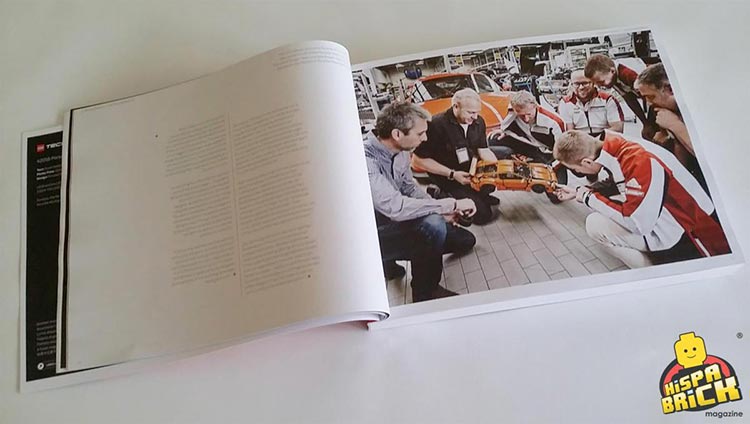
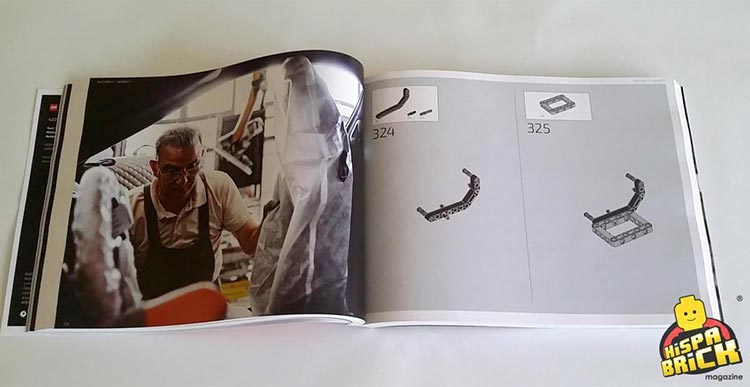
In the centre of the box, the instruction book takes a prominent place, because of the splash of colour it provides, despite being quite discreet and stylish, and the weight it represents, both physically and as the centre of the story the entire sets wishes to convey. The book is nearly 2.5cm thick and measures 20.6cm x 27.2cm. It contains 580 pages (including front and back cover) and the instructions don’t start until page 41. These first pages are used to explain some of the history and motivation behind the Porsche 911 and a description of the design process of the LEGO version in both English and German. To mention just one detail, the text mentions the use Porsche makes of black models to make it hard to see the proportions of the model, in much the same way as LEGO did when presenting the model at the toy fairs. These texts were obviously first written in German and while the quality of the English texts is impeccable, it doesn’t transmit quite as much information as the German original. There are an additional 6 pages of photographs from the Porsche archives in the back.
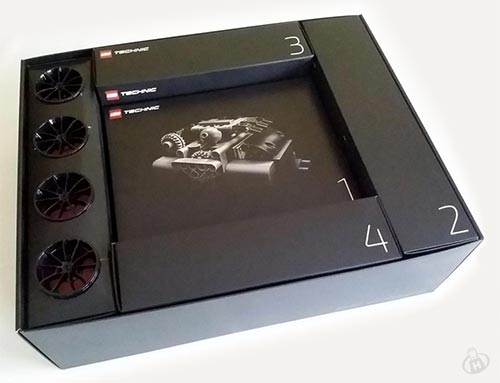
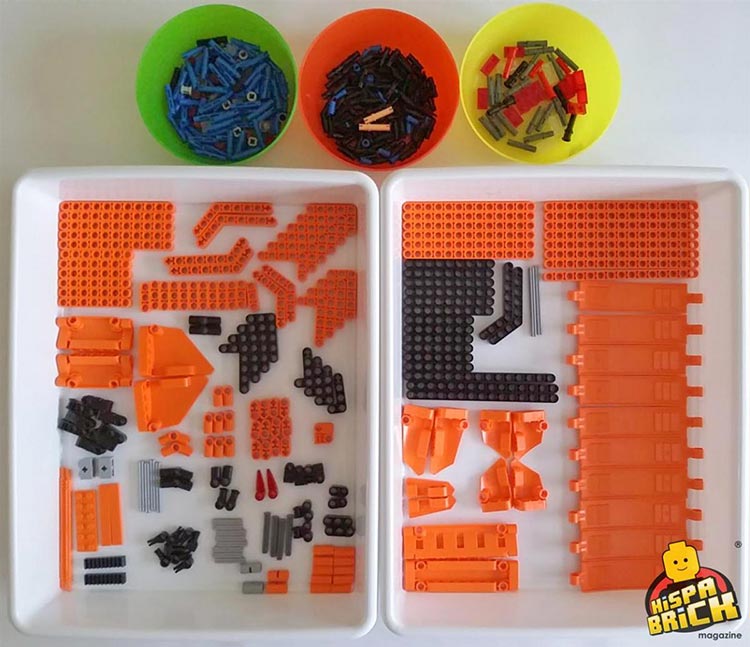
After taking out the book and a small sticker sheet underneath it it becomes clear the set has been divided into 4 stages, each with a numbered box.
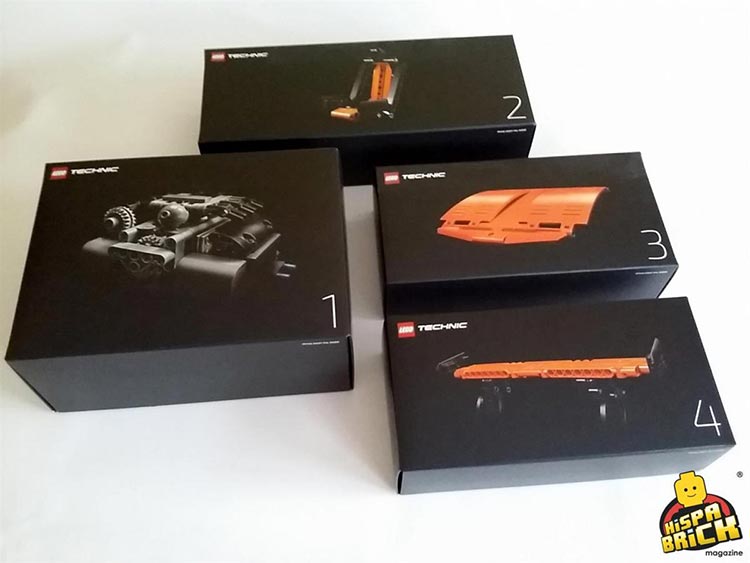
The fifth box, containing the special rims and tires for this set is used at the end of stage 4.
Similarly, the instructions in the book have been divided into four sections. Each stage is introduced with black two-page spread containing the same image that is also on the corresponding box and a short description of what will be built during that stage. Next up is a photograph of the building process of the actual Porsche, before starting the building steps.
So let’s start building
Stage 1: The Chassis
Box 1 contains the parts for the Chassis. For some reason the wheel arches are included in this box (presumably because there was space here and not in box 4 where they really belong). It is nice to see 2 of them are printed as a sticker in this location would have been really awkward.
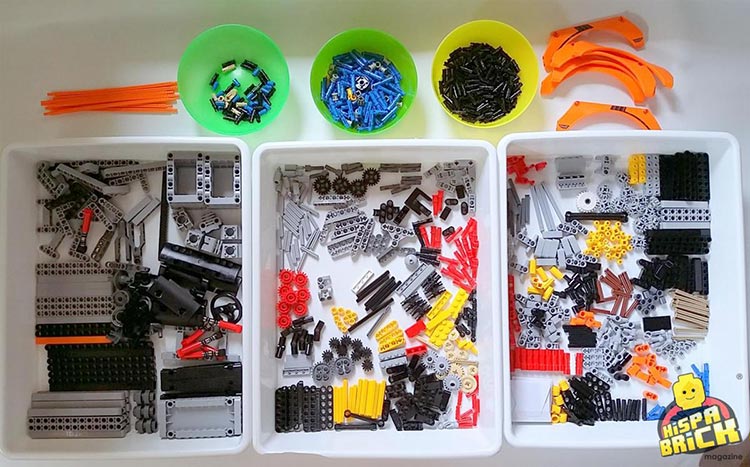
Some of the more interesting parts in this box include the following
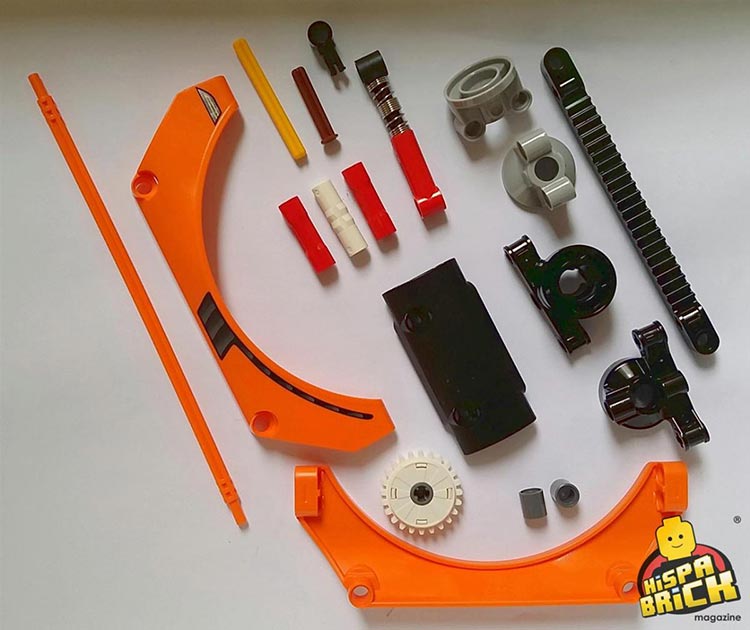
A question that immediately comes to mind is whether LEGO has decided more colour coding is necessary for the axles. This set comes with 3L axles with stop that are chocolate brown and the 5L axles in this box are yellow. A quick look at the inventory reveals there are some LBG 5L axles in the set, but those are used in places where they are more visible. Another nice surprise that can be gleaned from the inventory is the inclusion of a (yellow) 11L axle.
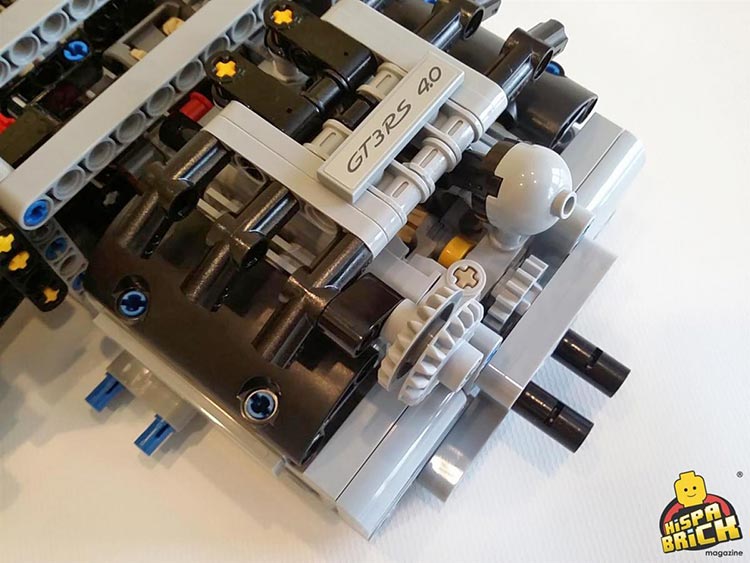
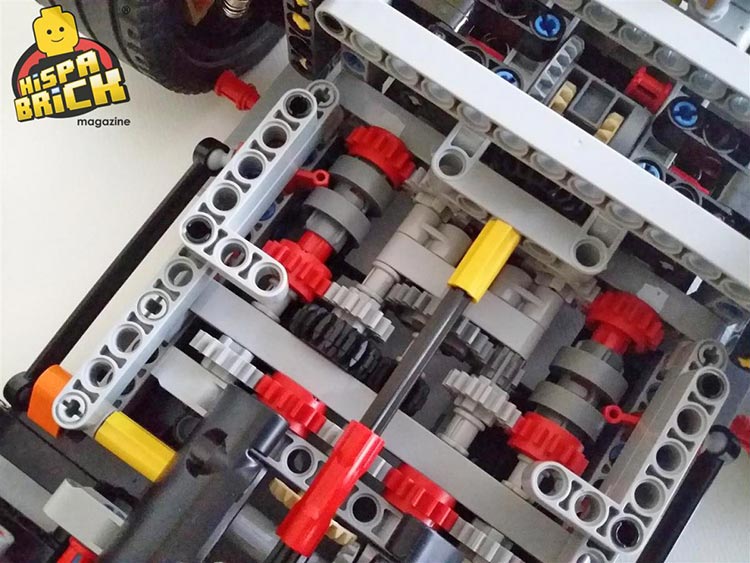
The red shock breakers were already mentioned in the designer video as well as the new 3L smooth axle connector that was developed especially for this set. No less than 11 are included (and only 2 are used in the gearbox as an alternative to the “traditional” 3L driving ring connector). There are a large number of panels and frames which help to create a large solid structure for the base of this vehicle.
The first element we build is the drive selector (setting the car in drive, neutral or reverse), an appetiser for what is to come.
The structure of the chassis progresses quickly with the use of panels, frames and beams.
and then on to the next little mechanism which helps the transmission bridge the gear selector mechanism (or so you will eventually realise).
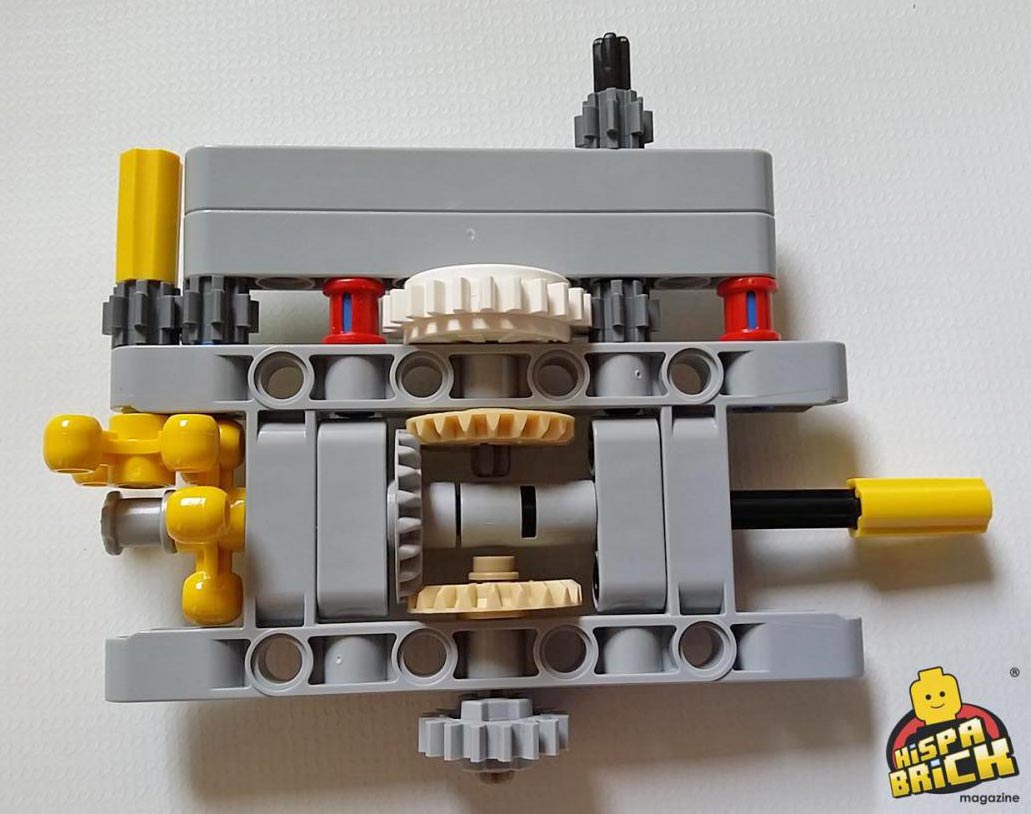
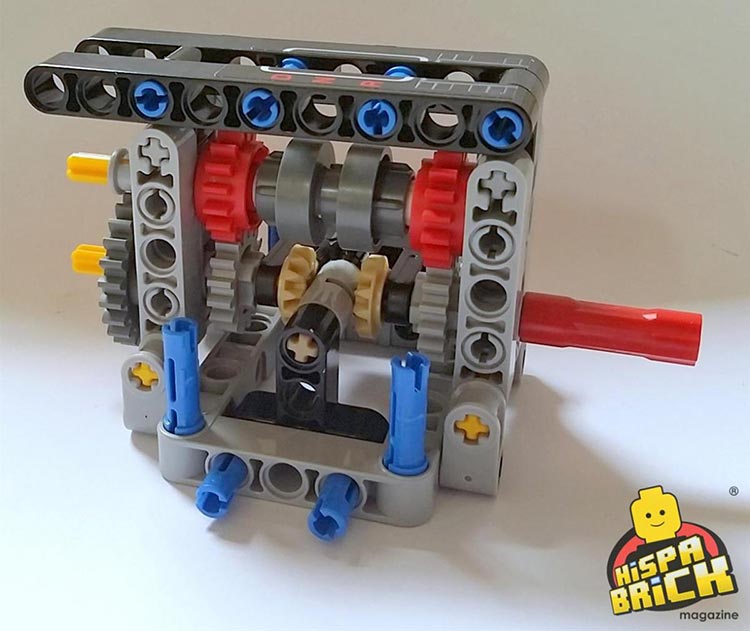
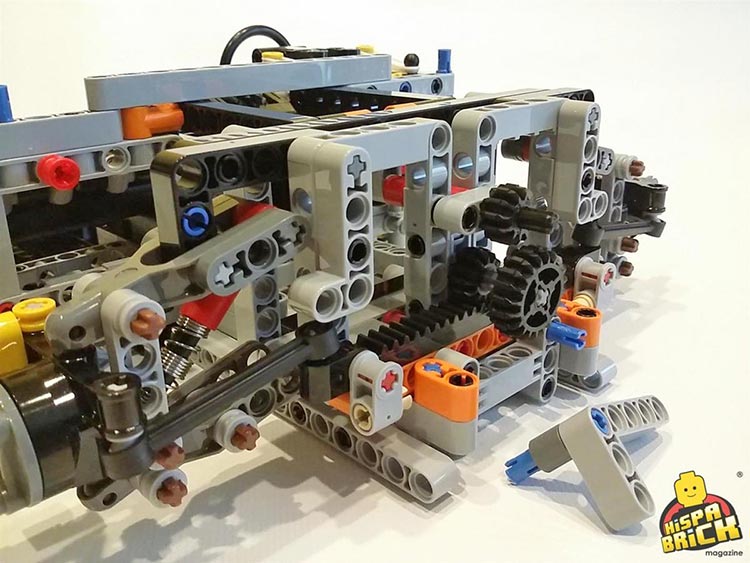
Then it is time for the gearbox. Aside from the use of the new 3L smooth connectors this is a very straightforward build.
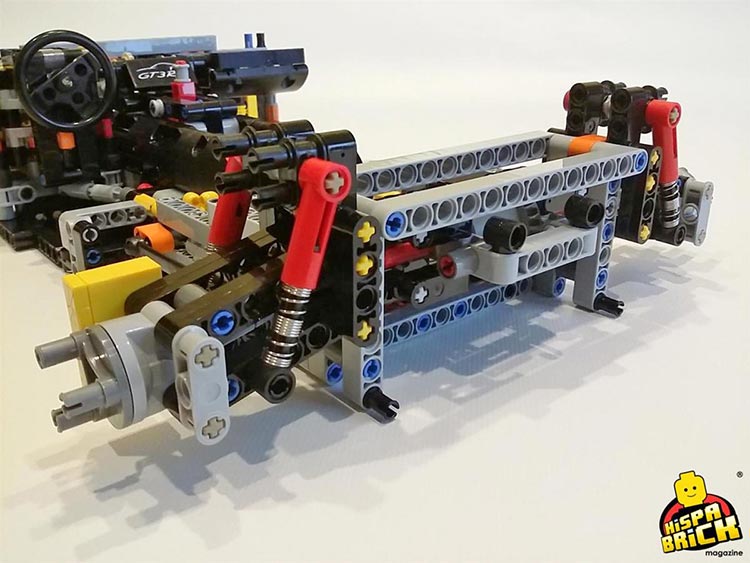
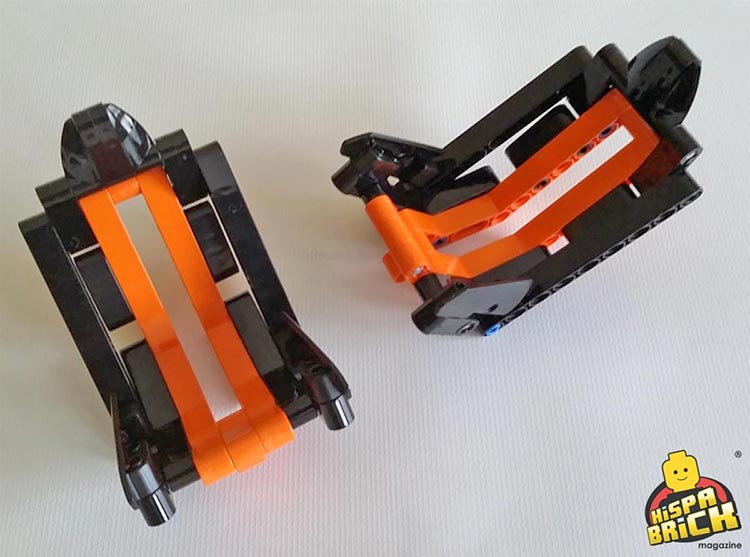
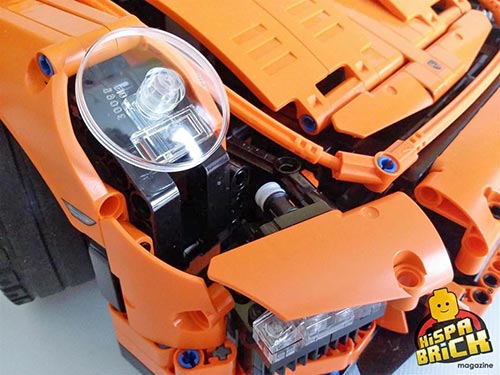
And then it is time for the steering column which also includes the gear shifting paddles. This is no doubt the mechanism that has generated more speculation. It feels quite fragile while building and you don’t get a real sense of how it will work until you connect it to the chassis and get some friction (from the changeover mechanism) that you get a real feel for how it works. As exciting as this part of the construction is, I was also a little disappointed with the steering wheel. The position of the steering wheel at 90º is very strange. In addition, the 1x1 round tile with the Porsche logo turns out to require a sticker! I can recommend the use of a pen knife the get the sticker on properly and more or less centred.
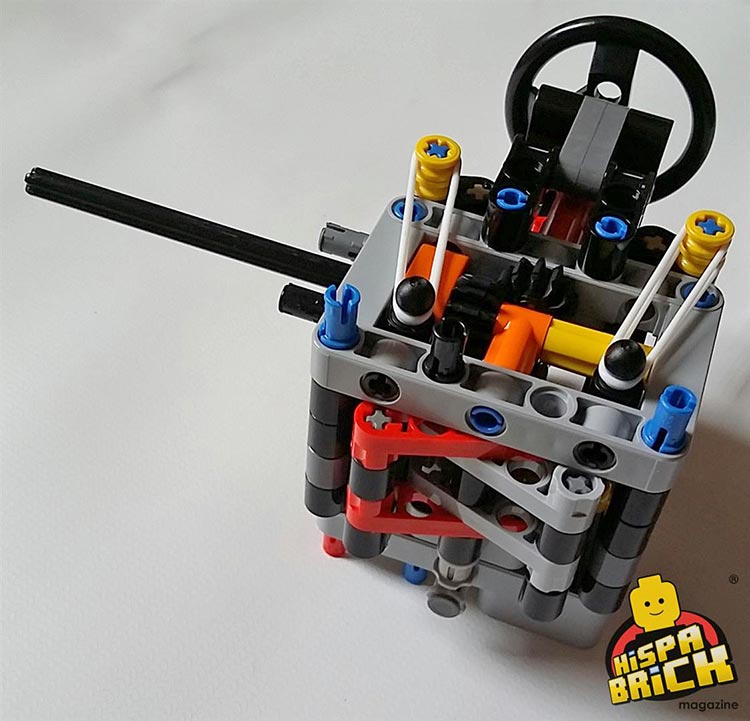
Once you install the steering column on the chassis you can test the paddles. They require quite some force (not surprising given they are held in place by two rubber bands each) and the amount of stretch the rubber bands are subjected to makes me wonder if I should release them whenever I don’t plan to use the mechanism for an extended period of time—otherwise they might get very loose or even break.
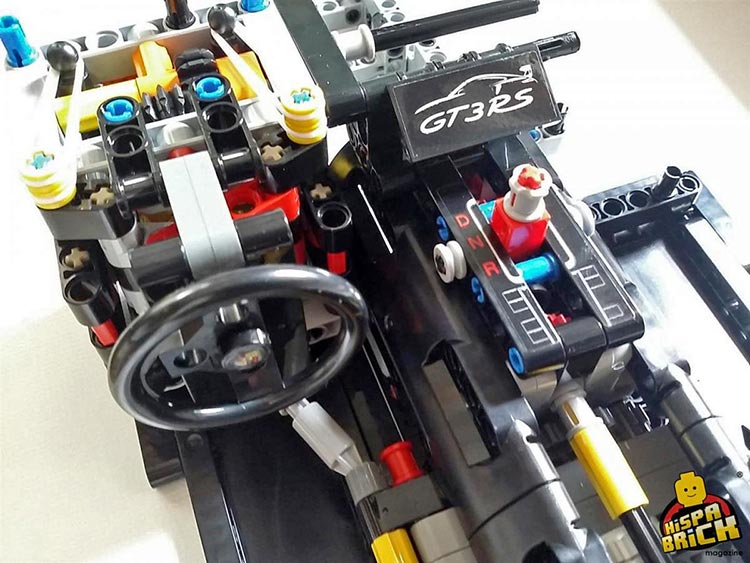
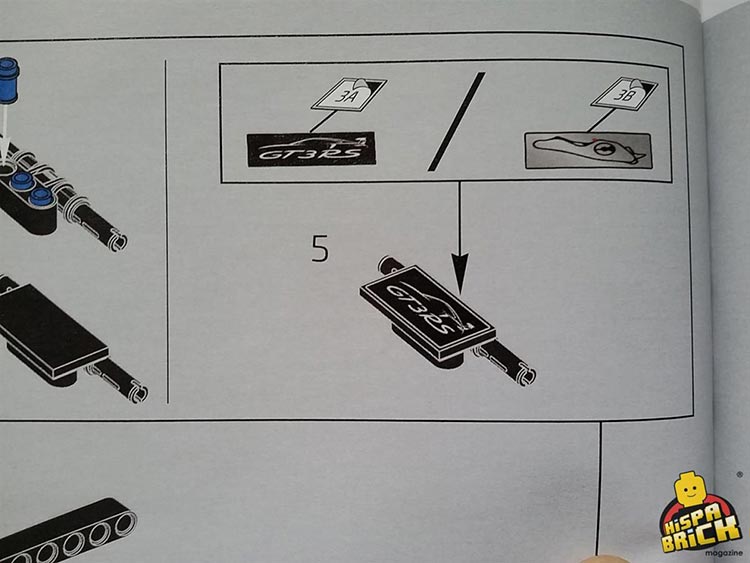
Next to the steering column and behind the drive selector you install a panel (screen) that can hold one of two stickers. One shows the same streamline of the car as is present on the box, together with the denomination of the mode (GT3 RS), the other shows a (GPS?) view of the Weissach Porsche test track. Again I felt disappointed: surely an “ultimate” set could include a second 2x4 tile so I can easily swap one display for another, instead of having to choose once and for all (or source a second 2x4 tile).
The next hurdle is installing the front suspension with steering mechanism. To anyone unaccustomed to building Technic models, getting the steering wheel to align with the wheels may seem a daunting task and no guidance is given in the manual. It would have been so easy to hold off adding that last 20t gear and the 3x5 beam until after hooking the assembly up to the steering wheel. Aligning it this way is a piece of cake, and much more reliable than the method the instruction booklet appears to suggest—holding everything straight while inserting the axle coming from the steering column into the steering CV joint in the suspension assembly.
The designer video made a big deal of the authentic yellow calipers on the front and rear wheels. In actual fact they are nothing more than a couple of yellow tiles with stickers that have no other function than to look reasonably good, but add no function to the model.

The gearbox isn’t completed until after adding the rear suspension. An odd choice as the last gears do on depend on the structure of the rear suspension assembly and following this order makes it really hard to see how the complete gearbox works. It also prevents you from easily realising a mistake is being made…
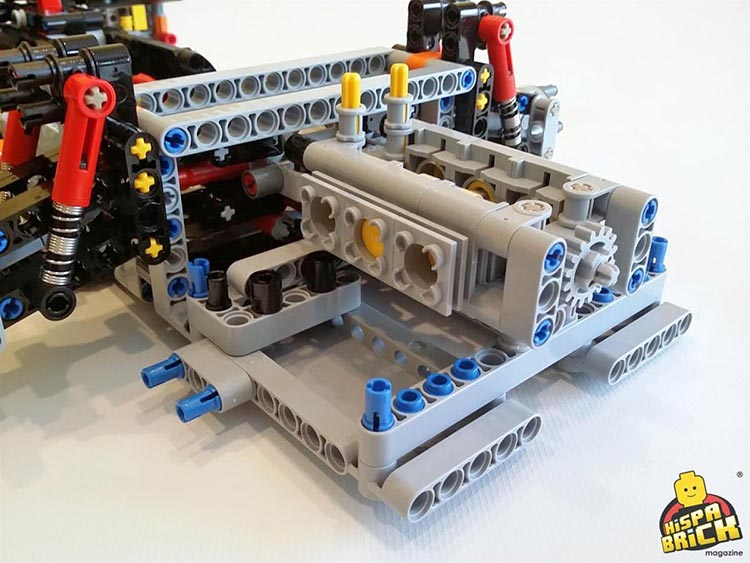
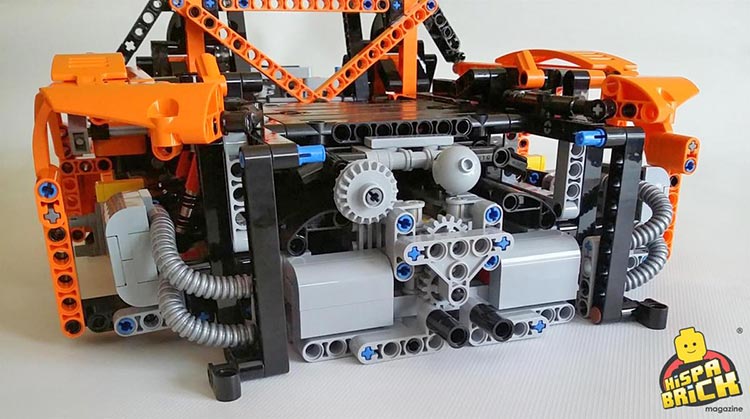
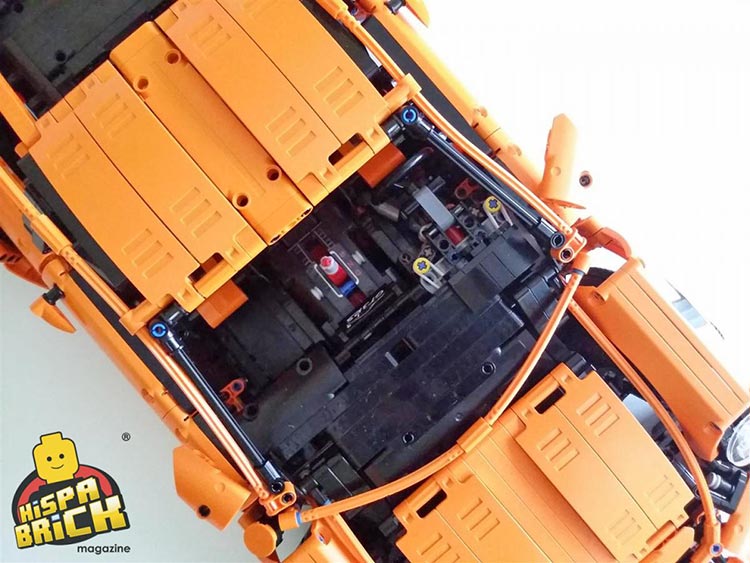
It’s time to build the engine. The flat 6V engine of this model is a bit of a puzzle to me. On the one hand, I like (and most certainly expected) the fact that the engine is built with standard LEGO Technic cylinder parts. The thing is that as soon as it is finished and hooked up to the transmission it is covered on all sides. The finished engine looks impressive and quite possibly a lot like the engine in a real Porsche 911. However, you can only really see the last two pitons working as well as part of the crankshaft. Of course it is hardly realistic to see the pistons of an engine in a real car, but there are certain “givens” in a Technic set…
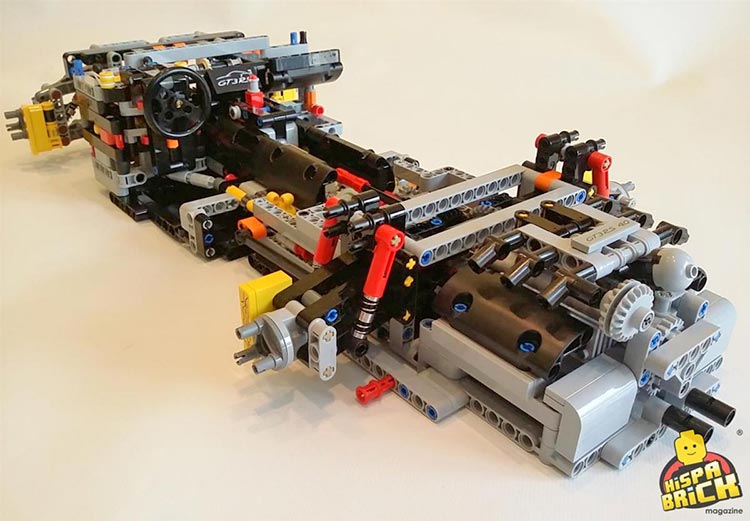
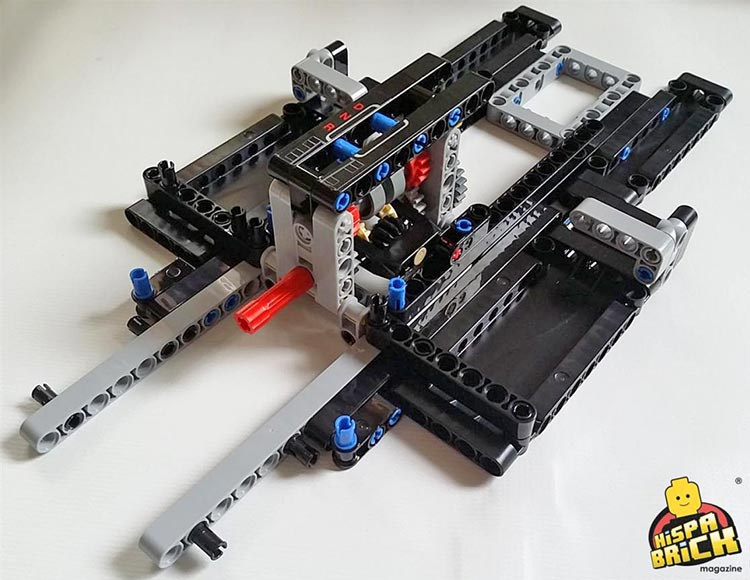
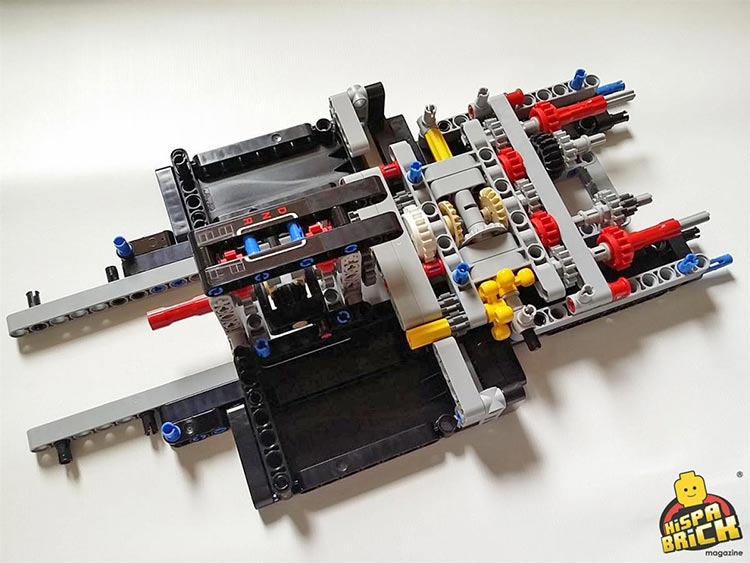
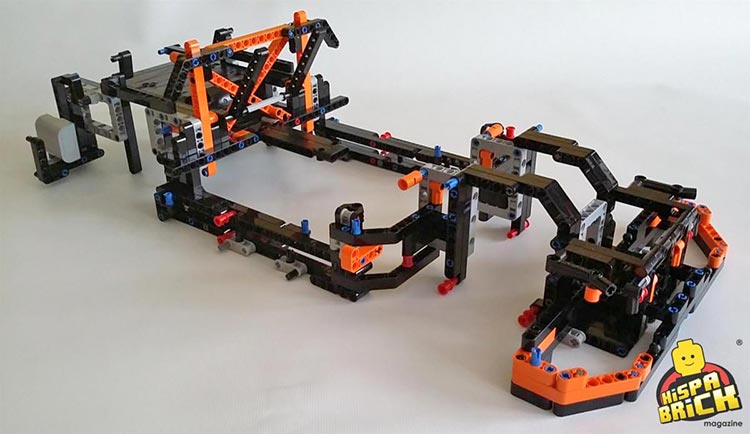
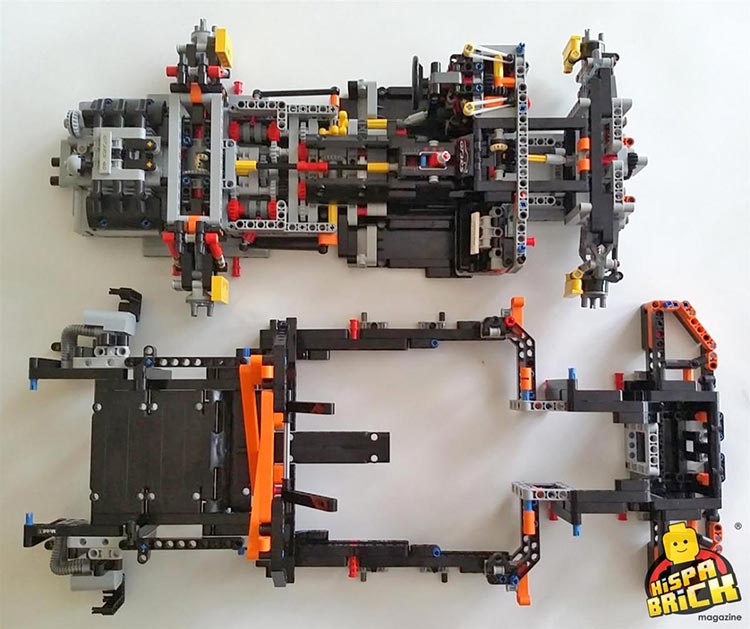
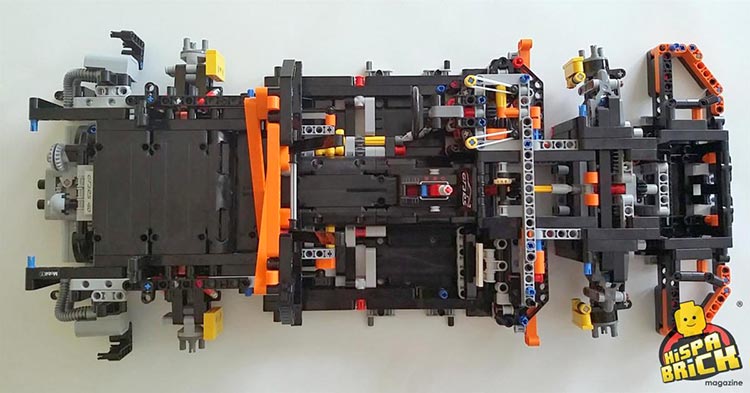
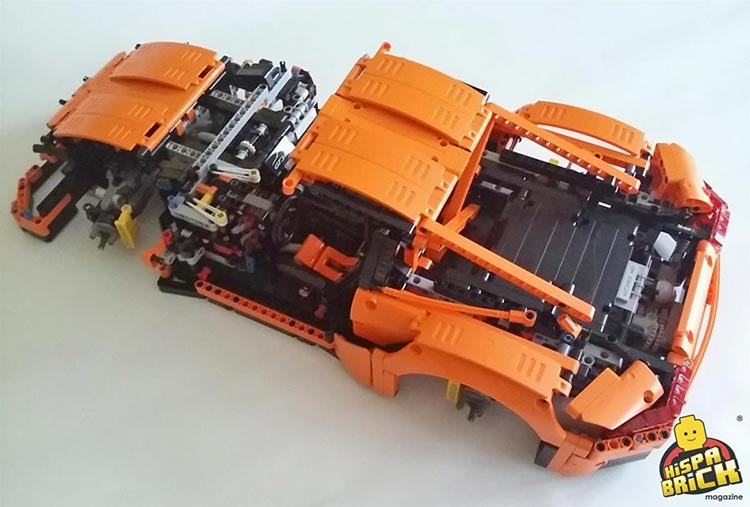
The chassis is finished. We have suspension, steering, a working motor, a drive shifter and the “piece de résistance” and innovation in this set, the gear shift paddles on either side of the steering wheel. The set certainly looks promising…
Stage 2: The “Marriage”
On to box two. As explained on the introductory page for this stage, during the production of the 911 GT3 RS there is a stage called the “marriage” when the drivetrain is connected to the body of the car. It is now time to build that body and after a little over 170 steps it is joined to the chassis.
While the construction process during stage 1 was more or less self explanatory (it’s quite easy to see you are building e.g. the steering column or the engine), the steps in stage 2 aren’t quite as obvious and unless you skip ahead to see where it is all leading to you have no idea of what you are building for much of the stage. Some explanatory notes would have made the process much more enjoyable.
There is only one sticker in the whole of stage 2: a tiny “Mobil1” sticker that ends up to the right of the engine.
By step 493 it is time to connect the body to the drivetrain [1], using 14 long red pins with bush (and a few other elements).
Finally the seats are added and it’s time to move on to Stage 3
[1] As I write this review I can hear myself thinking to “correct” my personal description of the elements. Both elements together make up the chassis, but since the upper part is connected to the doors and plates making up the bodywork I tend to think only of the drivetrain as the chassis.
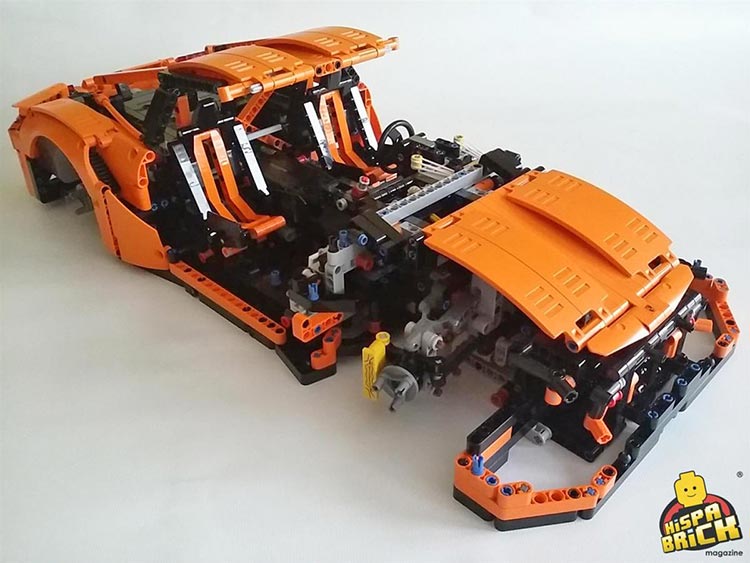
Stage 3: On to the Roof
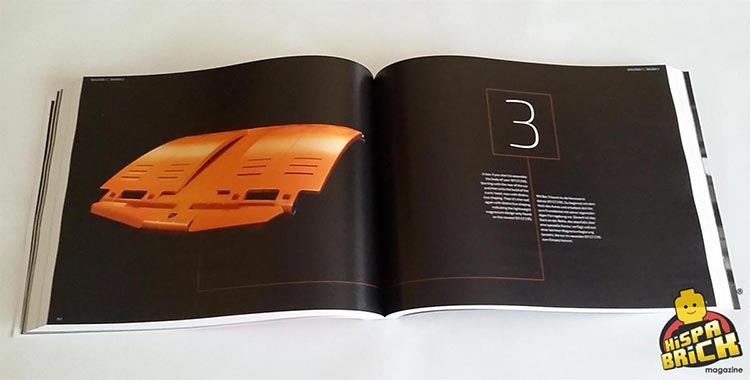
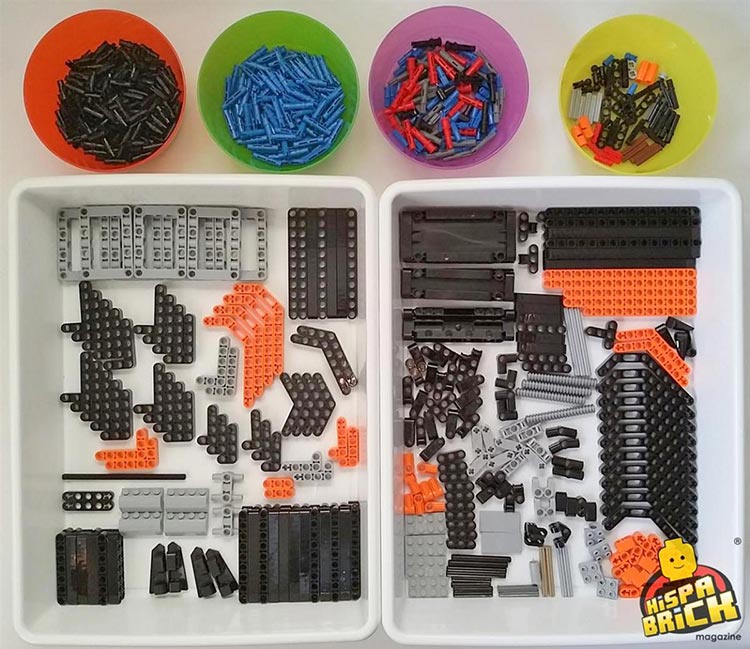
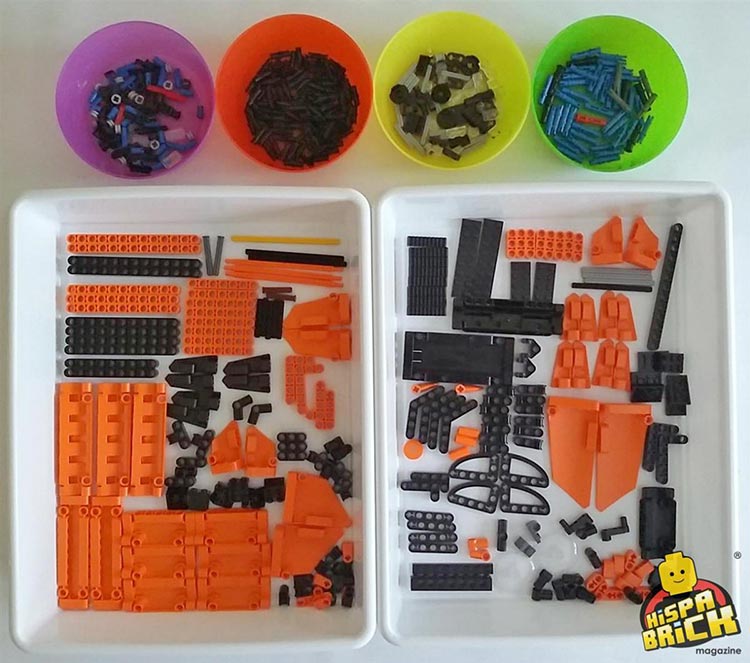
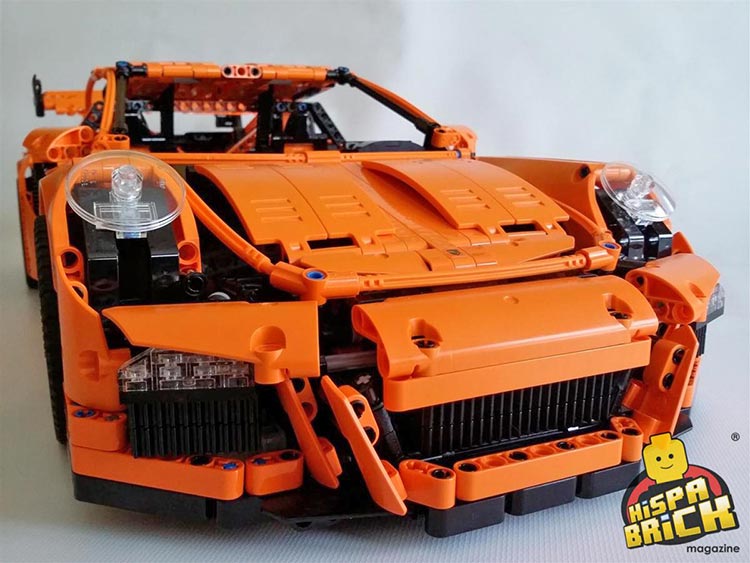
So far the model has been mostly black and grey, with some additional colours to make it easier to find the correct parts. Stage 3 is where orange really takes the limelight. As you can see from the inventory for this stage, there are plenty of orange beams and panels.
In addition to using some simple techniques to make the car look less square and to add some details (like the air inlets behind the doors), this entire stage is about body work.
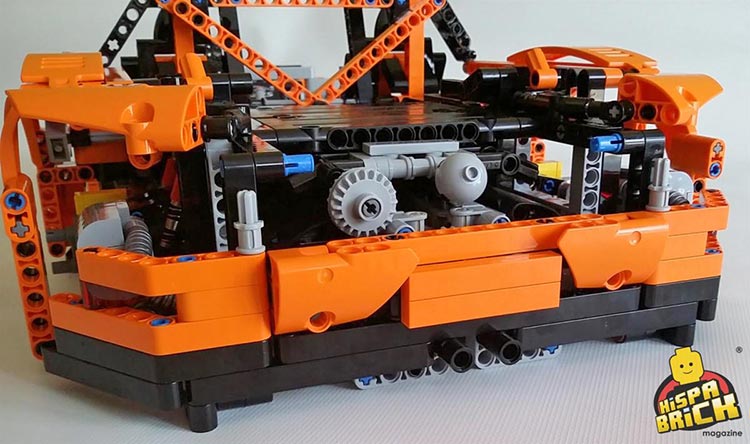
After attaching the rear bumper, what little could be seen of the pistons has now been definitively blocked from view, but you can still see most of the crankshaft.
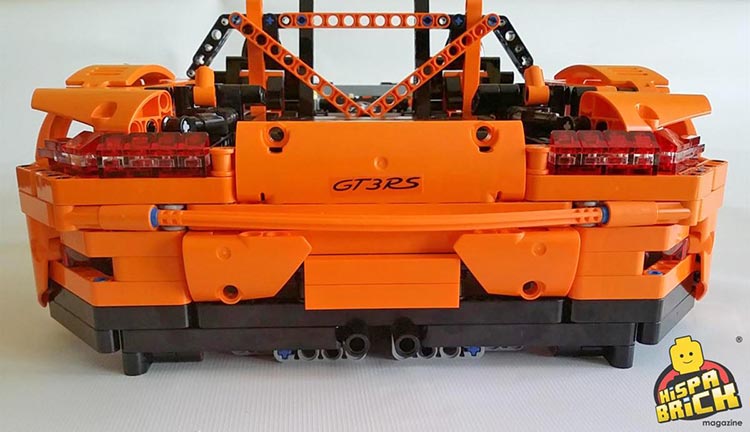
A single sticker identifying the make of the car is added to the rear (no license plate).
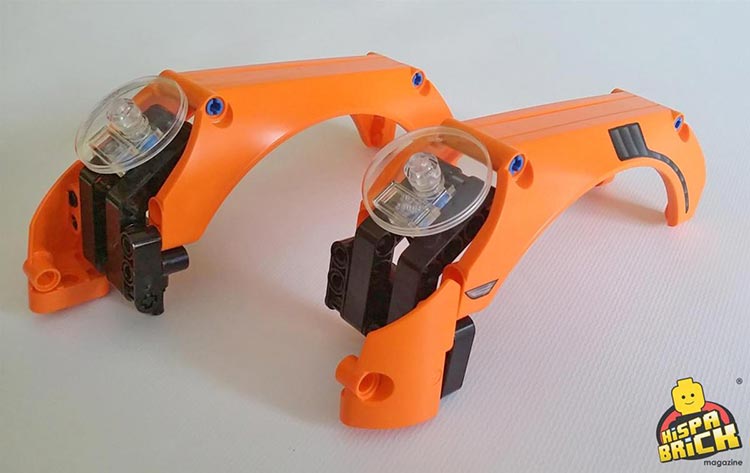
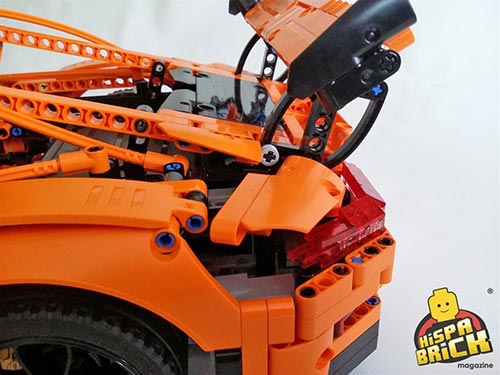
It’s time to use all those panels to create the wheel arches (a really interesting new part that makes the car look a lot more authentic), the hood and the roof.
The roof construction is surprisingly sturdy and the finished model can be safely lifted from under the roof on the rear side.
Stage 4: Finishing off
Stage 4 adds the front wheel arches and the rear wing, but starts off with the dashboard.
Again there is an interesting selection of orange beams and panels. In total this set will give you 22x3L, 14x7L 10x11L, 13L and 15L. There are also 34 angles beams of different types and 28 wing panels as well as several other orange parts. All in it is quite an interest orange parts pack.
In order to keep the building process interesting, the building process takes you around the car, building the front, then the wheel arch assembly on the side of the driver and the door on that same side. It then moves on to the back, adding the cover for the engine (with a large sticker) and the rear wing. The tour around the car continues with the other door and finally the wheel arch assembly on the passenger side.
After adding the dashboard, and in case you hadn’t noticed yet, it becomes clear the laser printed serial number is located in the glove compartment which opens and closes.
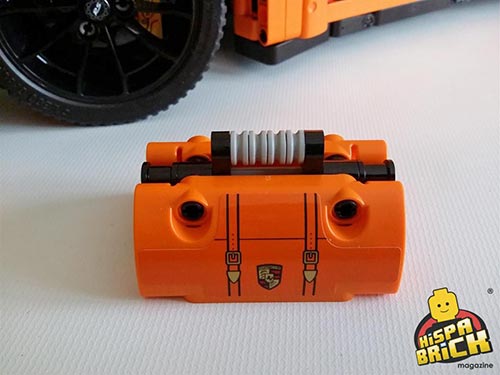
Finally the wheels are added with the (printed!) 1x1 round tiles, but there are still some largish parts left over. These are then used to build the driver’s bag which also uses two large, but very nice stickers. Unfortunately the driver’s bag is just symbolic: it can’t actually hold anything as it is open at the bottom.
Playtime
Building is over and it’s time to play with the set. Despite its considerable size the model has a sturdy and rigid structure. You can easily lift the car using the back of the roof as a kind of handle and it feels quite safe to hold it like that.
At the time of writing this review the code in the glove compartment could not yet be used, but the compartment itself is a nice little detail. The doors feel a little flimsy though. There is no locking mechanism and it doesn’t feel as if the doors close properly. Specifically the top of the door may or may not rest against the side of the seat so you may be able to push it in too far. Nothing serious, just a feeling.
The suspension has the right strength and while there is only 1 stud travel before the car hits the floor you wouldn’t expect anything else from a sleek sports car like the Porche 911.
Steering the car is not an easy task. For starters the steering wheel is inside the car and not particularly easy to access and there is no HOG (Hand of God) anywhere in the model to steer it from the outside. In addition, the turn cycle of the car is big. There are two tan half pins in the steering assembly that limit the travel of the steering rack which keep the turning radius to a bare minimum. Add to that the fact that there is a lot of slack in the whole mechanism and you will understand that turning the car around is going to take a lot of room or a lot of effort. Removing the half pins from the assembly doesn’t cause any readily noticeable friction anywhere and makes playing with the car a lot nicer so mine are staying out.
The gear paddles on either side of the steering wheel require some force and effort, but can be used without too much trouble. They are definitely easier to use than the steering wheel.
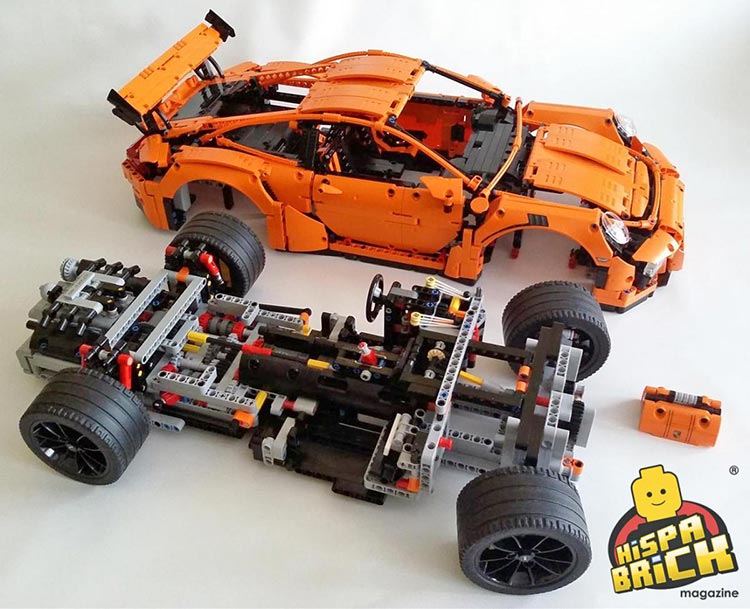
So far so good. But if asked you “what is the essence of a Technic set?” you would likely refer to the functions and seeing how they work—to me that is an important part of any set. The LEGO Technic Porsche 911 GT3 RS is quite different in this regard. No open spaces, just lots and lots of panels, both in the very complete body work and underneath. Very little of all the mechanisms can be seen and it almost makes you wonder if it was worth it to put them in. This may sound a little harsh, but let’s get back to those 14 long red pins with bush I mentioned earlier. Wouldn’t it be great if I could pull out those 14 pins and separate the body work from the chassis to get a good look at everything that’s going on inside? But pulling those pins won’t do the trick: there are several other obstacles to overcome. The seats are easy, there are two long blue pins buried under the dashboard that require some disassembling and modification to make separating both parts viable. It’s not that hard, and leaving the model ready to show the interior without too much hassle only requires you change a few pins. For an Ultimate Technic model this is an important missed opportunity. If you want to know how to modify your set to get the same result you can see my instructions in this video:
On to the next important thing: does the gearbox actually work? In order to answer that question I needed to make some space (my table top was simply too small) and test the functionality. With all the mechanisms so well hidden it was hard to see, but after some considerable back and forth I had the unshakeable feeling something was off. I extended the axle coming out if the gearbox to make it easier to see, and found that the sequence is 1-3-2-4 ( or 1-4-2-3 on the opposite side). Did I make a mistake? Could there be an error in the instructions? I consulted a few fellow reviewers who confirmed the odd behaviour and Paul “Crowkillers” Boratko, our technical consultant, provided the solution: the gear assemblies added at steps 267 and 269 (on pages 190 and 192) need to be inverted to get the gear sequence right. You can see a short video explaining how to get at those axles assemblies here:
That was not the end of my troubles though. Inverting those axles fixed the gear sequence, but there is another issue with the gearbox that derives from the shifting mechanism. The XO liftarms that pull and push the links so the different gears engage and disengage should stop at 90 degree intervals, to be precise at 0, 90, 180 and 270 degrees. The fact is they do…when you pull either of the paddles, but as soon as you let them go the backlash (or slop) in the system pushes the liftarm back some 30 degrees.
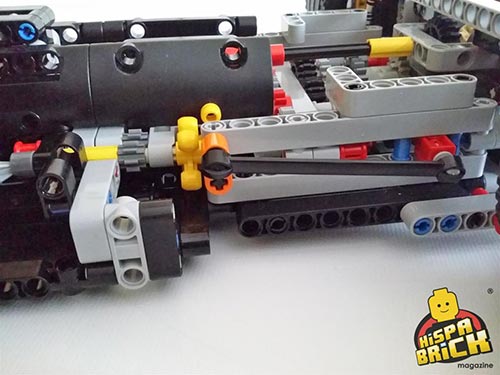
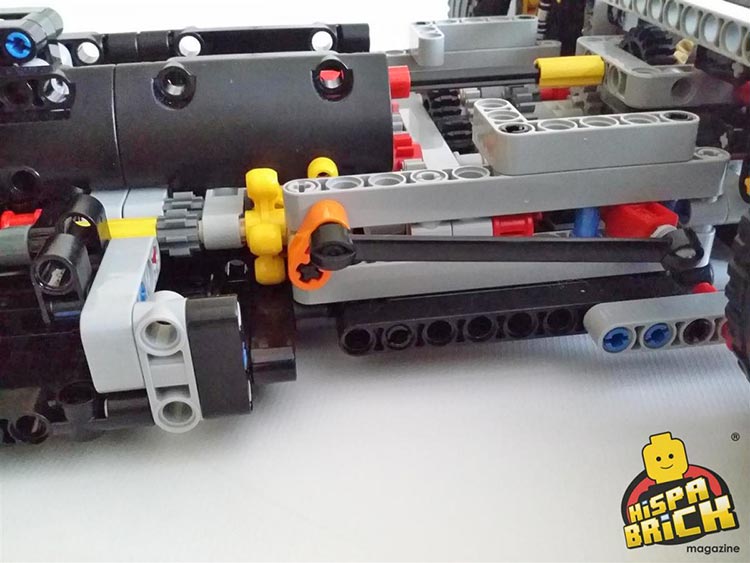
This can result in all sorts of unexpected behaviour. In the best case scenario nothing happens! However, quite frequently this results in a strange clicking sound in the gearbox as a partially engaged driving ring clicks over the notches in a clutch gear. Your worst case scenario is that that same driving rings stays too far inside the clutch gear meaning two different gears are engaged at the same time. This will result in the engine stalling and the mechanism locking up. This can be easily solved by shifting gears again, but it happens with a certain regularity.
Compared to all this, the fact that the car has 4 forward speeds, neutral and 4 reverse speeds (!?!) is just an anecdote.
Conclusions
It’s hard to find the right balance to judge this set. The packaging and presentation of the set certainly give you the “gourmet” feel. It’s a special set to savour while building and leefing through the magnificent instruction book. The part count is impressive in a LEGO model. The special rims and tires are a very nice touch and they work really well with the new wheel arches. The 3L axle connector is a great new part that opens up many new possiblities and the addition of a significant number of orange parts in good quantities is something many AFOLs have been asking for.
I should really be happy about all those new orange parts—even so, I cannot help but feel slightly cheated by the image on the box. That is vertainly no LEGO orang, and while it looks really good on the box, the final effect of the model is less inspiring.
There are also a few areas of the body work that have not been resolved quite as well as I had hoped. While I can live with the largish black gap under the headlights, the grey half bush that’s visible there is a bit distracting. The same happens with the grey half bushes on the rear wing—I’m not even convinced they are necessary and all black would have looked nicer.
The fact that the gear sequence is off is an unfortunate error, but can be easily corrected. getting the body off the chassis isn’t as trivial as it should be, but it can be done, after which swapping the two axles requires little work. I expect LEGO will soon provide replacement instructions. It’s a pity the first batch of books include the error, but a lot of LEGO Porche owners aren’t even going to realise there is an error until someone points it out—the engine is very well hidden…
More serious is the gear paddle problem, but again, the mechanism work reasonably well and wasn’t designed to be motorised so there won’t be any serious issues, just some inconvenient engine lock ups.
In the end it boils down to this: is the set worth the price? That’s a very personal matter. The premium packaging, the beautiful book and the “gourmet” building experience certainly make the set feel special. If you are a fan of sports cars, especially of Porche, the set is definitely for you. If what you are looking for is a lot of cool mechanics in a large set and a B-model to build when you get tired of the main one, there are other LEGO sets this year that better fit your profile.
The biggest question is where LEGO will take this new Technic series. I’ll let you know as soon as I find out…
2230


