Set Review ➟ LEGO® 10323 - Pac-Man
When I heard that this set was coming out, my eyes turned the colour of Pac-Man when he ate the pill. I've been a lover of old computer games as well as arcade machines since I was a kid. I think the fact that my parents bought me an Amstrad CPC 464 that loaded programs through a cassette had a lot to do with it. Thanks daddies! I think everybody, EVERYBODY, knows the Pac-Man game, well known as the "Pac-Man", so I won't go into it too much. Suffice it to say that the set we are dealing with is very successful and it is very cool that the designers have worked on the aspect of giving the screen some mobility even though it is circular and relatively simple, although I'm sure I'm wrong about this, you'll see. It obviously has its joystick, its coin purse that lights up and its stand with the Pac-Man and a couple of very successful ghosts.

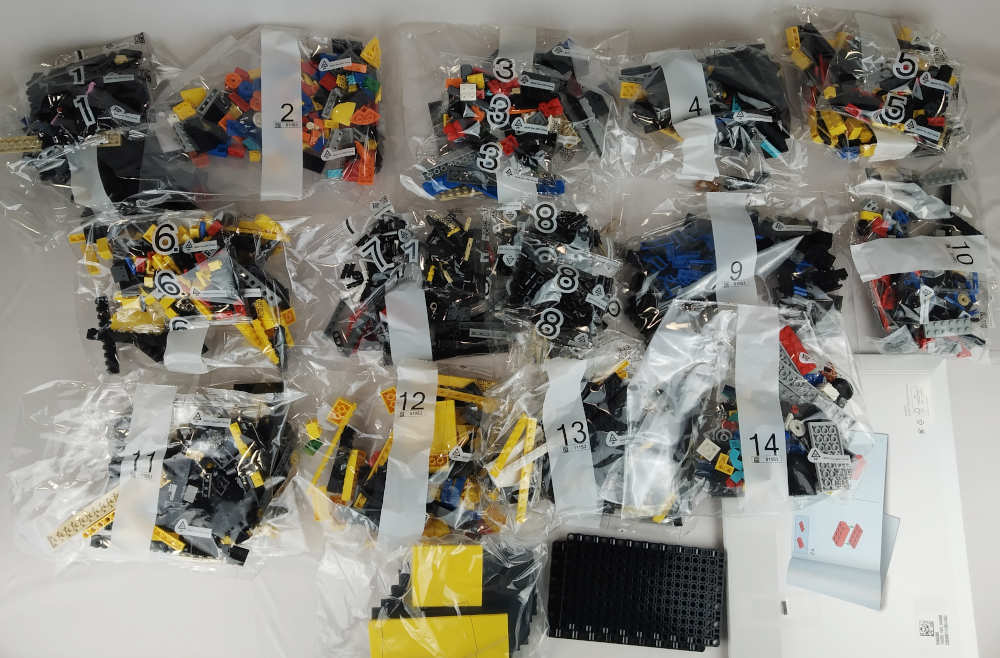
Well, as always we start with the contents and their distribution. As you can see there are a lot of bags numbered up to fourteen, we also have 2 plates technic type "grill" and an additional bag full of black plates and some yellow ones. Of course always accompanied by our companion the instruction manual and unfortunately also a sheet of stickers inside. A total of 2651 pieces of absolute "geek soul". It doesn't matter if you are AFOL... mmmm, or not? It will cost 269.99€ and will be available at the beginning of June, according to the LEGO website from the 4th, if you are VIP you get it on the 1st. Ah! It also comes with a minifigure to set up a very playful and very typical scene of the time :).
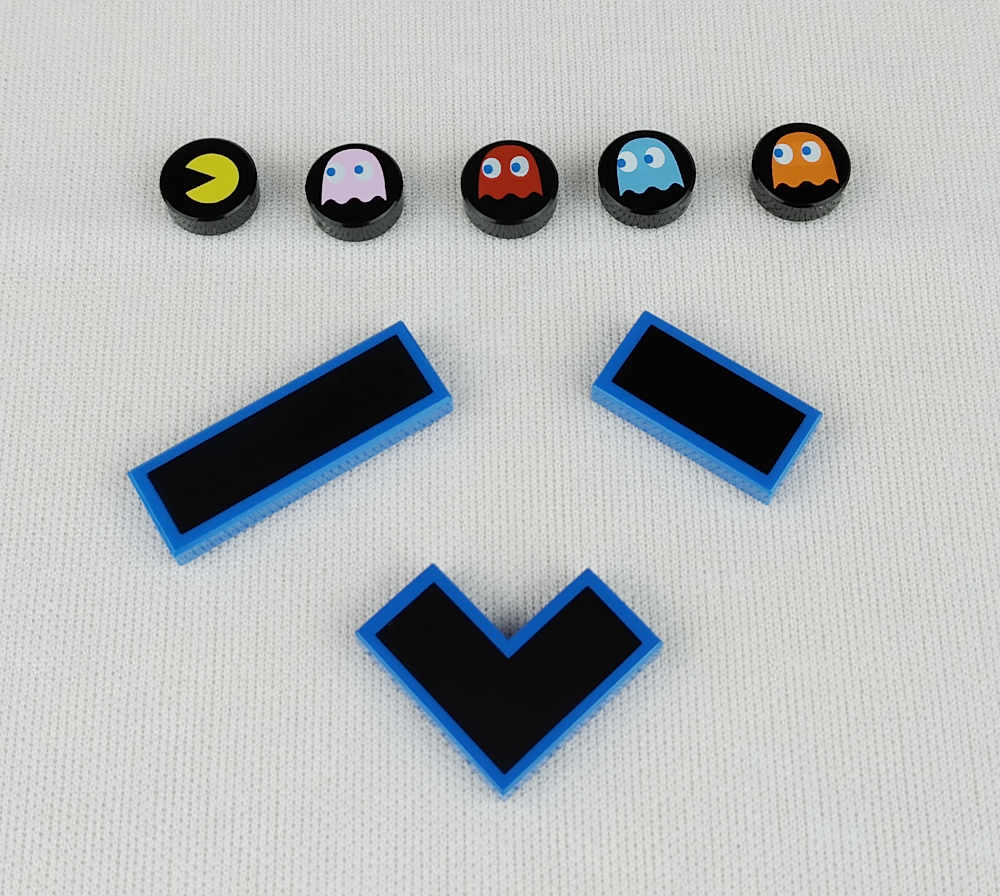
Right, let's get on with it! Once we open the manual we are delighted with those lines of popular wisdom such as where the idea of Pac-Man came from (yes, it was from a pizza with a piece missing), or what happened when we reached the last level 256 due to the low physical capacity of the hardware of the time... in short, some little pearls that are not to be missed and that we will also enjoy as we progress in its construction. Here you can see our protagonists in tile round 1x1 and some printed tiles that simulate the labyrinth of the game. Very tasty.
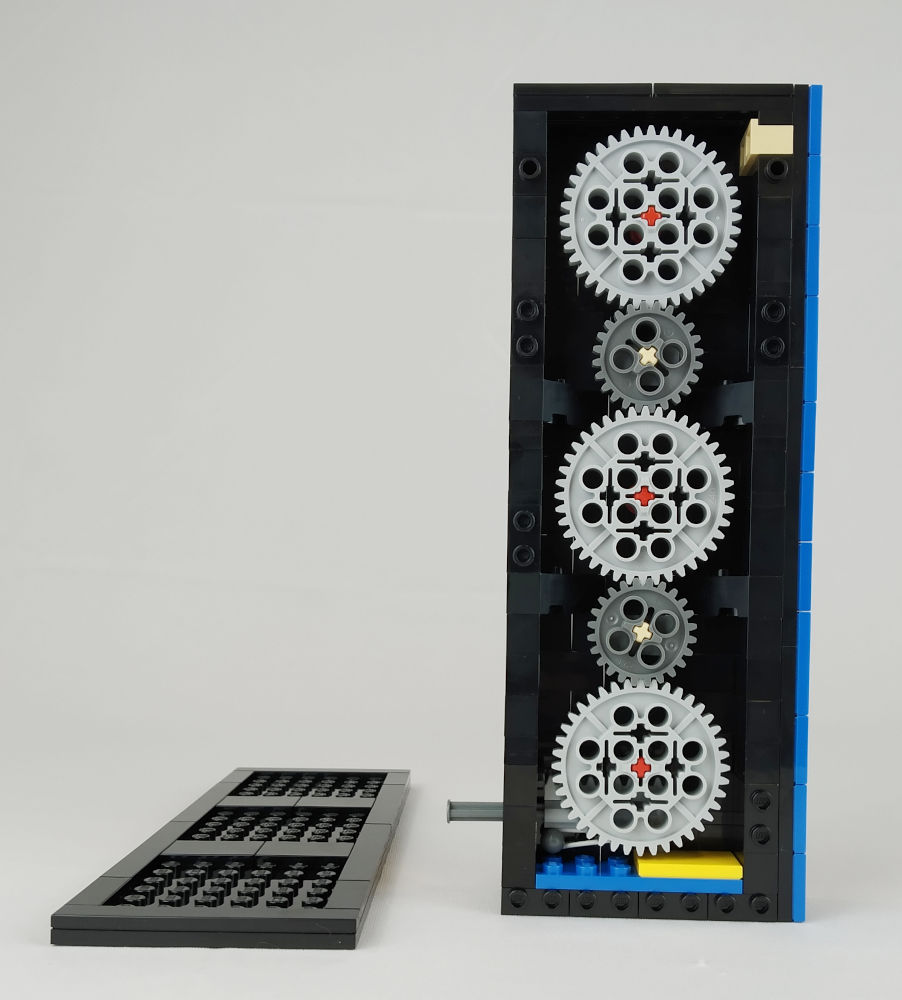
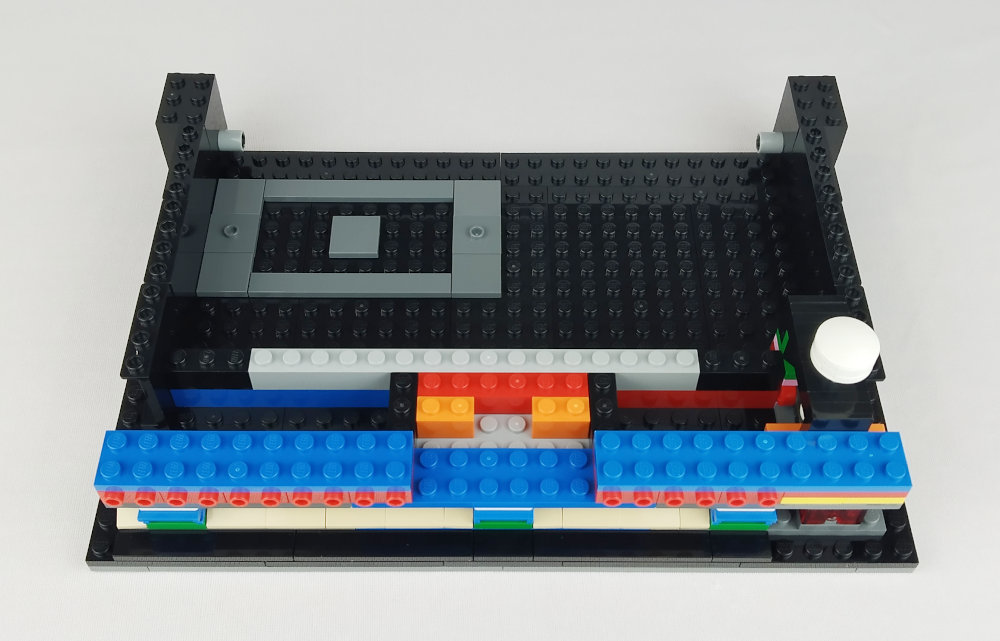
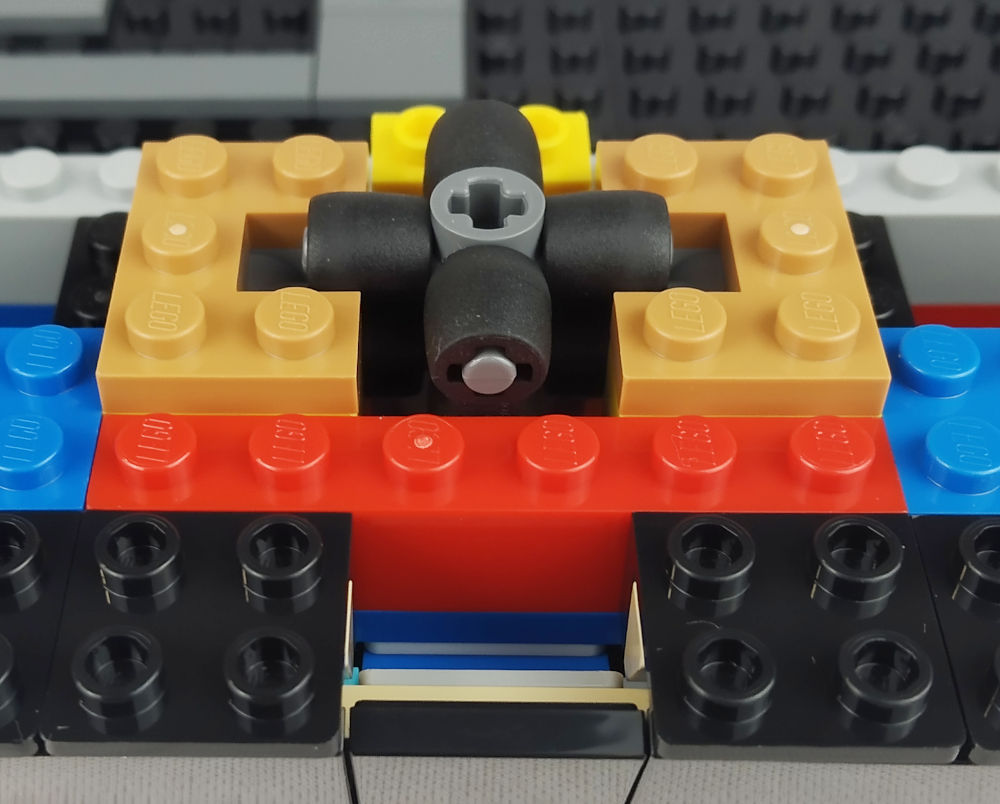
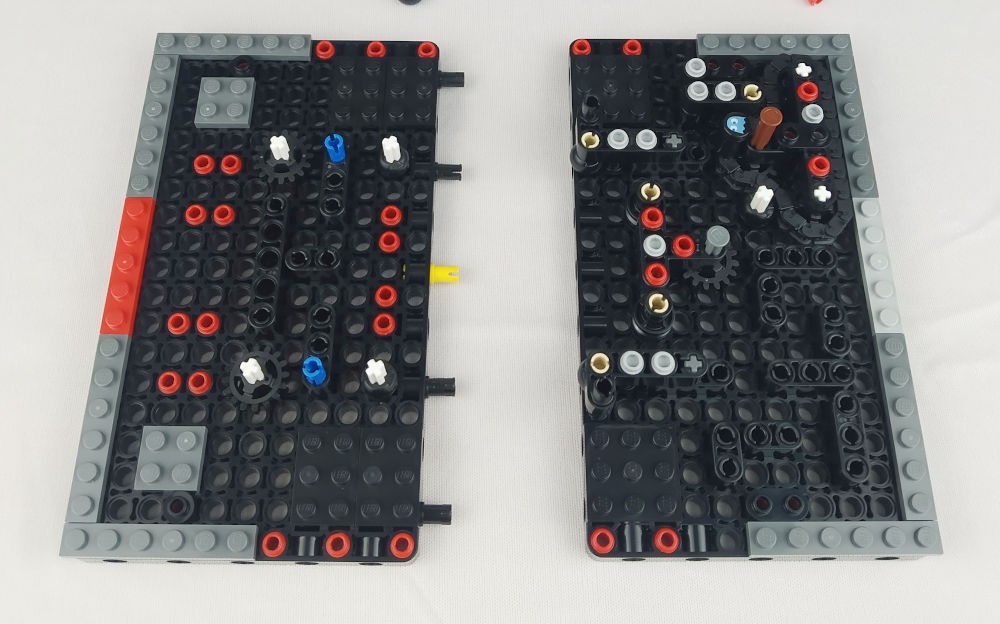
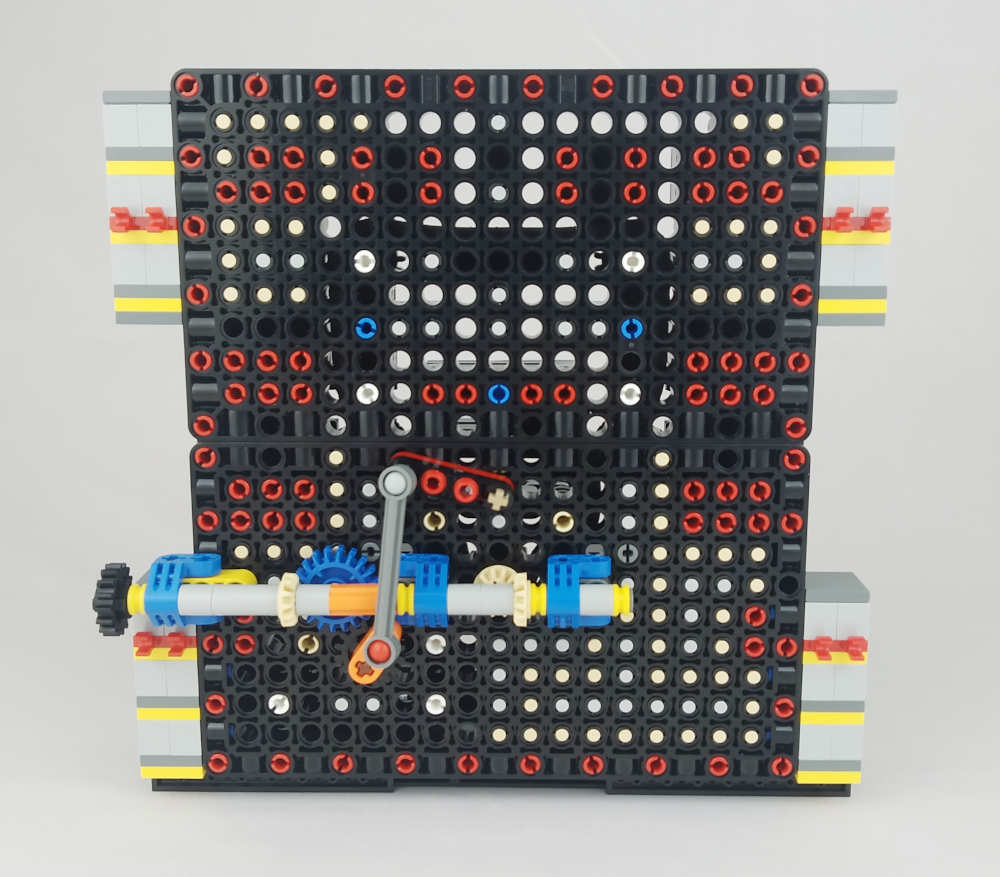
To whet our appetite, the first thing we'll build is the stand. We will see what mechanism they have implemented to rotate the icons, in one sense Pac-Man will run away, but we already know that when he eats the pill the ghosts are the ones who run away. The mechanism is very simple but it is even more effective. Here you can have a look at the inside of the base, the trick is achieved by putting a zip plate that is activated with the push button and makes the cogwheels rotate 180º. Wonderful result.
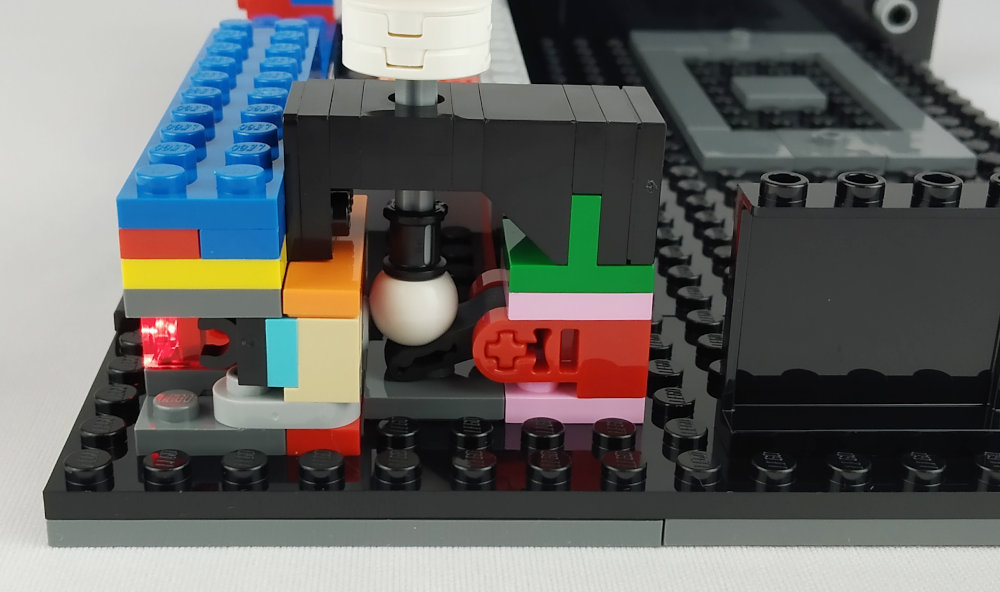
Here you can see a little of how one of the ghosts is constructed.
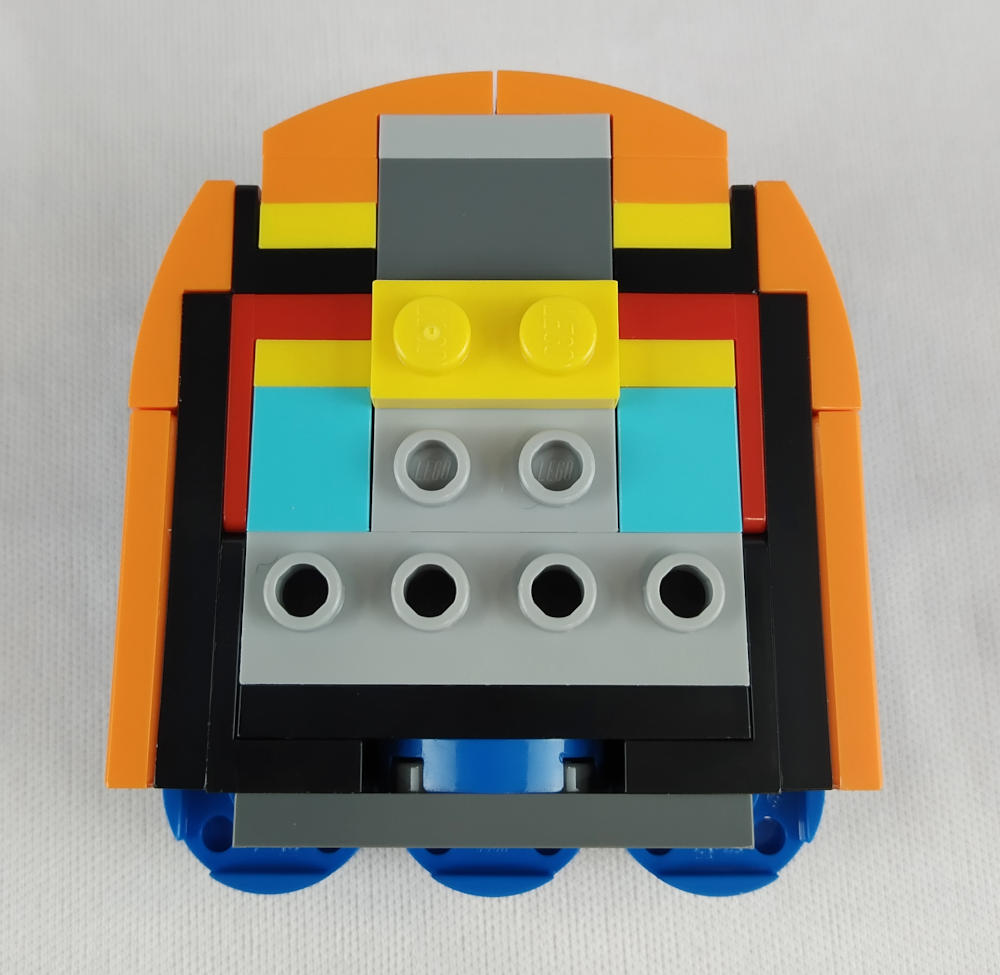
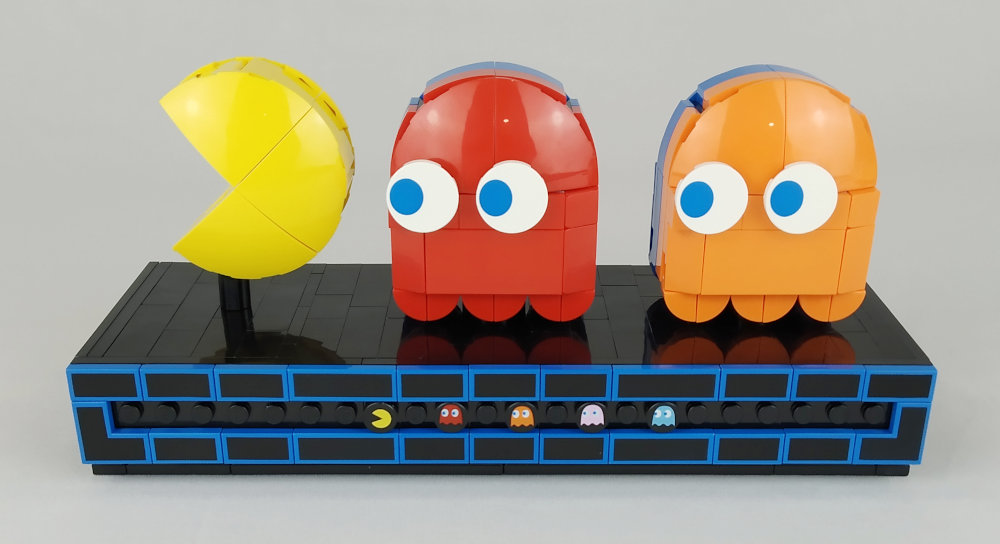
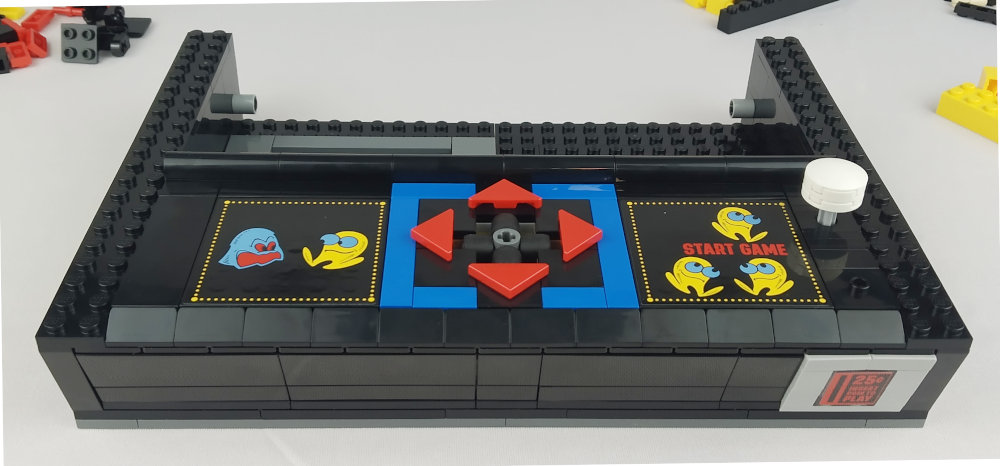
And here is the final result of the pedestal from the front.
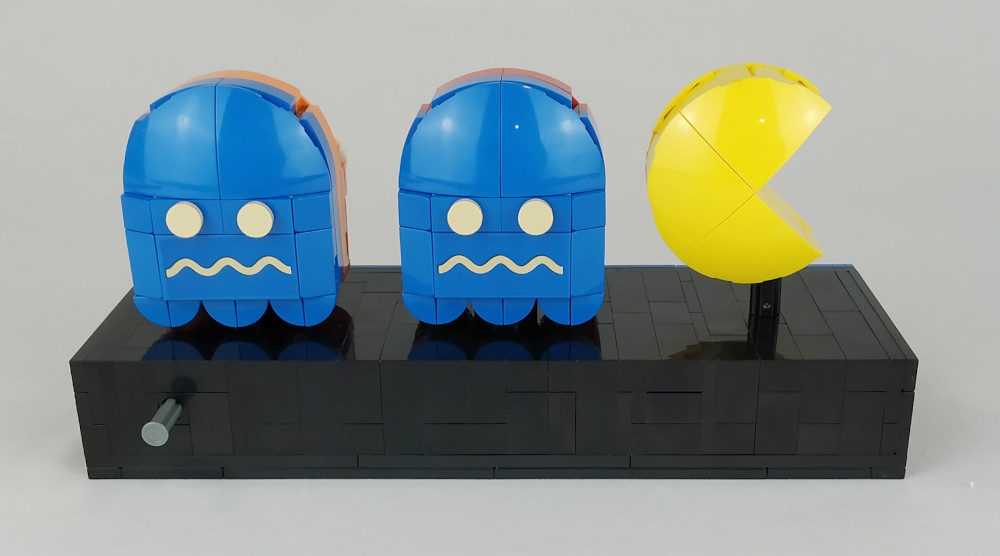
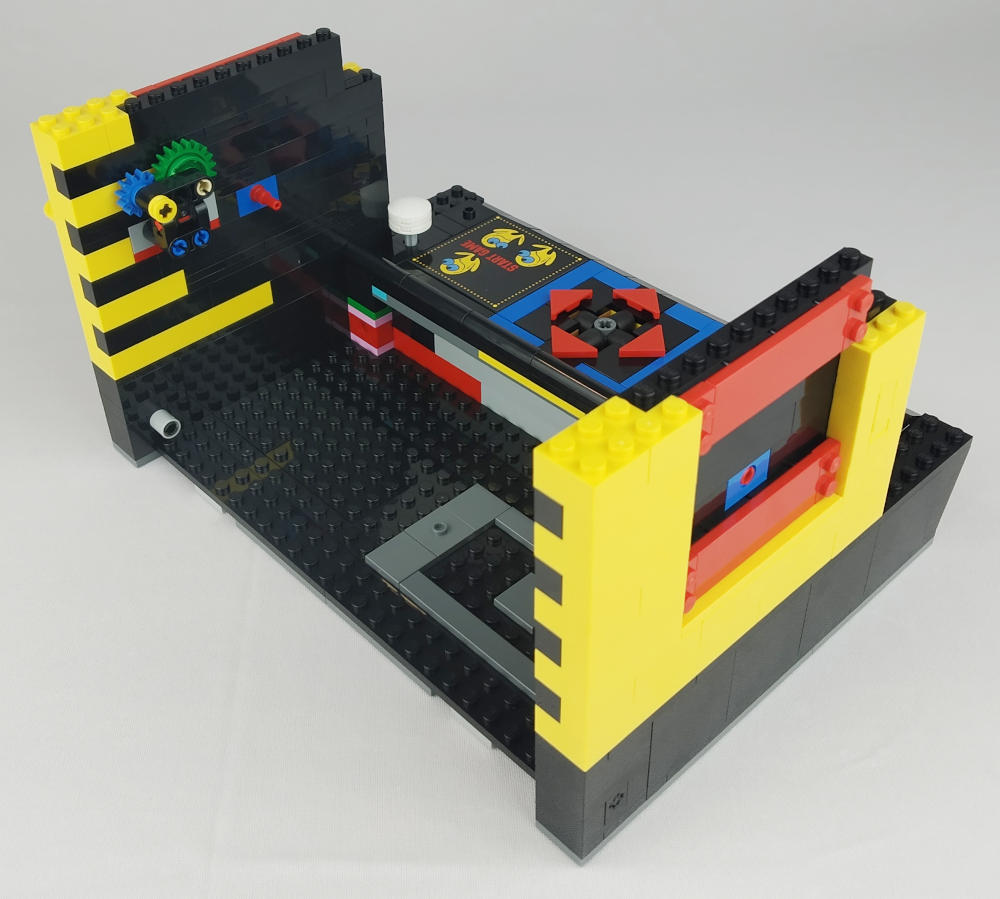
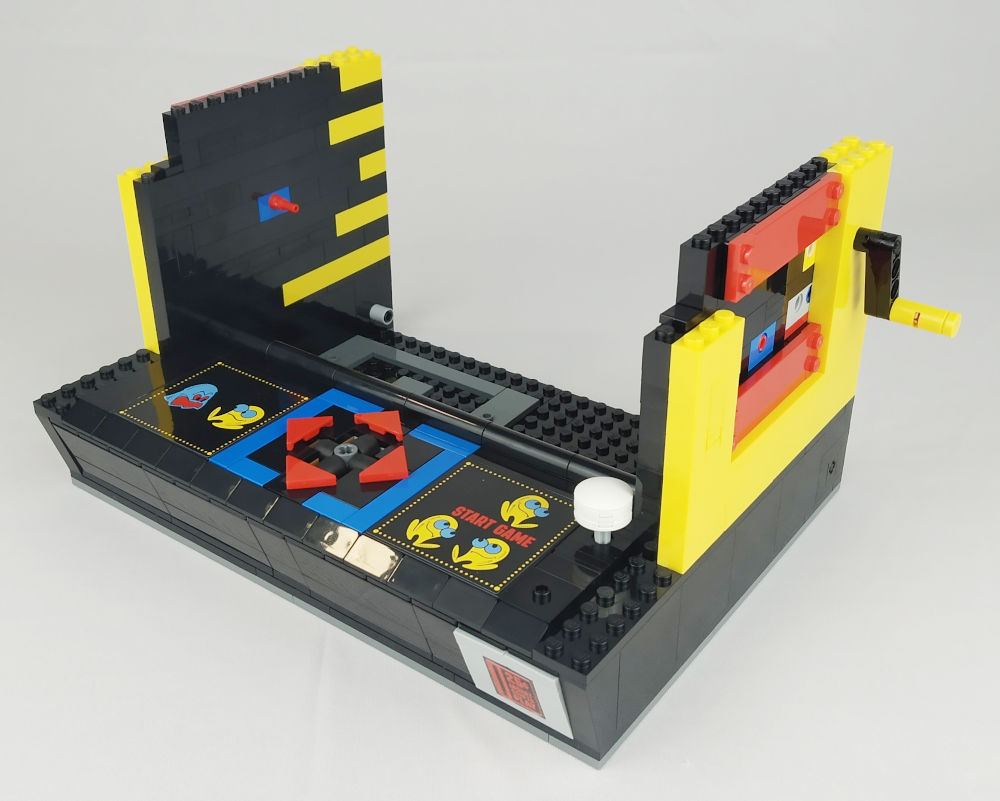
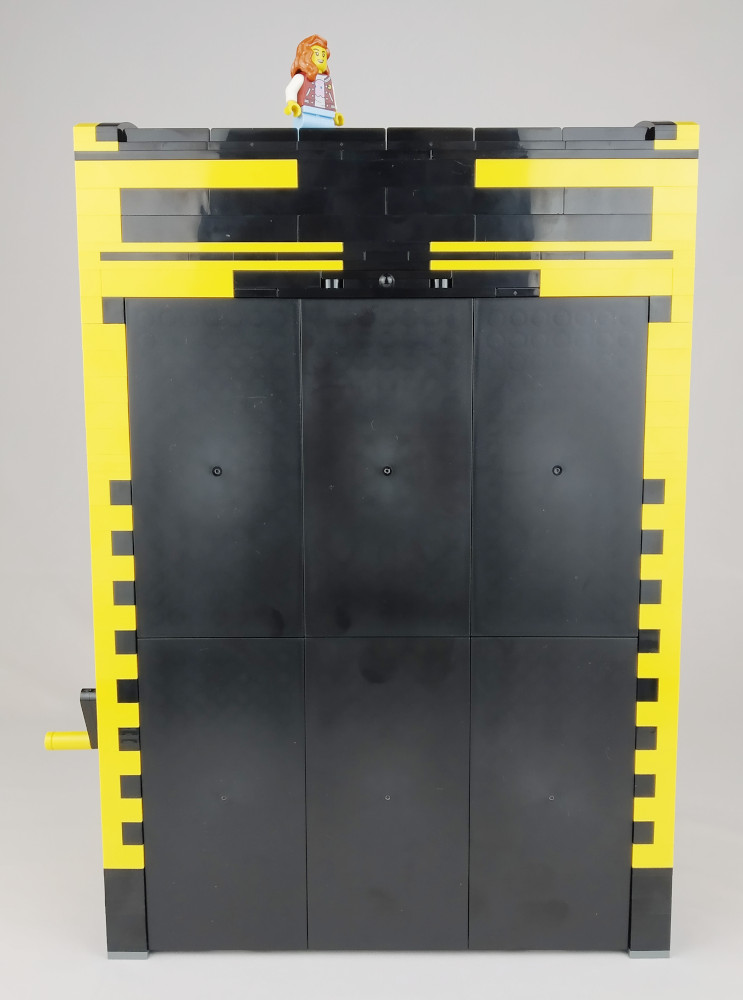
And here is the back.
From here we start to build the video game machine. The base has hardly anything to say and in a few bricks we have it ready.
This mechanism is interesting because although as you can see it is very simple, it works very well. What I don't understand is the push button. I seem to remember that the coin slot was illuminated so that the coin could be inserted even in the darkest places. If we had to press any mechanism to see the slot, few coins would have fit. Still, it's cool, isn't it?
In the next bag I find the next mechanism, the one on which the joystick will be supported, it's not to be missed!
The front under the joystick has a chamfer that gives it that peculiar look of some arcade machines. The coin mechanism is slightly protruding above the chamfer and looks wonderful. Too bad it's a sticker.
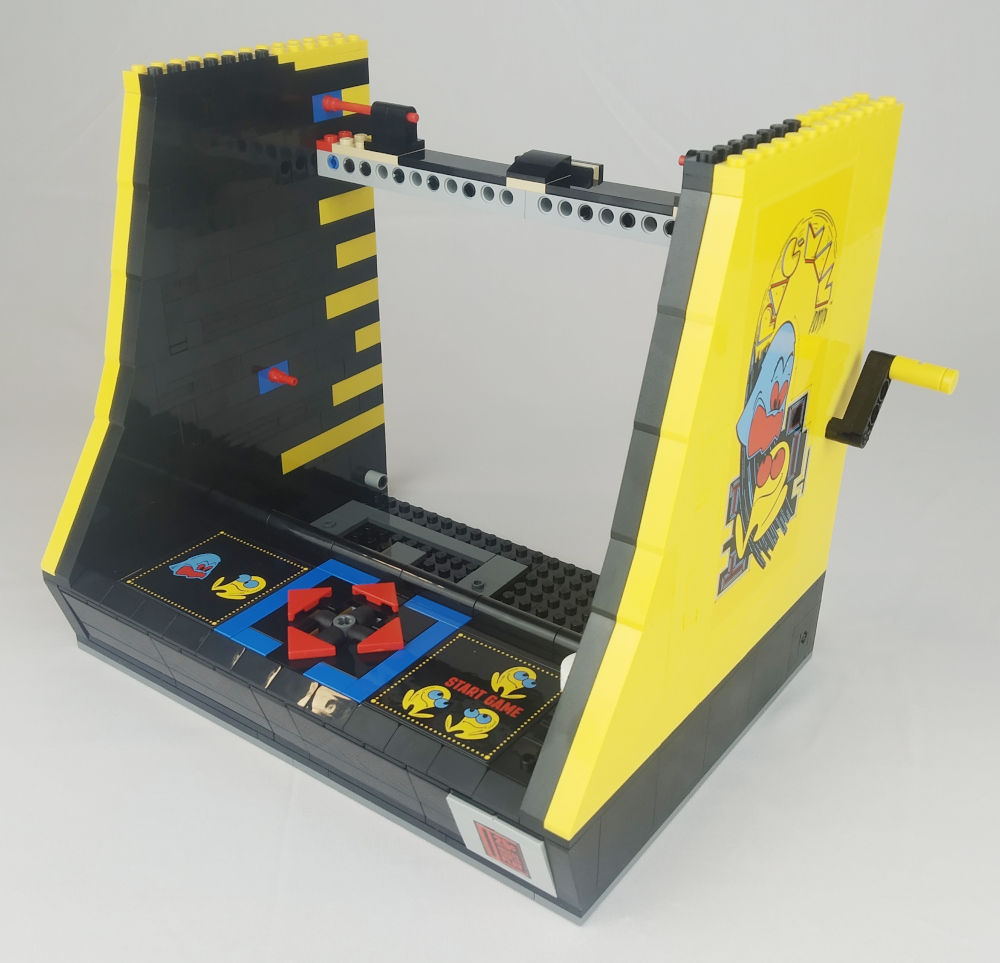
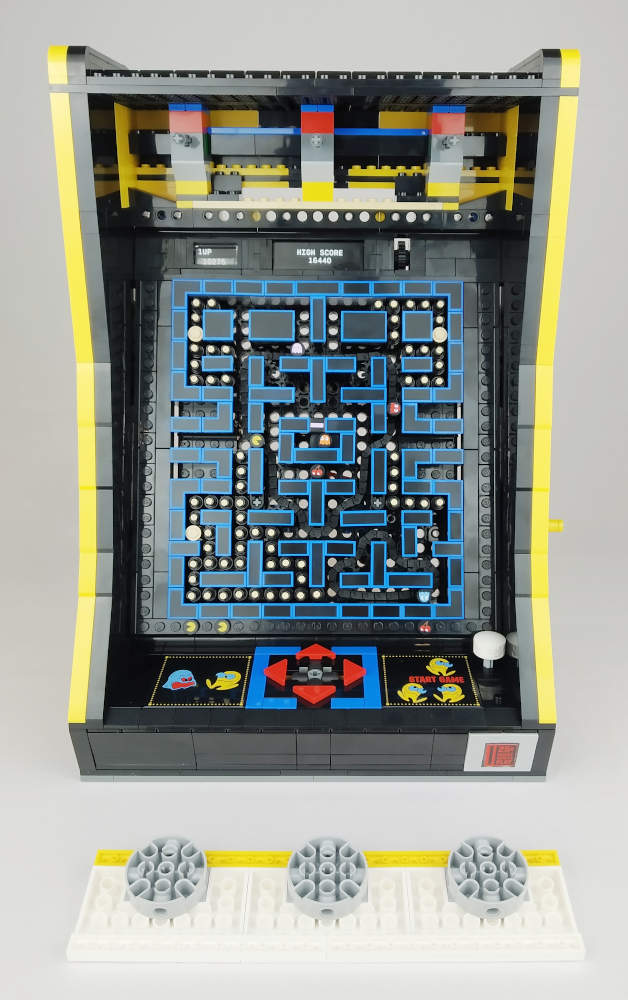
Now we are going to raise the sides and insert the crank that will animate the screen in that magical way.
In the following steps we will continue to work our way upwards with special emphasis on how the 8x16 tiles will be inserted with the mega stickers as well as the rear technic support.
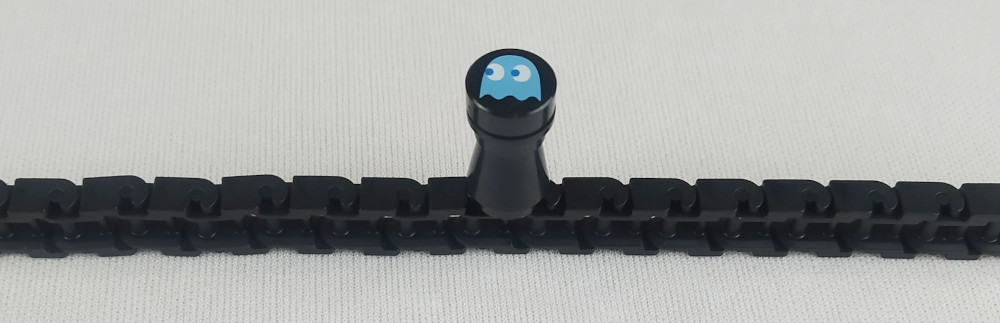
Now we come to the crux of the matter. The steps that have been intriguing me so much and that I didn't want to anticipate by looking at the manual. All the time I was wondering how the game's movement system would be implemented. I was thinking of something simple like a chain and a sprocket but still something told me there had to be something special... some trick. And here you have... a new reference!
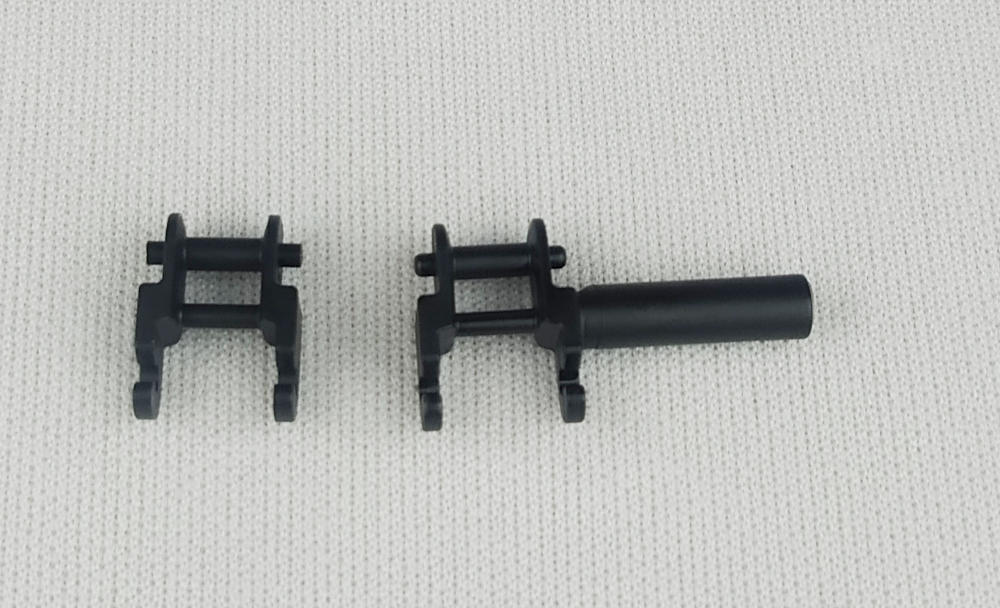
So now we are starting to get a glimpse of something better, aren't we? Anyway, let's not get ahead of ourselves. We'll see how this fits together to make something so spectacular.
Now you understand it much better, don't you? Well, it is still tremendously more complex. The concept is simple, the implementation is far from reality, it is extremely complex, at least for a technic layman like me :S.
We continue with the other part of the technic "grid" and then join it to this first part. Now we can say that there is nothing new.
The following route is implemented with exactly the same concept. Now that we know how the system is done, it seems trivial, doesn't it?

In the following bags I see that there is a huge amount of technic pins, tubes and also sand-coloured rods. I have the feeling that this section is going to be a rather tedious repetitive task. And so it is, but these moments are moments to think while repeating the task :). Here you will raise the height in many parts of the area and then you will fit these repetitive parts that simulate what the Pacman eater eats to pass the level as well as the pill that allows him to eat the ghosts :D.
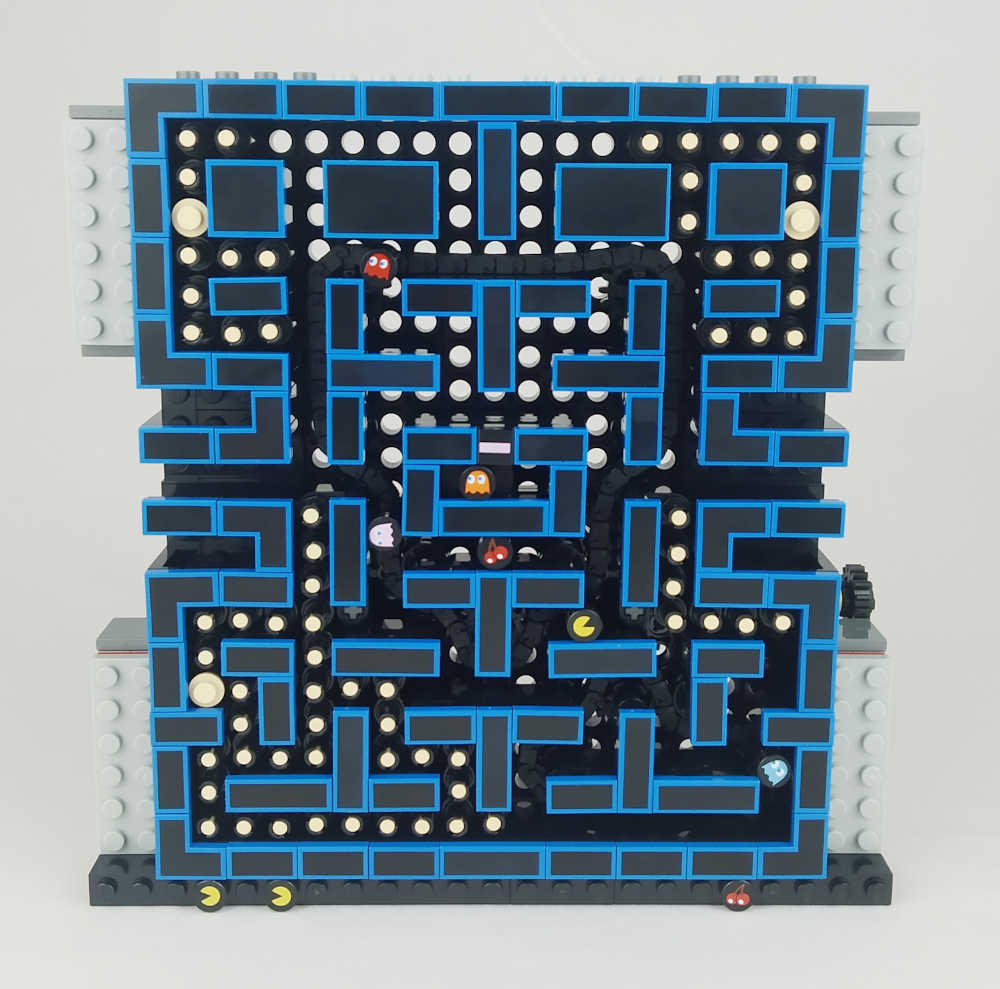
The next steps will take you to the top of the board, and of course the tiles that simulate the labyrinth look amazing - I can't wait to see it in action!
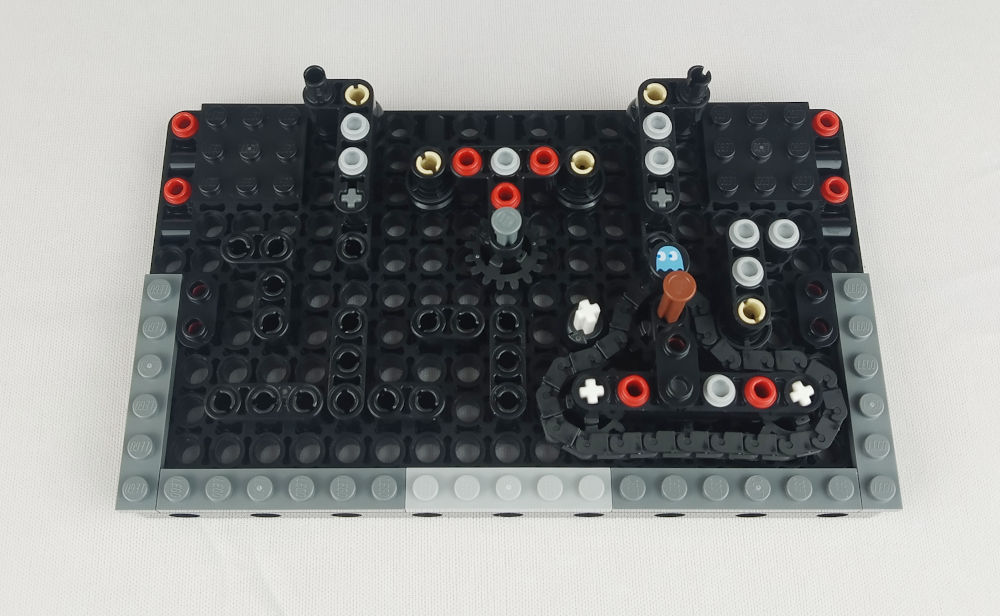
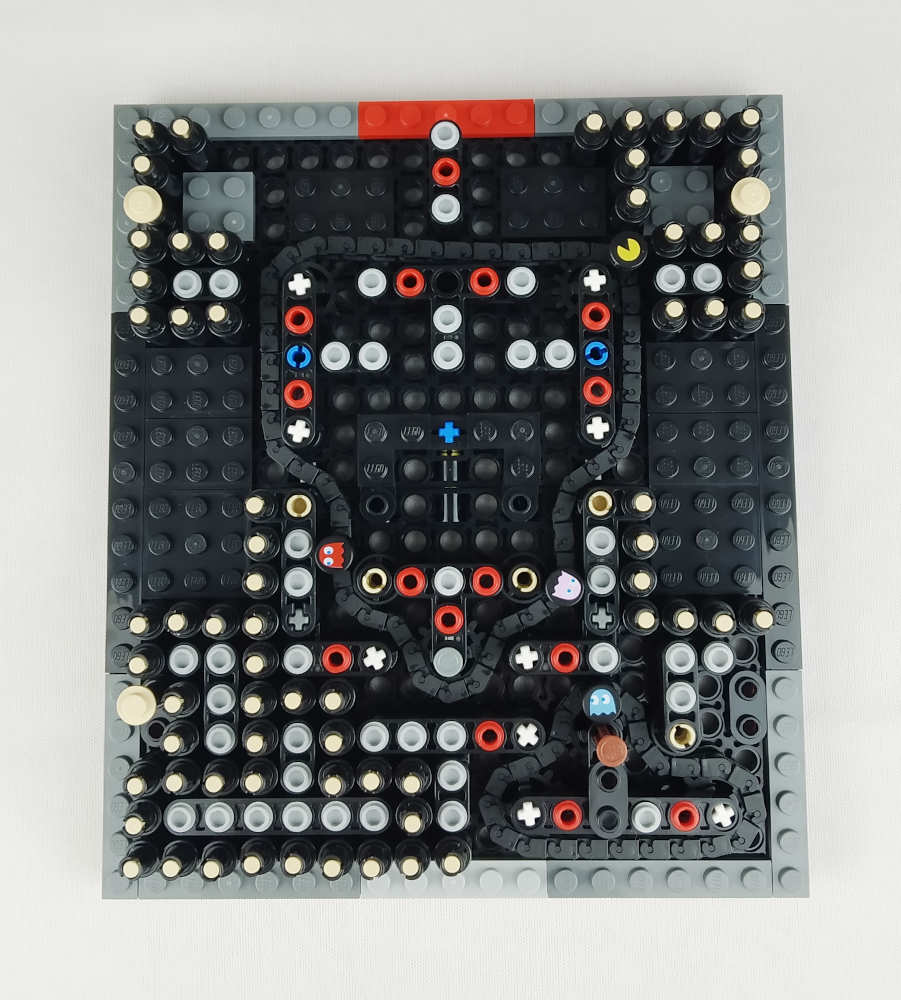
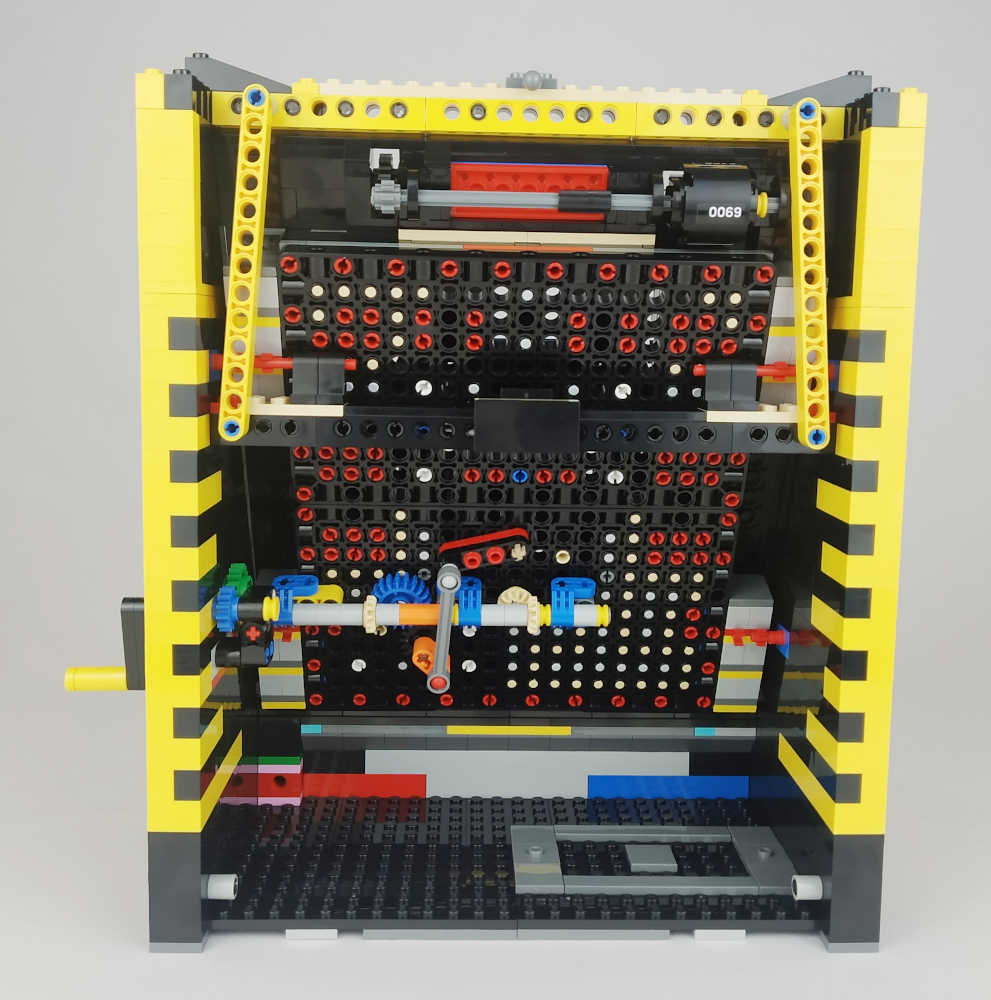
In this section I was blown away by the gear that makes the characters move on the board, it's very ingenious and simple. Also the arm with the ball and socket joints is very clever and works like a charm, making the ghost that is going to go out on the board move from side to side as it should. This is very good! Note for gamers. When moving the screen with the crank I see something that I will tell you below and that I found incredible. The ghosts each had something particular and although I don't remember much about them I do remember that there was one that was faster than the others and that's exactly what I see. The blue one goes slower than the others when turning the crank. Great!
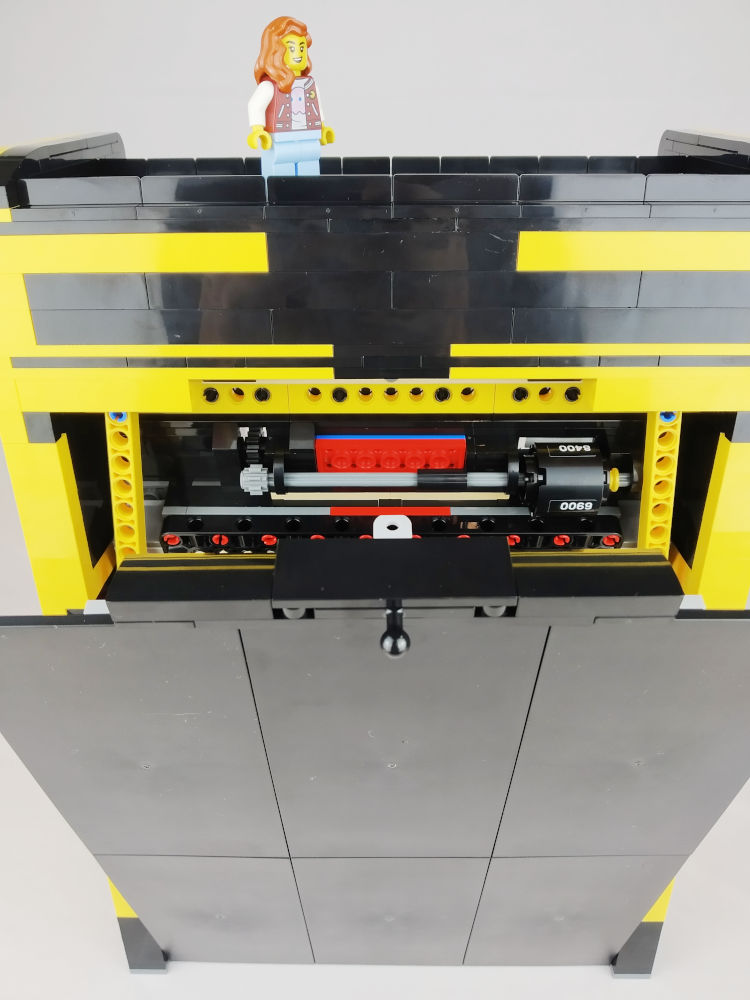
Rear mechanism that prints the movement to the objects on the "screen".
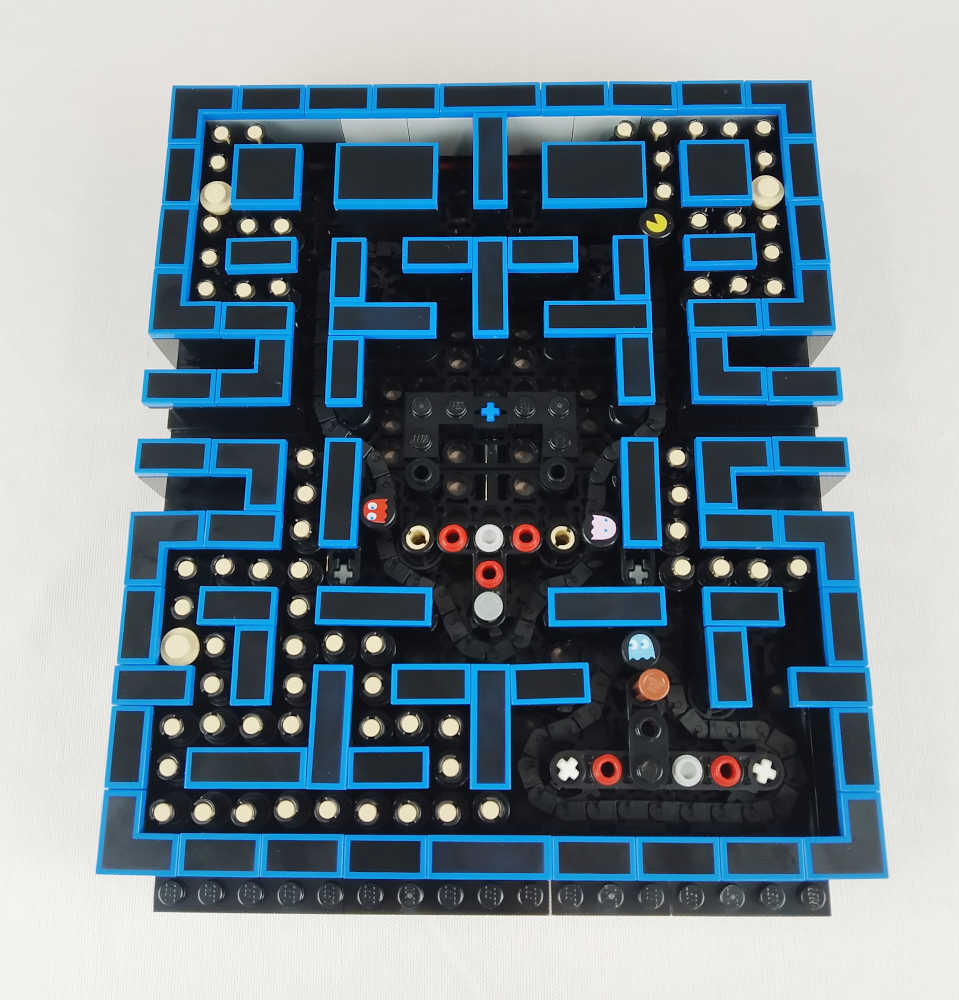
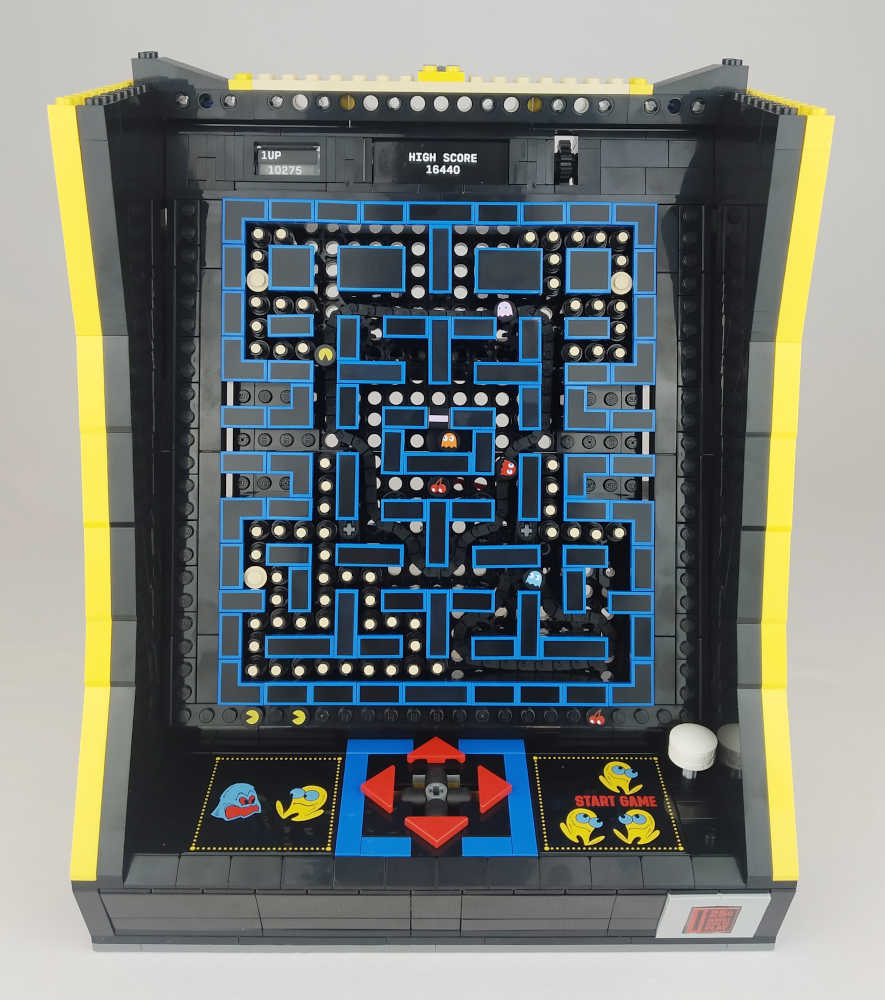
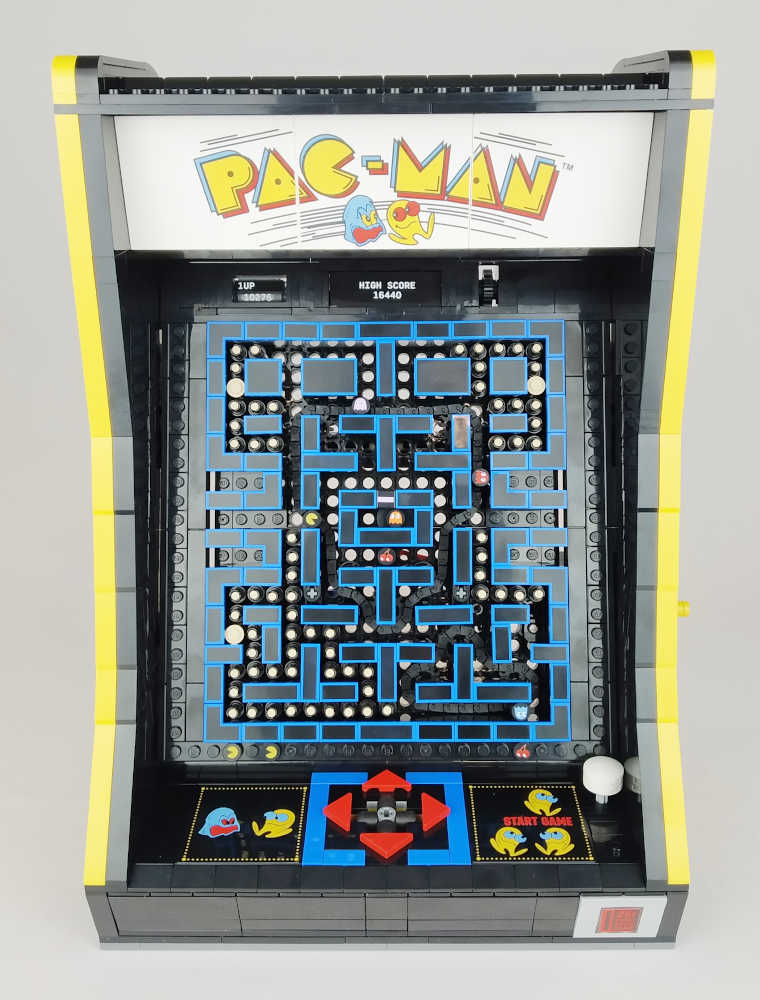
Well, in this next part we will obviously raise the sides even more and we will place the screen in the corresponding place in the machine. This is simply clipped to the structure with some 1x2 plates with clips and these are placed on the bars of the previous image number fourteen. Simple. What comes next is the score panel and the remaining lives indicator to put the coin back in the machine :P. The poster is fantastic, it's fantastic. In spite of the 4 stickers on the roller, I love the mechanism which, although manual, gives it a much more realistic touch.
In this part we will raise the construction a little bit more and make it more robust at the top and add 3 structures with a frontal axis in each one of them, which I don't know exactly what it will be for. Maybe to put the white Pac-Man poster. We will see it soon because we only have two numbers left to finish the set.
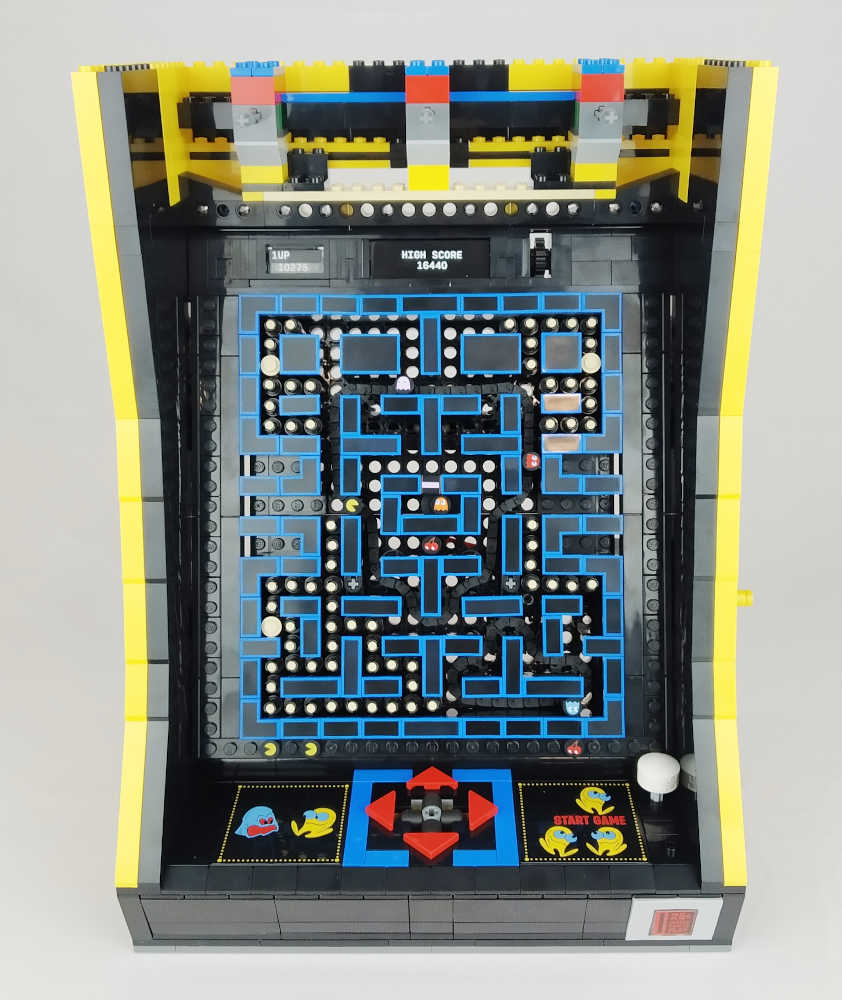
Here we will build the top cover of the video game machine. Its design is simple but very successful. The only less good part is that it is difficult to fit it due to the amount of studs it has, but the best part is that the base on which it is supported is so stable and strong that you won't have any problems when attaching it. As for the three structures mentioned before, we can see that they are indeed for the poster, which we are very grateful that they are not stickers :).
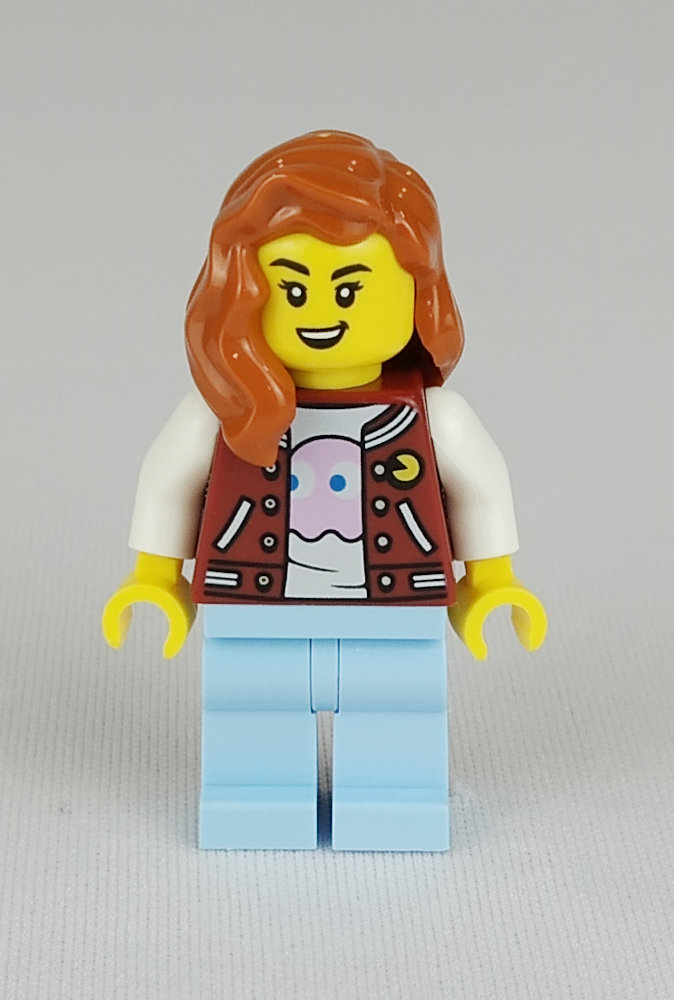
We have bag number fourteen left! Let's see what's in store. Here we find a minifigure with a beautiful torso and certainly in line with the theme of the set. Gorgeous.
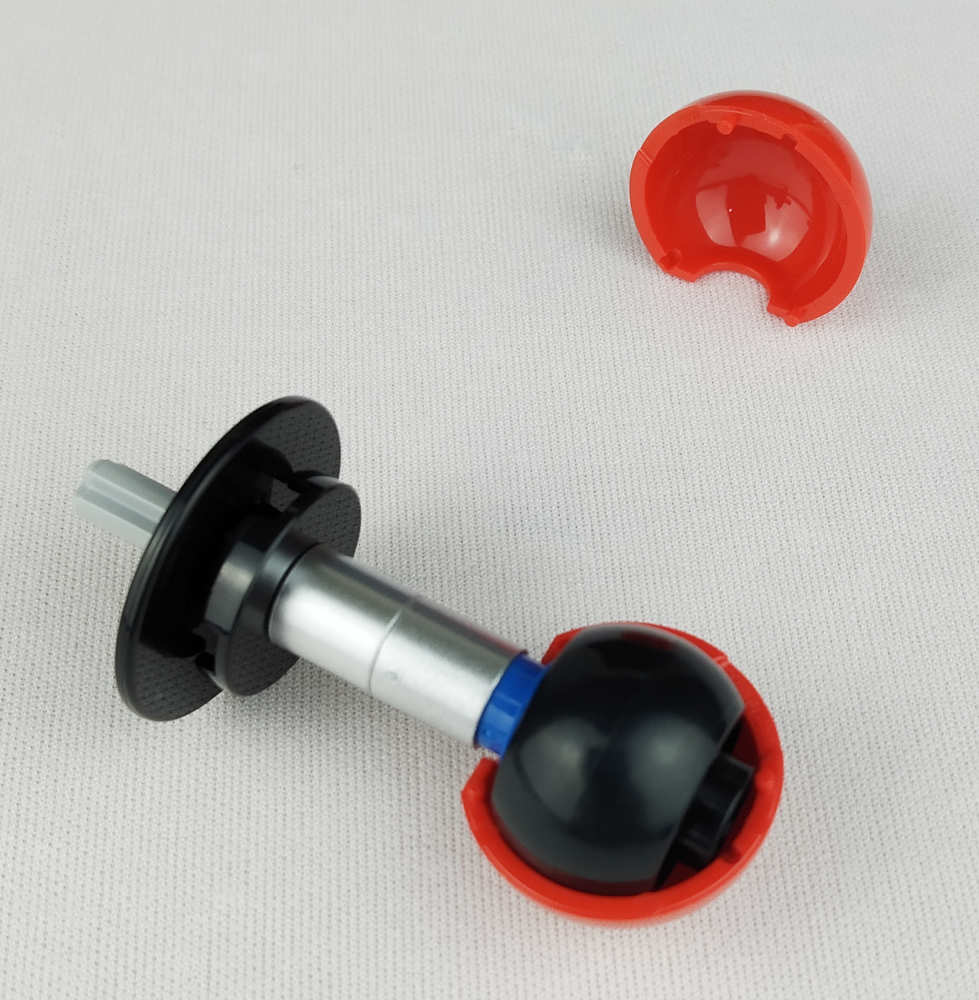
But we also see a new mould that looks like a pumpkin without grooves. I think it will go inside the joystick's ball...

And there it is!
But I must not get ahead of myself. Before the joystick I have shown you, the back cover of the machine will be made. It is very simple but also ingenious because of its simplicity and above all its ease of use. It looks great and it will also house a real treat inside.
The set ends by building a replica of these machines that were, are and I believe will continue to be a success regardless of the nostalgia they may produce.
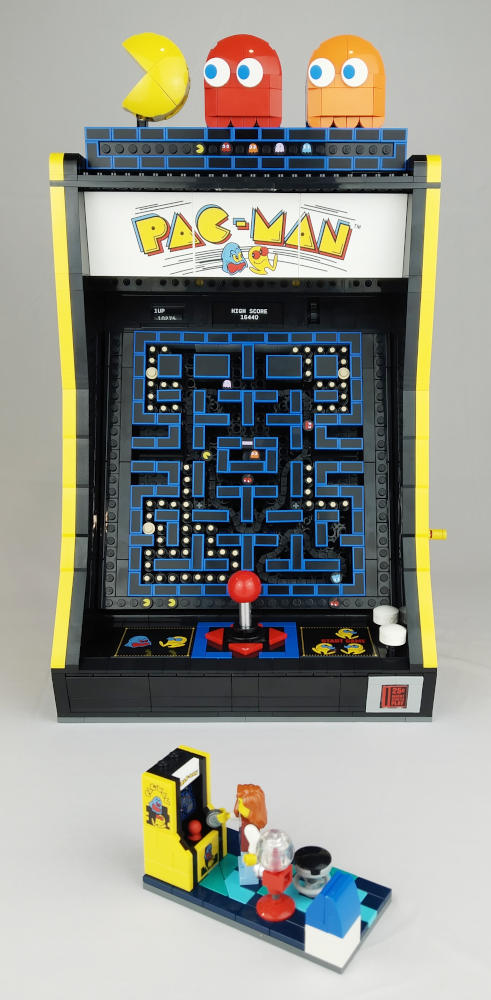
The minifigure scene is located inside the big machine itself behind the lid. Without a doubt this is an impressive set and a big congratulations must go to the designer Sven Franic, it's an excellent job! The set has a very well thought out design, from the exterior finish and details to the implementation of the screen movement. Everything has been designed to the micron and yet once built it looks like a much simpler task than it actually is. It's the feeling that we get from things that are very substantial and very well made. Those that as time goes by and you meditate on them you realise how good they are. If you are fans of arcade games or AFOLS nostalgic of that era and you would definitely play the Pacman... I can't tell you anything else but that this set is a must have. We are grateful to LEGO for providing this set for this review, although LEGO does not endorse or support the opinions expressed in this review in any way possible.
33590


