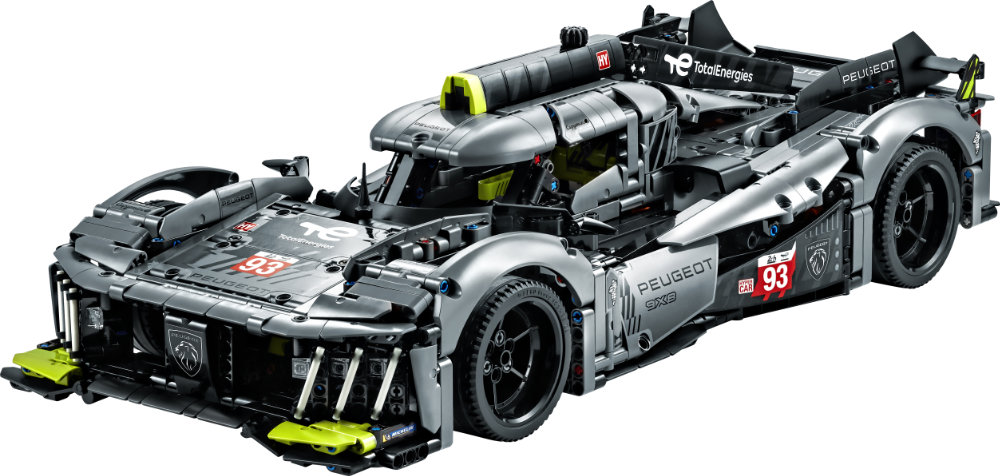
Set Review ➟ LEGO® 42156 Peugeot 9x8 Hypercar
When LEGO brought out 42154 - 2022 Ford GT, which turned out to be a slightly smaller scale than I initially thought, but a great building experience as well as a cool model, I thought that's that for 2023. Imagine my surprise when LEGO announced 42156 Peugeot 9xX8 Hypercar.
First off, let's have a quick look at the specs:
- Name: Peugeot 9xX8 Hypercar
- Set number: 42156
- Nr. Of pieces: 1775
- RRP: 199,99 EUR/USD
The press release for this model contains the following information about features to look for in the model:
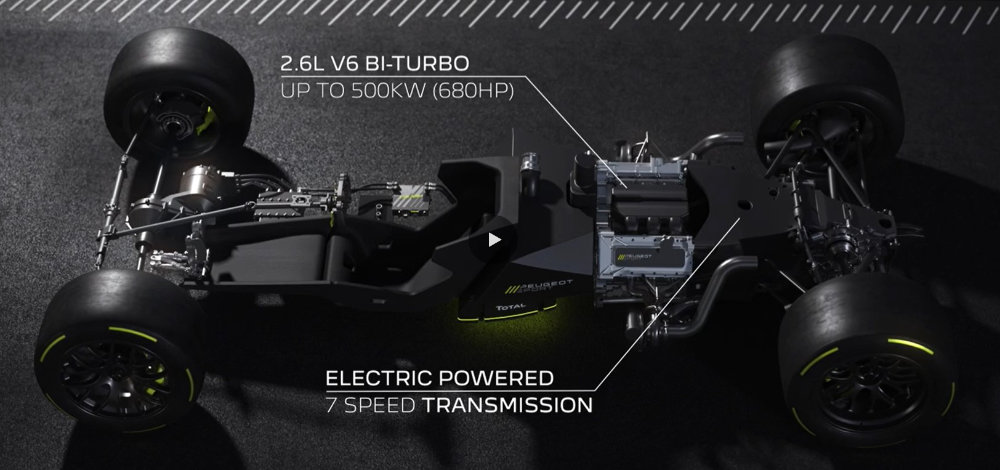
“The real-life 4-wheel drive hypercar's electric powered 7 speed transmission has been replicated in precise scale in this new model, which also sports the hypercar's unique doors, low-emission hybrid powertrain system, powerful suspension, and elegant profile. Fantastic details such as the V6 engine and glow-in-the-dark light elements truly capture the thrill of racing.”
You may imagine that, as cool as glow-in-the-dark can be, that is the feature I as least curious about, or interest in.
The V6 engine was already visible in the lifestyle pictures that were shared together with the press release. I am curious to find out how visible that engine is once the model is completed. It's of course nice to know your car has a V6 engine, but even nicer to actually see it in action.
The lifestyle images also showed suspension on the front axle, but not on the rear axle. The front suspension uses a single thick shock absorber mounted horizontally (a push-rod suspension) so it would be reasonable to suppose something similar was done in the rear, only the shock absorber isn't visible Could it be placed under the differential? Would that make it a pull rod suspension? Let's build and see.
4-wheel drive is not the same as 4x4 drive. It means all wheels are powered, but since this is a hybrid car I expect to find a differential on each axle, but no connection between front and rear (so no third differential).
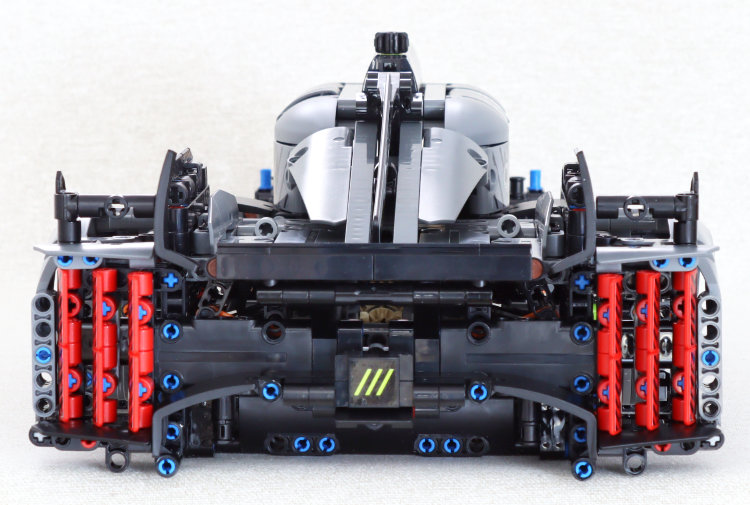
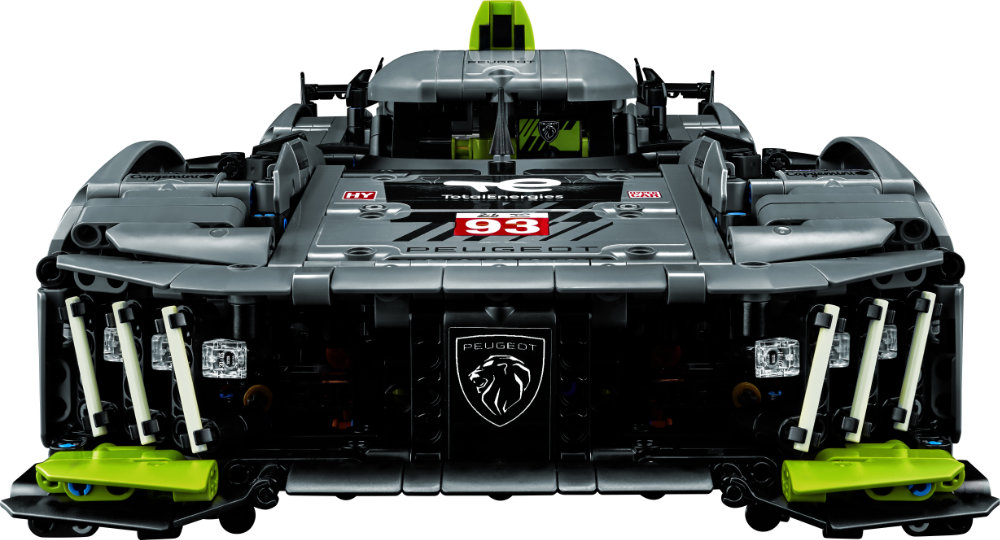
The unique doors are also visible in the lifestyle pictures and they don't appear to be linked to any special mechanism.
I have conspicuously left out the 7 speed transmission. None of the similarly scaled and riced cars that have come out in recent years (42125: Ferrari 488 GTE or 42096: Porsche 911 RSR) had a gearbox. Those were reserved for the somewhat larger and much more complex models and given the size and location of the 6V engine, I don't really see how a 7 speed transmission could even fit in the model, but who knows.
Time to start building…
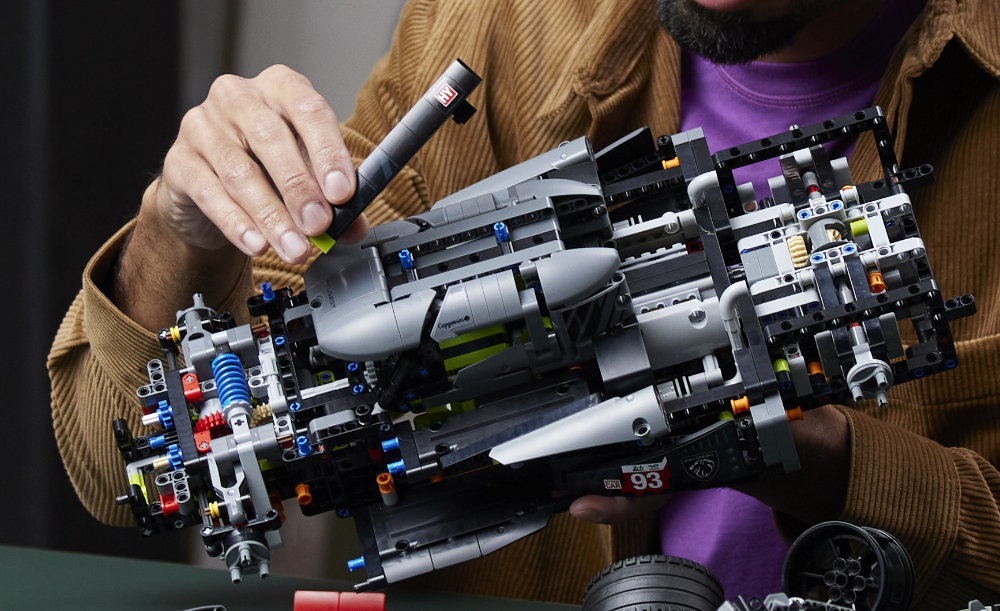
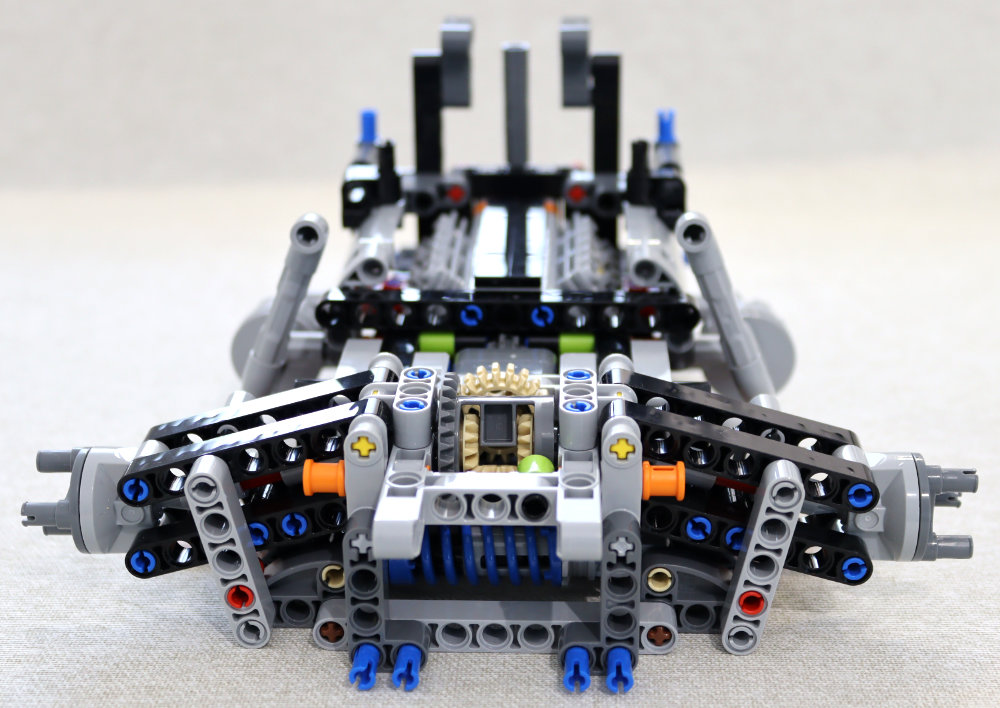
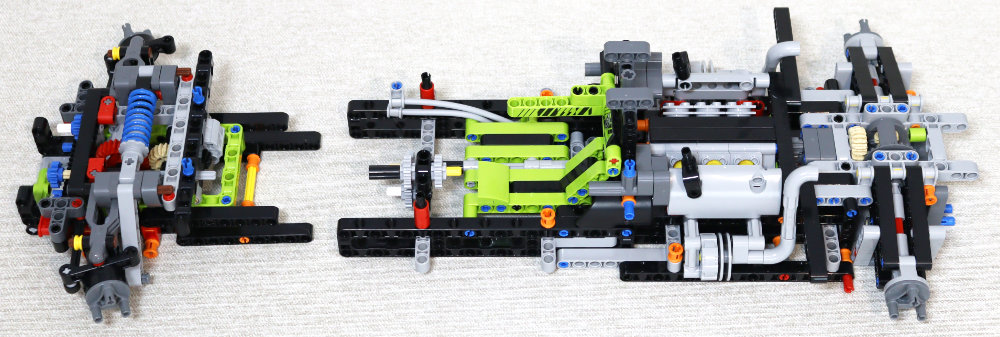
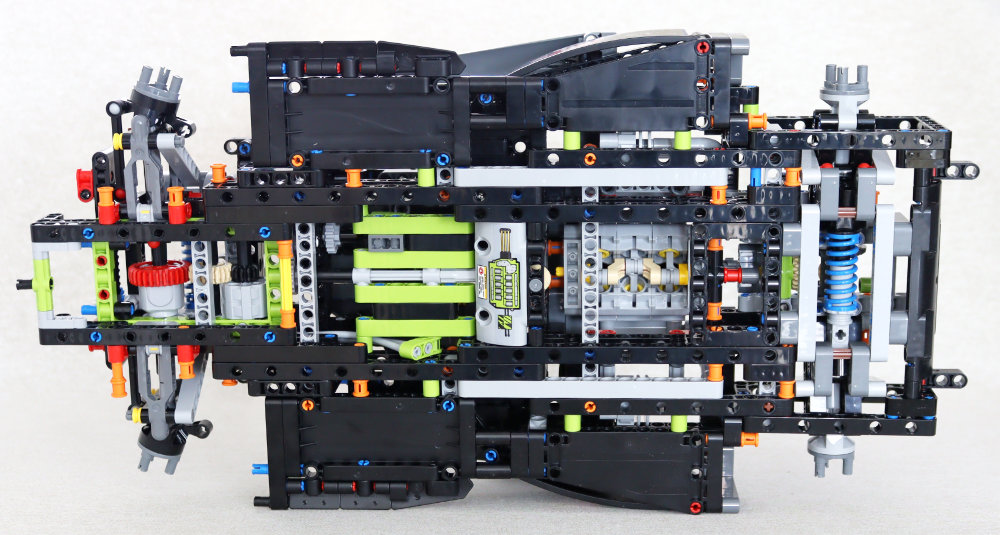
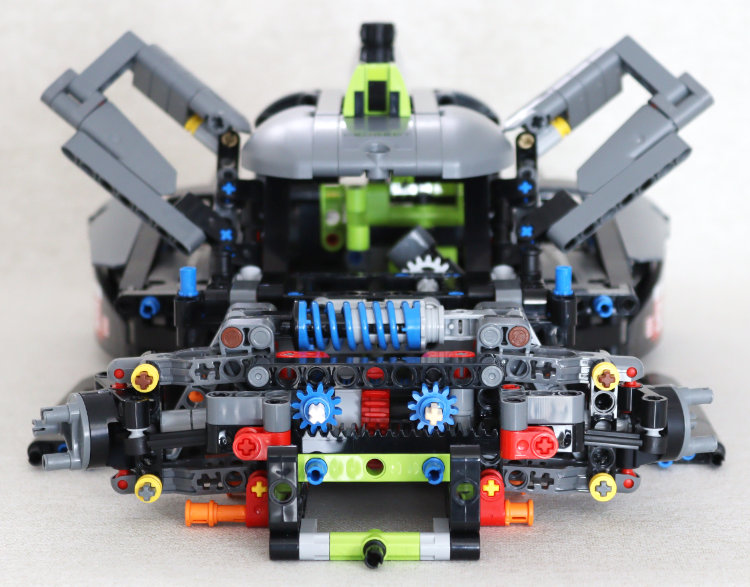
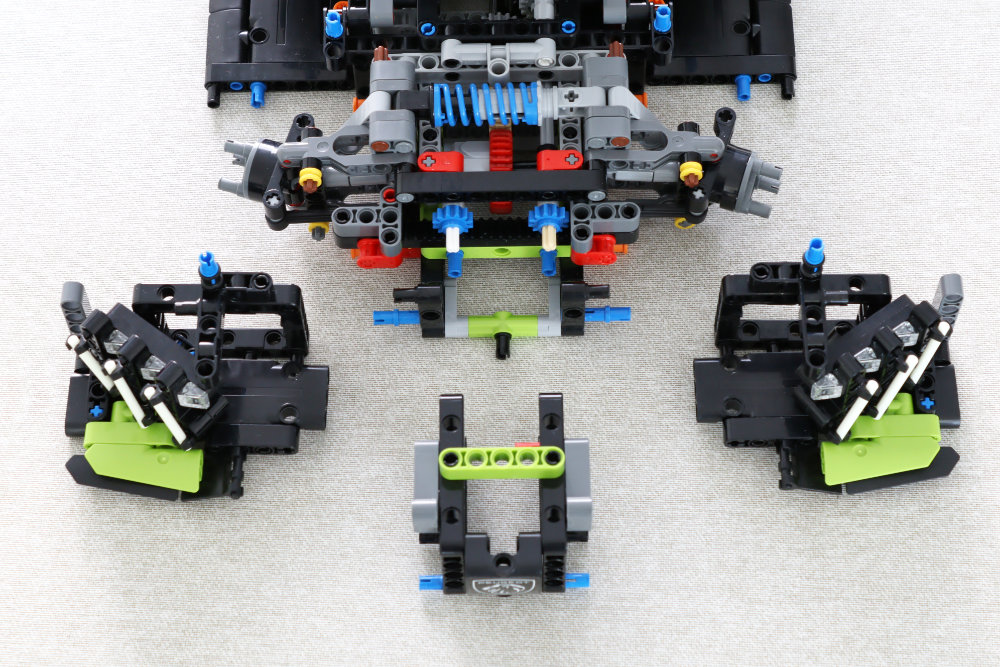
Building the 9x8 Hypercar begins at the rear axle assembly, which is immediately attached to the engine block. Step 26 brings in the shock absorber which, as predicted, is lodged under the differential. It is quite hard to get a feel for how the suspension will behave once the model is finished, so for now I am simply happy to see it is there and appears to be very sturdy.
Right in front of the engine is what looks like the beginnings of the HOG mechanism, making it possible to steer the car from above its roof.
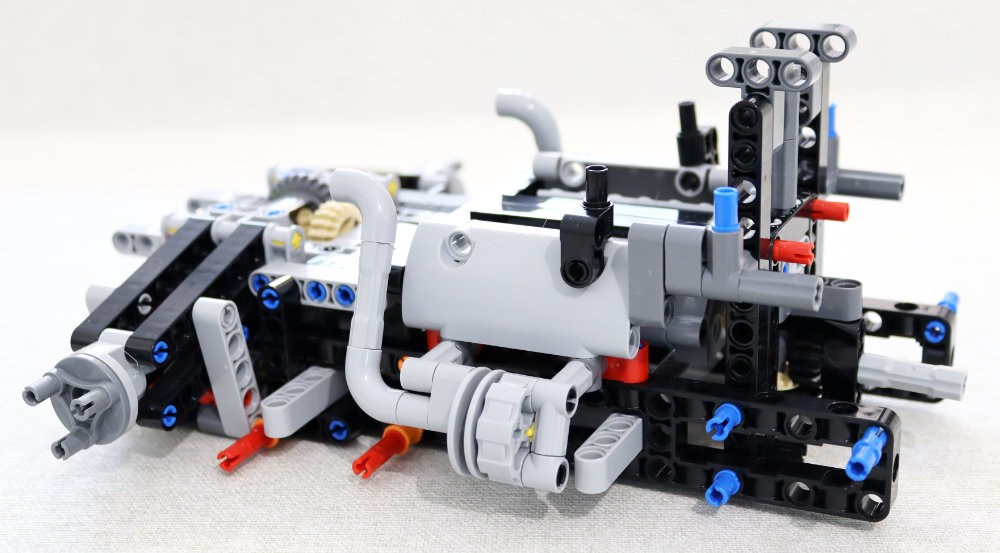
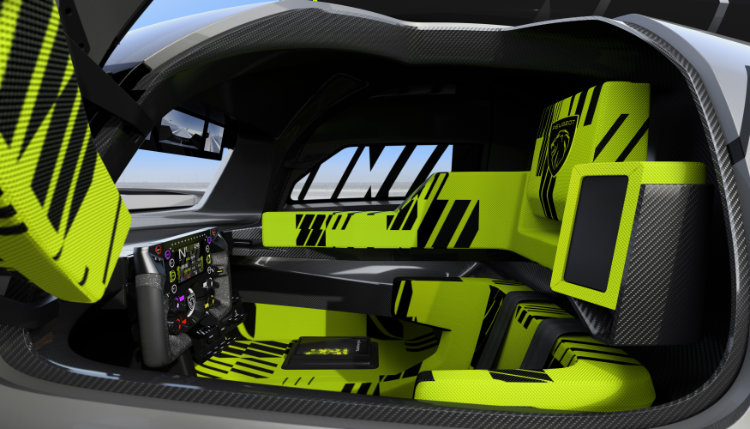
Up next is the driver's seat. Considering this isn't a street legal car and is specifically designed for racing, I am a little surprised to find it is not in the centre of the car but to the left. There is no explanation as to why there should be two hoses curving up from beside the driver's seat. This probably makes the car authentic, but unless you dig for additional information on your own you are left to wondering why this is placed here.

Even after finishing the build I was stumped so I decided to do some digging. There is a short film clip explaining the technology in the 9x8 hypercar on the Peugeot website that shows this to be the cables that go from the battery under the driver's seat to the electric motor that powers the front wheels. This also explains the first sticker representing that battery, but more about that later.
With all of this in place it is time to start building the front wheel assembly. In this case the new reinforced differential is used – the one that you get in all the sets that use Powered Up motors – not because of any extra stress on the components, but because this is the only differential currently in use that has a double bevel and so can be used with gears in a straight line (as opposed to at a 90-degree angle). Why is that an issue? Because the front drive train is powered by an electrical motor that looks like a drum. The differential is connected to a Tan 20t double bevel gear which in turn drives a black 12t double bevel gear. This last gear is on the same axle as the drum representing the electrical motor
You will of course have spotted the shock absorber on top of the assembly. If you look carefully, you will see that the suspension assembly uses brown 5L axles with stop that rest on top of red half pins to limit their travel. This creates the very slight downward slope of the model. The suspension travel is very limited but the front suspension is also very stiff – much more so than the rear suspension.
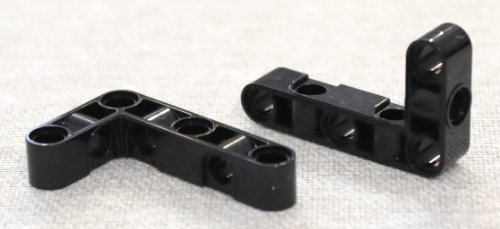
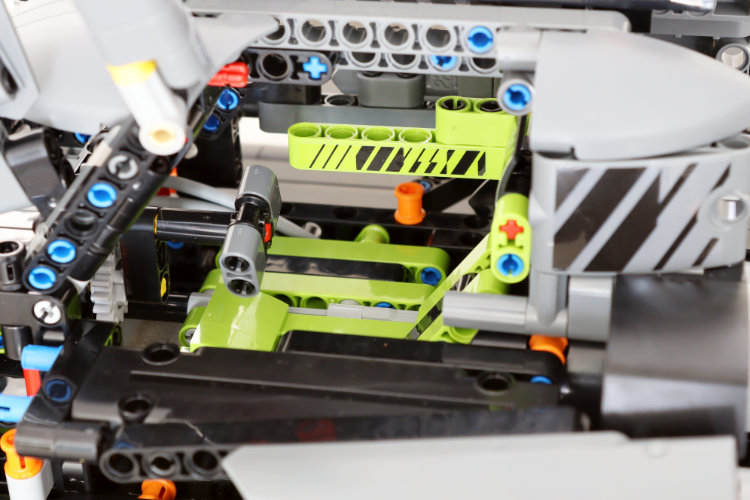
Did you also see the new element that is introduced in this set?
There is now a version of the 3x5 liftarm with perpendicular holes! A total of 4 of these are used in this model.
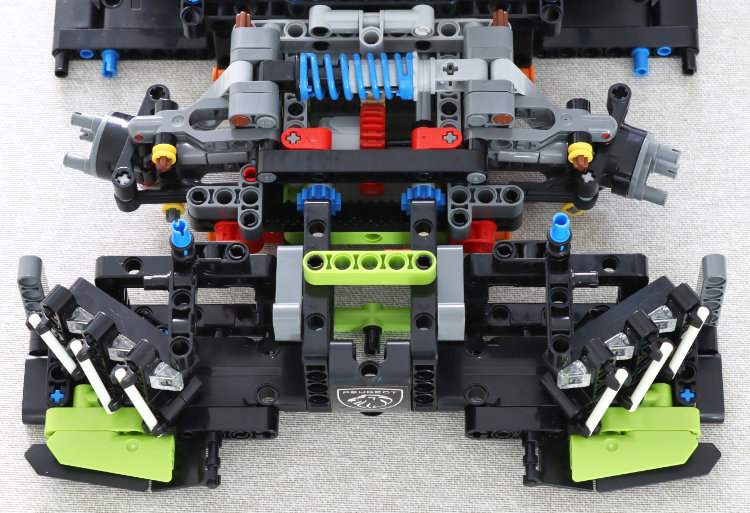
The front drive train is then connected to the rest of the model and you start to get a sense of the size of the model.
So, what are the hoses for on the other side of the driver's seat? Another look at the video made it clear the hoses are the cables that lead to the electrical motor. There is quite a big gap between the end of the hoses and this revolving drum so it wasn't immediately obvious to me.
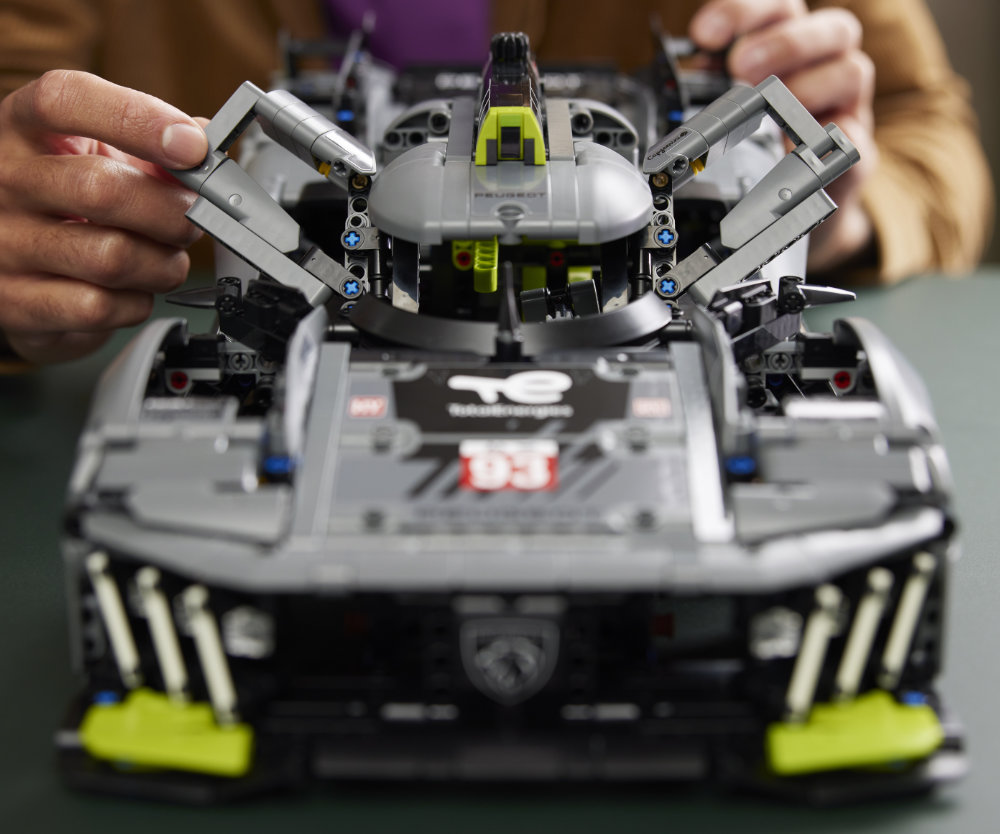
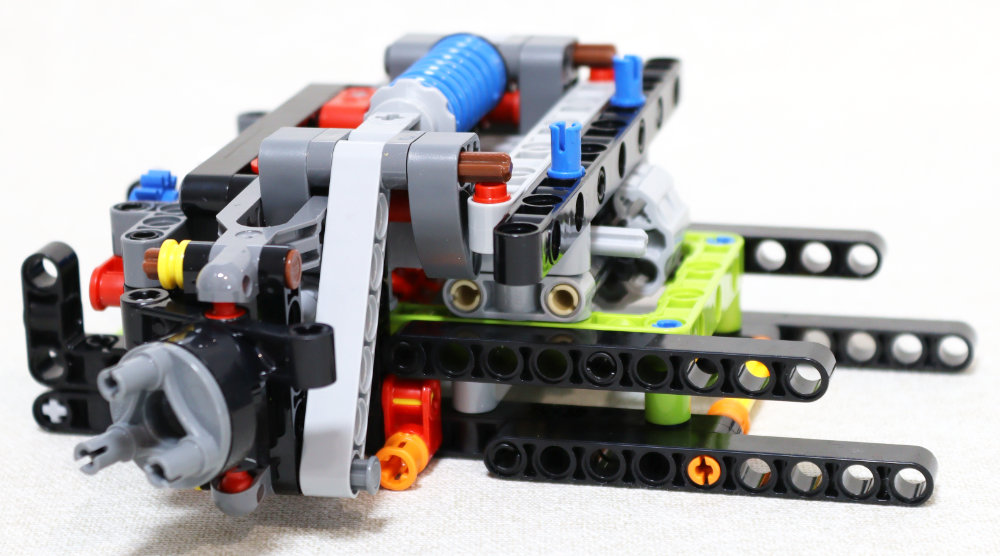
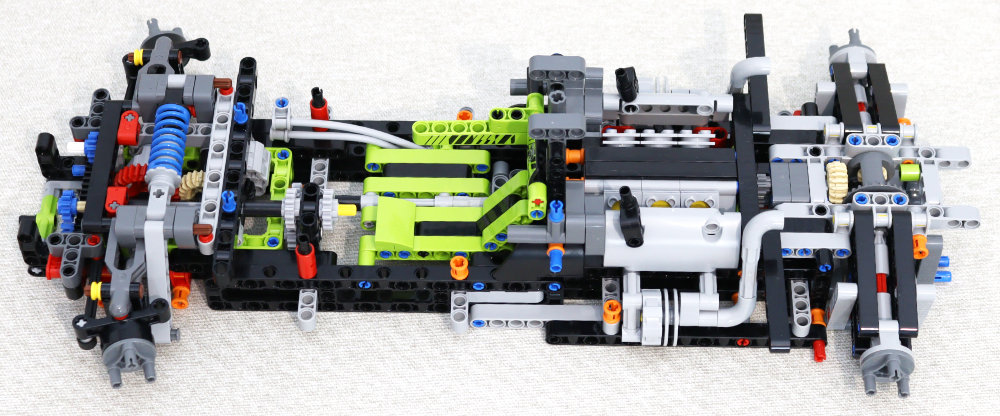
The next stage widens out the model and builds the cockpit structure.

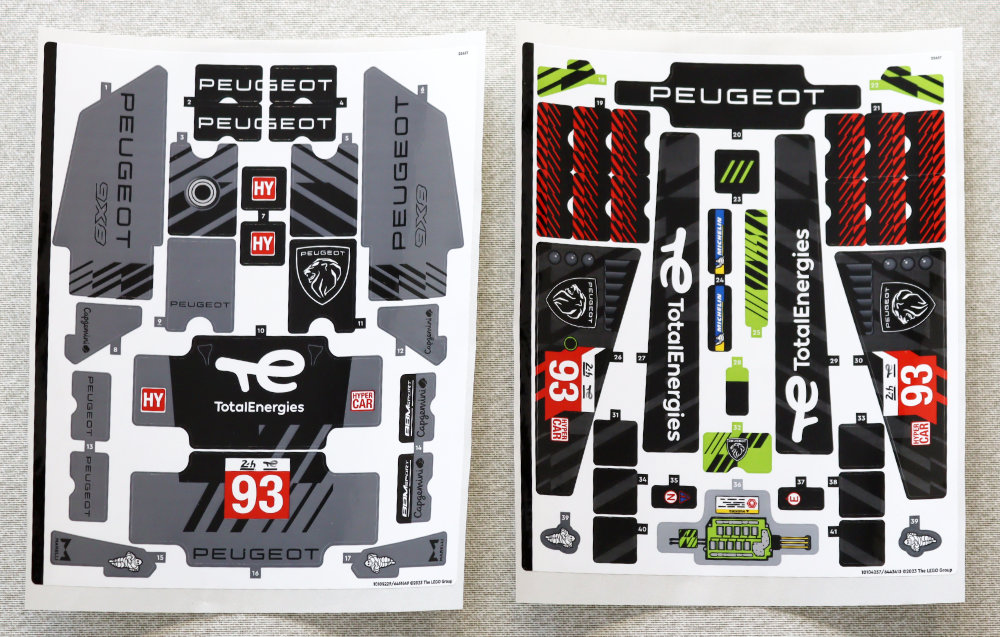
As you can see in the image below, the steering wheel is very simple, and there are no stickers to make it more realistic. Compare that to the original and there is a stark contrast.
I'm not unhappy about this though. There are plenty of stickers in the model as it is. Even though there are two sticker sheets I did not have the feeling I was adding stickers all the time. Yes, there are plenty of stickers on the model, but this is a race car and as such Is supposed to be full of logos. Even so it doesn't really interfere too much with the building process and a nice balance has been struck between getting a great building experience and applying the necessary stickers.
Let's go back to the very first sticker, as I hadn't highlighted that yet. Right there, in the middle of the bottom, between the bottom of the driver's seat and the V6 engine is a sticker. Once again, it took me a while to figure out what this sticker was for. It turns out that represents the car battery. This battery powers the front drive electrical motor and gets recharged during braking. It is an essential element of this car, but once again, no information is provided in the booklet. A few lines on the corresponding page would have been nice.
Align the steering and slide the blue gear into place, nice view of the doors to go with it.
On to stage 4 which completes the rear of the model. The red fins take a sticker each. Since they are not all placed at the same time, but nicely spaced out, applying those stickers doesn't become tedious – and they are easy enough stickers to do anyway.
The entire cover theta goes between the cockpit cover and the rear spoiler is a single piece that sits snugly over the rear wheels. This is where I would really like to congratulate the designer of this LEGO model. It's probably a feature of the original model as well, but I really like my Technic models to show… well, something technicky. With the cover in place, the engine is completely hidden inside the model and I can only see something is going on there if I turn the model upside down.

The final stage is finishing the front of the model, What I like here is that the parts that make up the front are built in blocks that are then added to the model. I chose to first build all the blocks and then assemble them on the car in one go.
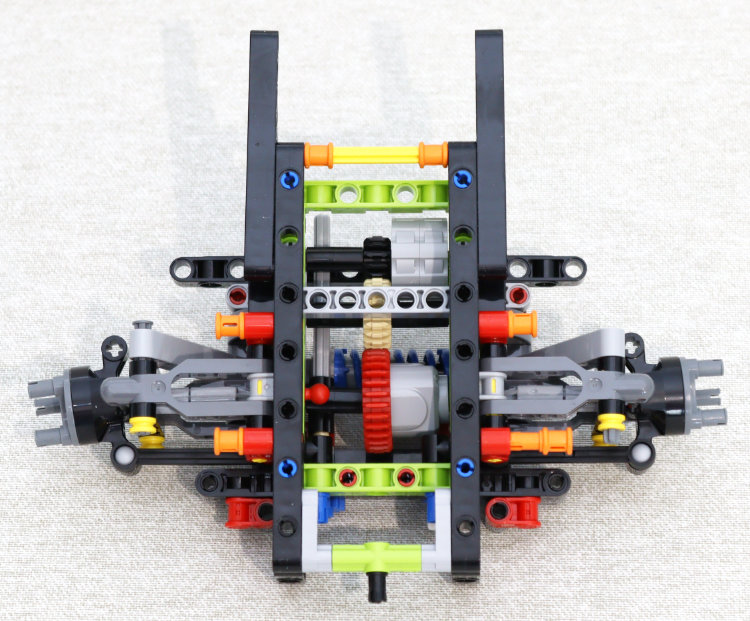
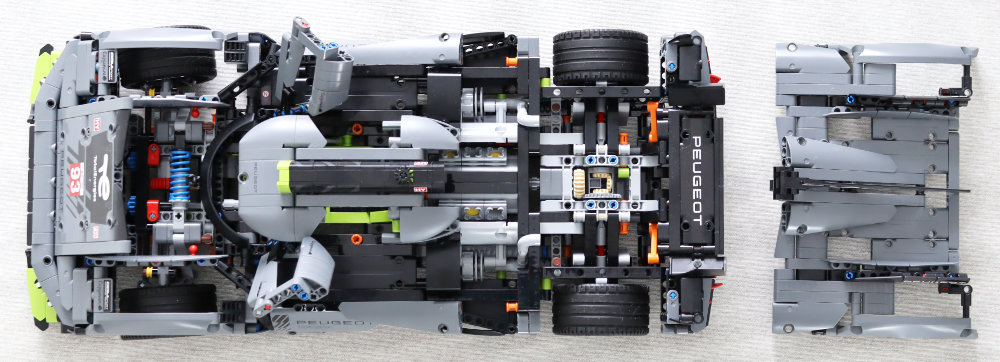
Finally, a top down picture of the finished model without the rear plate
This brings me to my final thoughts about the model and about the way LEGO has presented it. Within the somewhat square and blocky limitations of LEGO I feel the model is a reasonable representation of the original model.
There is one thing I do not understand though, but this is more related to marketing than to the model itself. A recurring complaint with previous models in this scale was that they lacked a HOG. It is true that a HOG can add an unsightly bump to a model in an unexpected place and that the model might look better without it. This is what marketing must have thought when they took the model to the studio: let's get rid of the black 12t gear sitting on top of the model and make it look nicer. Removing that gear (and pulling out the 4L axle it is attached to) isn't too hard, but is it really necessary, or even reasonable?
This is a picture of the Hypercar at its presentation in Monza.
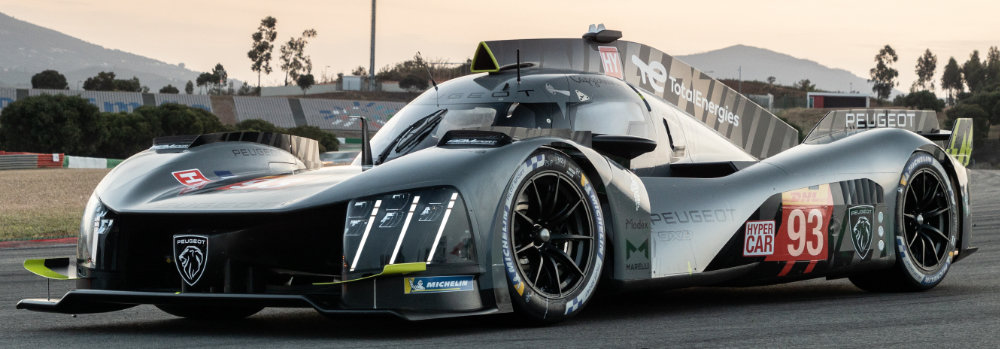
Do you see the little wing in the same place as the HOG in the LEGO model? There is something there and in exactly the same place. So why remove the HOG. On the other hand, this picture made me realise I would have liked to have a testimonial windshield wiper in the LEGO model to divide up that big open space. I haven't found a solution yet to make one myself, but I'll certainly be looking for a solution to add that little line in the centre.
We wish to thank LEGO for providing this set for review. LEGO neither approves nor endorses the contents of this site.
33579


