Set Review ➟ LEGO® Technic™ Ferrari Daytona SP3
Despite many rumours to the contrary, LEGO have launched their fourth Technic Ultimate Car right on schedule. After the Porsche 911 GT3 RS in 2016, the Bugatti Chiron in 2018 and the Lamborghini Sián FKP 37 in 2020, 2022 brings us the Ferrari Daytona SP3. Let’s have a look at the specs before we dive into the review of this set.
Compared to the first car in this series there is an important increase in both the part count and the price of the set. Over 1000 additional pieces have been used in the Ferrari model compared to the Porsche, and as is to be expected, the price has increased accordingly by roughly 100 EURO/USD. Most, if not all, of those additional elements have gone into the bodywork, and the result is quite stunning. Compare the fairly open bodywork of the Porsche to that of the Ferrari and you will immediately see what I mean.
The bodywork of the Porsche was very much in the style of traditional Technic sets with lots of gaps and panels that outline the shape rather than cover it.

The Ferrari on the other hand, present very few openings and a lot of elements and interesting building techniques are used to make the car as sleek as possible.

Another detail that immediately jumps out in the comparison is the difference in branding. The Porsche sports a tiny logo in the centre of the hood. The Ferrari on the other hand, has a much larger and ore visible logo on the hood, Ferrari shields on the doors and hub caps on all four wheels. And that is just what’s visible in this single promotional image.
There has clearly been an evolution. Let’s get started with the set and discover exactly how much has changed over the years.
Unboxing
LEGO have done an outstanding job where packaging is concerned. The form factor of the box for this set is completely different from that of the previous cars in the series. The box is much taller, and the irregular shape of the lid also gives it a nice edge. Additionally, LEGO have taken great care to ensure the box arrives at the customer in perfect shape. To this end reinforcements are inserted on both ends of the box to make sure that even of any of the corners gets damaged, the actual product box inside stays is still protected.
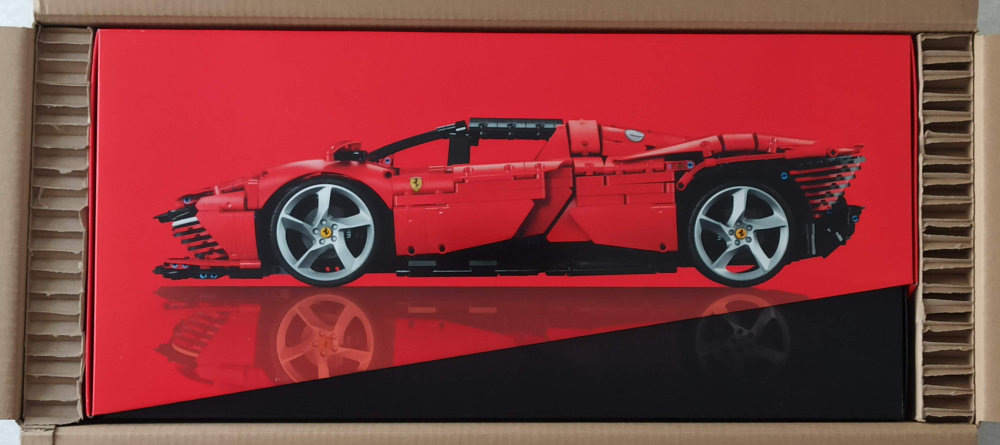
A taller box also means more space for images. Whereas the Lamborghini Sián box art was limited to a representation of the hood (at the top) and lights (front and rear on either side of the box, in this case there is space to represent the whole car. I especially love how lifting the lid – with the full LEGO model printed on the side – reveals the real car on the side of the box.


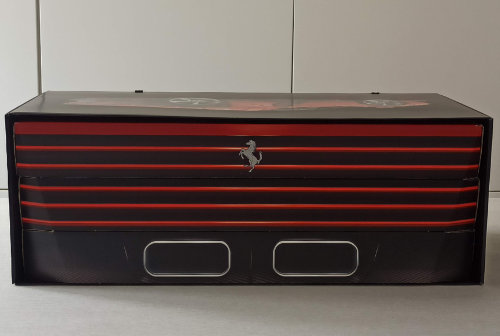
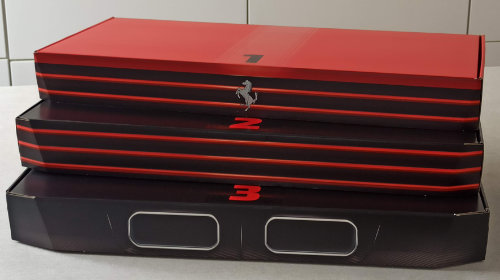
True to style, inside the large box there are three boxes with parts. The sides of these boxes show the curved profile of the rear of the Ferrari Daytona. Box 1 – the top box – contains 2 richly illustrated large instruction manuals as well as bags for stages 1 and 2. Boxes 2 and 3 feel light by comparison an contain the remaining build stages as well as carefully protected rims (unique to this set) and new tires.

The build experience
Large Technic sets tend to be built from the core out. Unsurprisingly, in this case the gearbox, followed by the rear suspension, are the first things you build. Looking back at previous cars in this series, the Porsche build started with the gear selector and built back from there to assemble the gearbox.
In the case of the Bugatti, the gearbox was built as a separate entity and placed in the cradle of rear suspension and chassis after completion.

The Lamborghini brought another innovation with the use of new large frames to encase the gearbox. That way it could be attached to the rear axle as single structural unit.
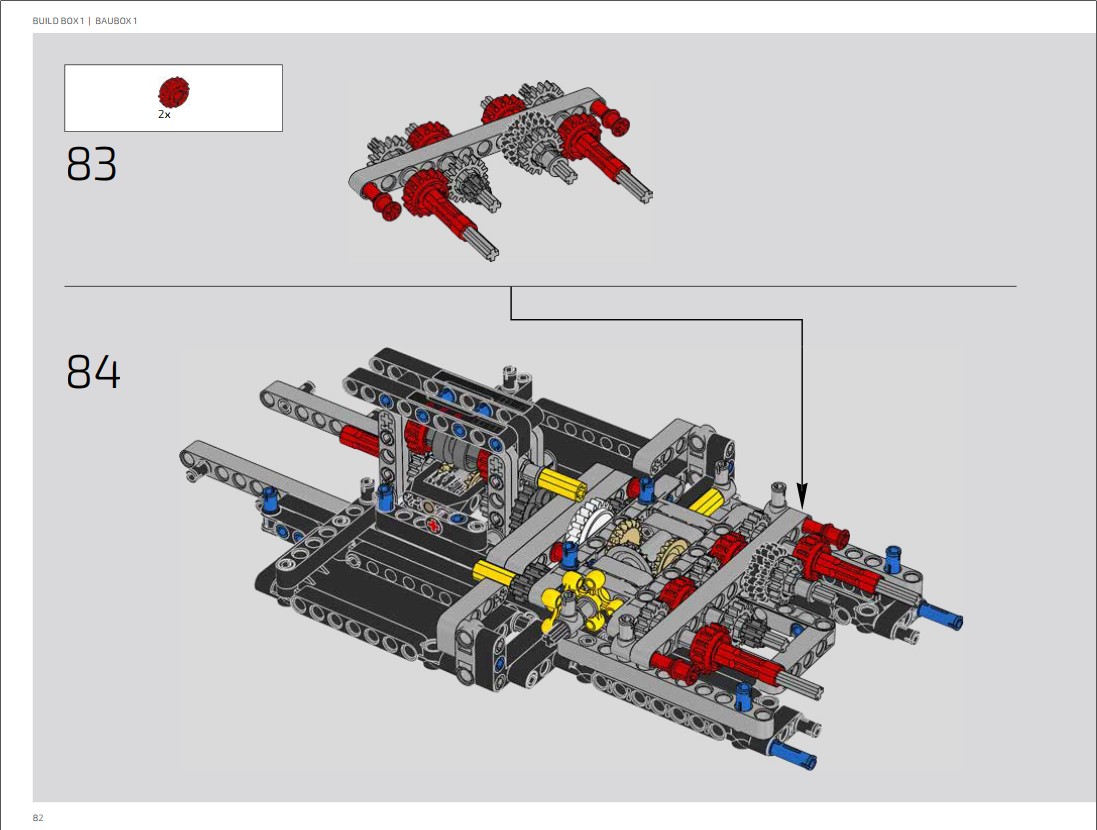
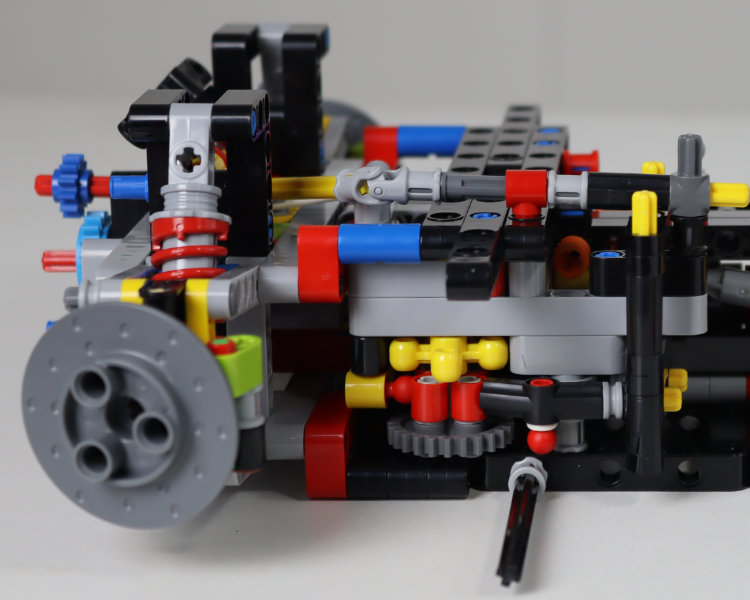
The Ferrari Daytona uses a slightly altered approach, building first the gearbox and gear selection mechanism, with new straight gears (12 tooth in Bright Blue, and 20 tooth in Dark Azure) instead of the older bevel gears of the same size. However, the gearbox is identical to the one used in the Lamborghini. Well, only nearly, because as I said 1) straight gears instead of bevelled gears (less wear and friction) and 2) the instructions contain a mistake at this stage, causing the gear sequence to be… out of sequence. For details on this slip up, I recommend you watch Racingbrick’s excellent demonstration of the reason behind the mistake here https://youtu.be/q6jCMhtJTv4?t=437.
Correcting the mistake is easy… if you are in the process of building the model. Once built, making the change is incredibly hard, so be warned!
It has been two years since I built the Lamborghini and, admittedly, the order in which some elements are built is different, but there were quite a few moments that felt like deja-vu. “I’ve seen this mechanism before…”. Well of course I would. It’s a car, and there’s only so many ways you can build a car.
Of course there are things that are different, and there are a number of technical innovations in this model. One of these is related to the new differential, or rather the new crown gears for use with the latest version of the differential.
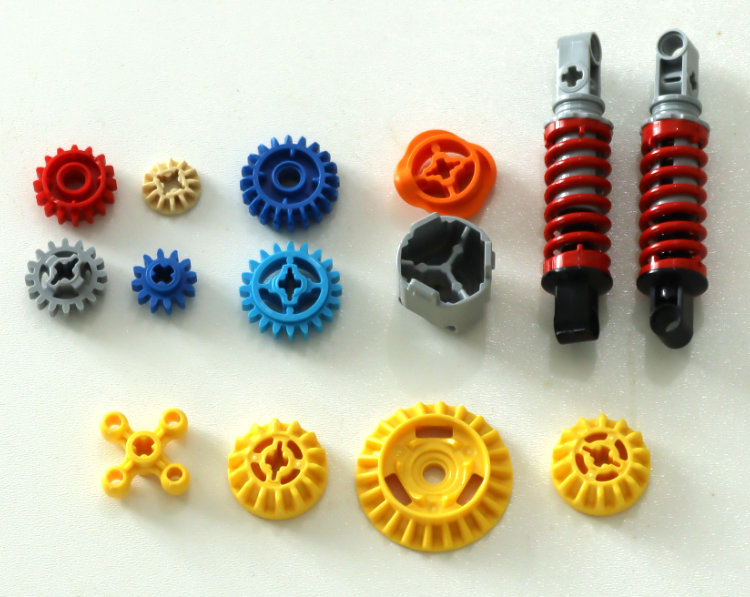
These gears have wider teeth than other existing gears and can only be used together. As a matter of fact, the smaller gears will only mesh with the larger gear, not even among themselves. This new setup makes a heavy-duty differential that can be encases in a 5x7 Technic frame.
Not that the Ferrari Daytona needs a heavy-duty differential. It could have easily been built using the same old differential used in all the previous Ultimate technic Cars, but I guess LEGO had this part on hand for a motorised set that is still under development and decided to use it here too.
You will have probably noticed the new shock absorbers in the image with the gears. Those are not entirely new (they already appeared in the 42130 BMW M 100 R in blue) but they do require some innovation in the front and rear axles to accommodate the new piece. Interestingly this is done without the use of the traditional ball socket, making for a nice change in building style.

Up until this point it felt like the Ferrari Daytona was going to be a size smaller than its predecessors. I know, they are all supposed to be scale 1:8 and pretty much the same size, but this car just felt so much shorter.
Of course, I hadn’t bargained for the complex front-end structure that is added at this stage, suddenly making the car a whole lot longer. This is also the first time you start adding System bricks (“traditional” LEGO elements with studs) to the build, making a start with building the exterior of the model. At first it felt a little strange to be adding to many system bricks to a Technic set, but the result is eye catching and the perfect way to represent the lines of the original model in this LEGO rendering. Suddenly everything feels new and different: so many angles and different techniques to keep things in place. There is nothing very “Technic” about this part (other than the fact that most of the elements are in fact Technic pieces) and yet this is probably the part of the building process I enjoyed the most.


I had a similar experience when it came to the rear end of the car. Suddenly there was this huge extension to the back of the car, making the overall model look much bigger, and better styled. And also here it is the System elements that really steal the show.
Mechanisms
A LEGO Technic Ultimate car can be expected to have some fancy mechanisms. So let’s have a look at what this model brings.
I have already mentioned the gearbox at the start of this review. It could be said that gearbox is a piece of art in its own right – not an especially original piece of art as it is identical to the one used in the Lamborghini, but still: it works great and for a Technic fan like me it’s a joy to see the mechanism go through its gears. It’s unfortunate the mistake in the gear sequence was made and even more so that it is almost impossible to correct once you finish the model. However, that doesn’t take away from the fact that it is an awesome gearbox.

Linked to the gearbox is the pedal shifter mechanism behind the steering wheel. Again, this is a mechanism that has been used in pretty much the same setup since the Bugatti, but it does a stellar job, so why change it.
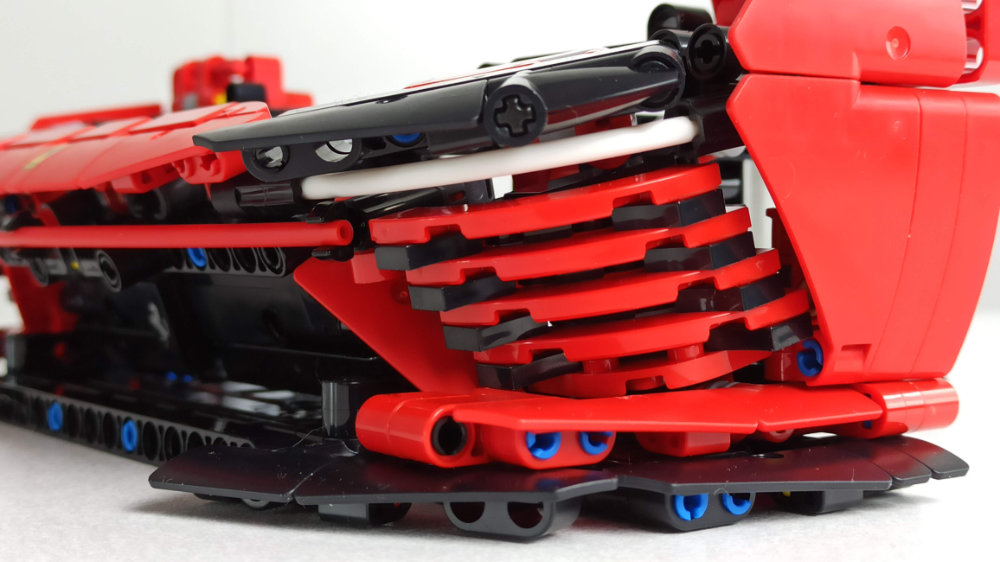
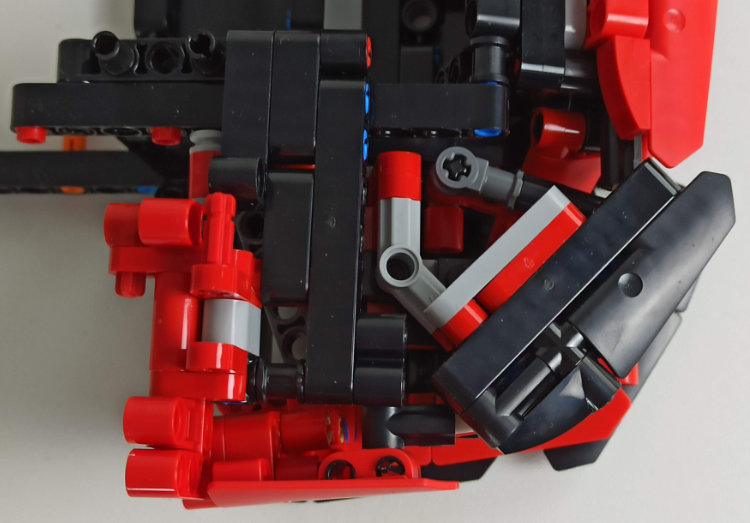
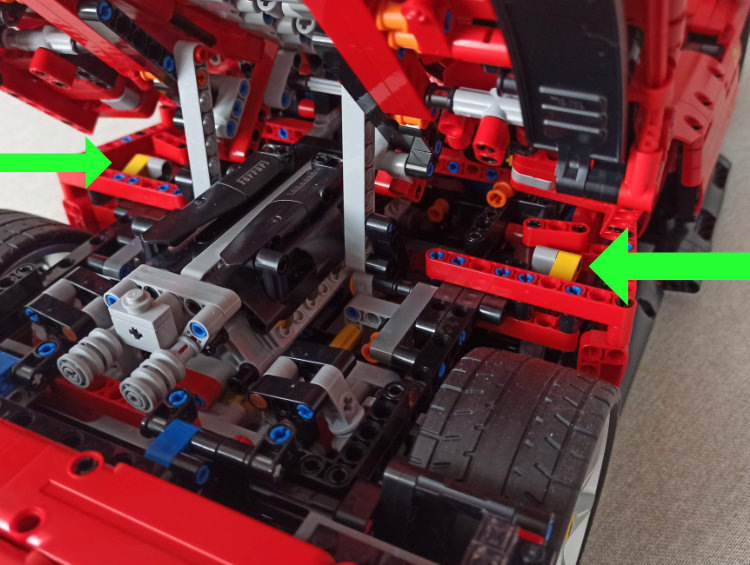
There is some innovation in the front and rear suspension. This is mainly due to the introduction of a new element: the large shock absorber. This shock absorber no. 3, which already appeared in blue in the 42130 BMW M 100 R motor bike earlier this year and now comes in red. The red coil on the outside is just for the looks. The actual spring element is inside and it is very stiff – perfect for a car this size and weight. The fact that the hood opens to reveal… essentially nothing is not something I would add to the list of functions for this model, despite the fact that there is a stand to keep the hood open. The same cannot be said for the engine cover. This engine cover is a really complex build with some interesting techniques. The function however – being able to lift and close, in order to reveal or cover the engine – does not really work as I would have hoped. Maybe it’s the angle, maybe the weight of the construction, but the engine cover will not stay up of its own accord. Every time I put it up it will slam closed immediately. This is unfortunate for several reasons: it means using the function as a display option (with the engine cover lifted) is not an option. It also means that gaining access to and using the door mechanism become that much harder. More on that later.
The suspension – with the new shock absorbers mentioned above – has excellent travel and the steering works great. The steering wheel is virtually inaccessible though, but this is not a play model. It needs to look good and be technically ok, and it is. Aligning the steering is one of the easiest parts in the construction process and I love how much the steering wheel turns when you manually move the wheels left and right. The gear shifting padels behind the steering wheel aren’t easy to access either, but again, it is enough to show the model works and it’s quite satisfying to hear the gearbox click into the next gear.
Back to the doors. After the gearbox, this is the most complex mechanism in the model. These are operated by a lever system that is put in place before you start building on the bodywork. It was another one of those “I remember this” moments. Once the model is finished, the mechanism is not easily found again and it is surprising to see it is nowhere advertised in the instruction manual. I only thought to push the yellow leavers under the engine cover because I remembered the mechanism in the Lamborghini. There it was much easier to access though. Since the engine cover doesn’t stay open easily and the door mechanism requires quite some strength this is really a job you need to do with two hands.
The doors open beautifully. The mechanism is quite satisfying to see. Closing the door is a little more problematic. The door will not always close as intended. It will go down, but not necessarily flat against the side of the car. It is a matter of hit and miss, and in my case more miss than hit.
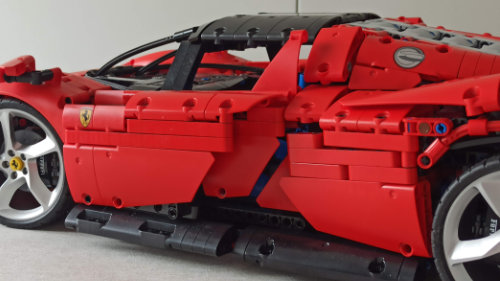
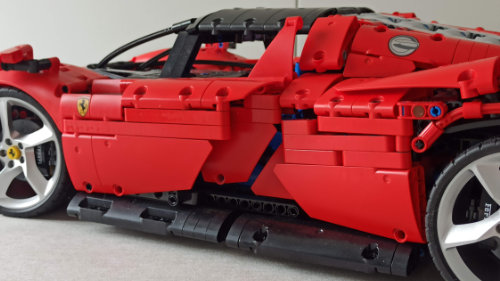
I also feel the angle of the panel at the back of the door is a little strange – too open for my taste – so that even when it closes properly it still feels ever so slightly out of line.

I have a similar feeling with the removable roof. The front feels a little too high. As if a piece were missing to complete the curve. Overall though this is a magnificent model, and these are minor aesthetic details compared to the way the finished model looks.
Conclusions
The Ferrari Daytona is a premium set and as such it is nice to see there isn’t a single sticker in the entire build. There are plenty of printed elements – mostly Ferrari logos, but also the fuel cap and the dashboard controls. Also a printed element is a plaque – a black 8-by-16-stud tile with the specs of the original car. Although similar plaques have appeared in Star Wars Ultimate Collector Sets, this is a novelty in the Ultimate Technic Car series. Personally, I am not convinced this is the way to go. Previous models in the series all had a brick-built bag to place in the luggage compartment of the car. This model doesn’t. More importantly, placed side by side, none of the other cars have a plaque, and while the absence of a bag is not a big deal, the absence of a plaque in all the previous models does make this one a little … awkward.
Another “issue” is the fact that it is hard to pick the car up. Previous models could be picked up by the roof, or rather the support right behind the roof. Since this model has a removable roof I guess you could remove the roof to pick up the car, but it has become a lot harder to handle. This is probably a non-issue for most set owners as this is in no way a play model. This is a atrophy model: something to put in a glass display case or have on a shale to look at, not something you take out for a spin.
Nit-picking aside, this car is an amazingly detailed model, with some really cool Technic features. So there is a small mistake in the gearbox. Very few will ever notice and fewer will care enough to correct it. So the doors don’t always close perfectly. But they open very nicely, and the shape is near perfect. Are we looking for reasons to diss the model or are we looking at how much has been accomplished? For Ferrari fans and LEGO super car fans alike, this is an amazing model. It is a premium experience with beautifully illustrated instruction manuals, a slew of nicely printed elements, cool new rims and tires, The list goes on. If I hadn’t received a review copy, I would probably save up to buy the car anyway. In part because I already own the previous three Technic Ultimate Cars, in part because the whole experience as well as the final product are really awesome.
We would like to thank LEGO for providing the set for this review although LEGO does not endorse or support the opinions expressed in this review as they are ours alone.
33534


