Set Review ➟ 42083 Bugatti Chiron (Part 3)

After building the rear axle together with the gearbox and the W16 engine in the first part of this review and dedicating the second part to building the front axle with the drive selector and the gear selector, in the next act we will combine these two parts of the chassis into one sturdy “monocoque”.
After this third act there will be a short intermission with an imposrtant announcement so read on…
ACT 3 – SCENE 1
With the front and rear assemblies completed it is time for that magical moment when everything comes together.
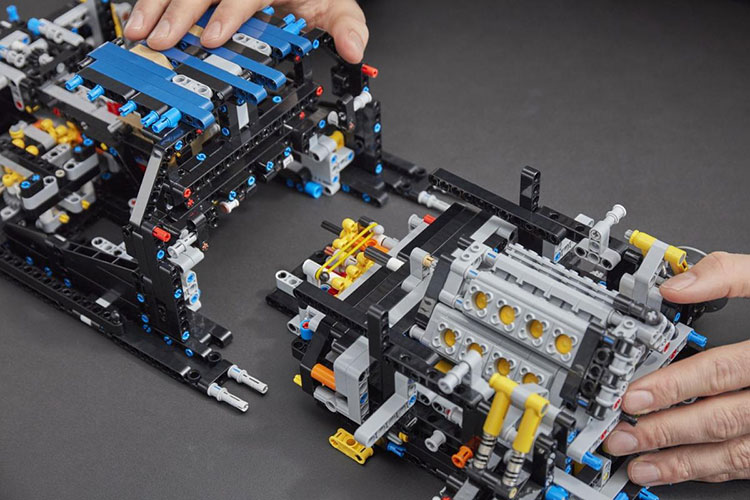
The instruction manual contains clear indications for the orientation of each protruding axle and axle joiner so that the parts will line up perfectly. The process is surprisingly easy considering all the different elements that need to slot together, be it axles, axle connectors or pins. And after everything has clicked into place there are couple of strategically placed long pins with bush (4 in total), followed by two 8L axles with stop that will make sure the two sides don’t come apart again.
All the important mechanics of the model have now been locked into place and it is all I can do not to take out the rims and ties and take the chassis for a spin. But for now, let’s review what I have built so far:

The model is very near its full length as only a few studs of the front and rear bodywork will be added. Joining the two halves has hidden the gearbox even further from sight, but you can still se a little of it through one of the frames in the base. Let’s have a closer look of what we still can see.
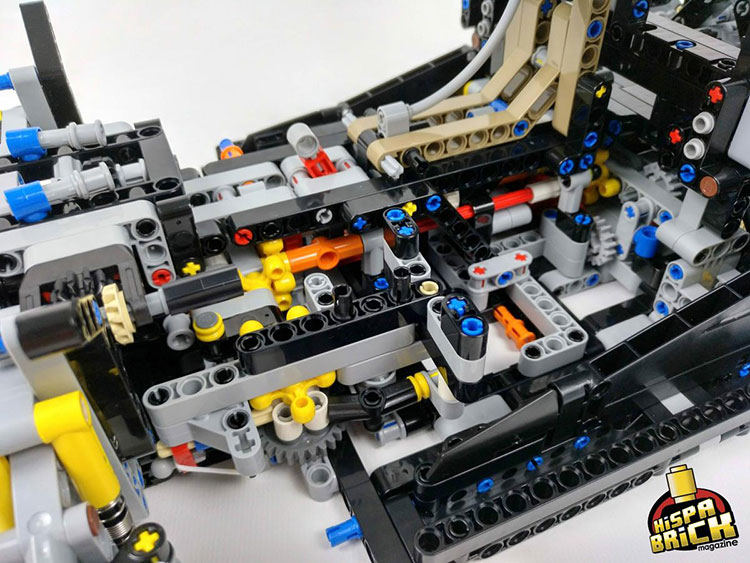
In the bottom centre you can see the primary gear selector mechanism which has now meshed with the secondary gear selector that is connected directly to the gearbox. The two paddles are actually opposing sides of the same 7L beam and you can either push or pull either side of the paddle to change gears. Although you can’t see that secondary selector you can see the yellow knob gear on the right.
The orange long pin with bush you see in between is one of the four that keep the two parts together – I hadn’t pushed it in yet at the time I took the picture.
On top of the primary gear selector you can see the steering assembly. In the centre of the image and to the left of the tan beams you can see the drive selector.
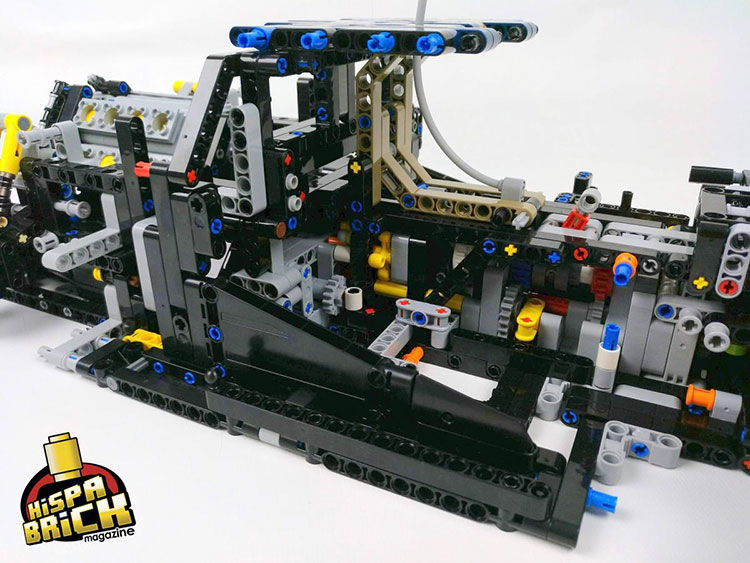
On the opposite side of the model you can more clearly see the drive selector. In the picture it is set to “drive”. It engages with the blue clutch gear and connects the engine to the gearbox. The central position is neutral and choosing the opposite side will engage the reverse gear which goes through the centre of the gearbox but does not engage with it.
Another change you will have noticed is that the model has become wider. Just before connecting the front and the rear, a number of panels and long beams have been attached on either side of the front. They are also connected to the roof of the car and make the assembly very sturdy. After the “marriage” you can easily pick up the entire chassis from the front of the roof.
With the chassis “welded” together it is time to start building the bodywork of the car, but that is for the next act
INTERMISSION - PODCASTS
So far, I have completely failed to mention that the Bugatti comes with a podcast in 9 parts. In order to listen to the pocast you have 2 options (or three - depends how you count). Option 1 is using your smart device (Android or iOS) to install an app called "Stitcher for Podcasts". The app will require you to log in, which you can do using your Facebook or Google account or by setting up a new Stitcher account. Once you are logged in and have selected the type of podcasts you would like to listen to (never mind that, the app requires you to make at least one selection, but whatever you choose it doesn't influence what we are looking for now). My phone screen is not especially small at 5", but I did not immediately realise the feed I was looking for is simply called "The LEGO Technic Podcast" - I was looking for something that included the name Bugatti, or the set number... The podcasts are between 21 and 39 minutes long, so while they may not be long enough to complete the part of the build they reference, they will surely keep you busy for some time. The advantage of using the app is that you can easily bookmark the episodes and even download them so you can listen to them when and where you like.
The second (or third) option is to go to LEGO.com/technicpodcast. The advantage of using this method is that the podcasts are numbered (Stitcher they are simply named and presented with the newest one on top). A word of warning: this page redirected me to the Technic website of LEGO Spain (where I live) and NOT to the podcast. In fact, it took two more clicks (to the 42083 Bugatti Chiron minisite and then to the podcast section) to run into my second unpleasant surprise: there was no podcast there. Eventually I figured out I needed to change the language for the website (bottom right) to any other language to gain access to the podcasts. It does say the set is for 16+... While the instruction manuals have text in both English and German, the podcast is only available in English.
The podcasts are quite entertaining and there is a lot of information about the original Bugatti Chiron, as well as some insights into the design process of its LEGO rendering.
2350


