Set Review ➟ 42083 Bugatti Chiron (Part 2)

In the first part of this review we have focused mainly on the rear axle assembly or Act 1, as we named it. Without a doubt this part of the build includes most of the innovative features of this model since this is where the gearbox is located.
During a live streaming interview with Achim Anscheidt (Bugatti Design Director), Andy Woodman (Senior Design Manager Specialist) and Aurelien Rouffiange, the LEGO Technic Designer who took the lead in designing this model, we learned the new orange element which the Technic designers internally call the “Wave selector”. It took about 6 months to develop this element to its final shape and it is a game-changer when it comes to designing new gear boxes.
You can watch the complete event here: https://www.facebook.com/LEGOTechnic/videos/10155751117008403/
However, there is still much more to discover in this model, so let’s move on to:
ACT 2 – SCENE 1
We now move on to the front axle and everything that is connected to it.
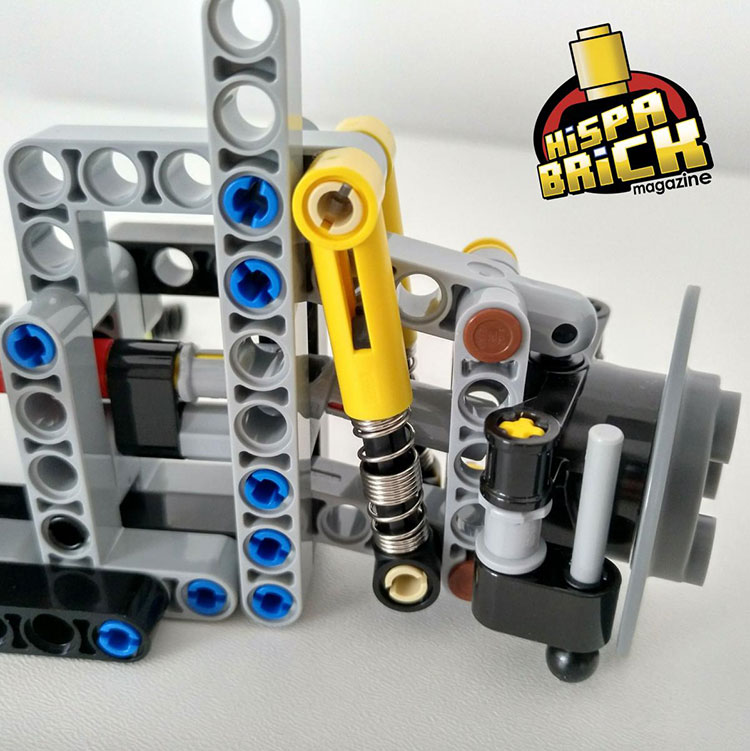
Since the Bugatti Chiron is 4WD, we start off with the front differential and continue with the front suspension, which is relatively similar to the rear suspension, but has the shock breakers connected to the lower arm of the suspension setup to allow for a sleeker shape. Again, the suspension is built using blue friction pins and only the shock breakers themselves are connected with frictionless pins.
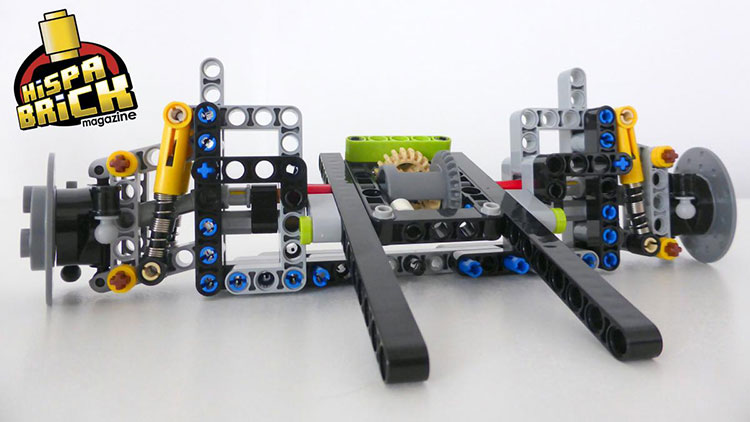
The bar right behind the brake disk is the attachment point for the calipers which will not be installed until the very last moment.
The wheel hub is connected to the axle with a steering CV joint (same as on the rear axle).
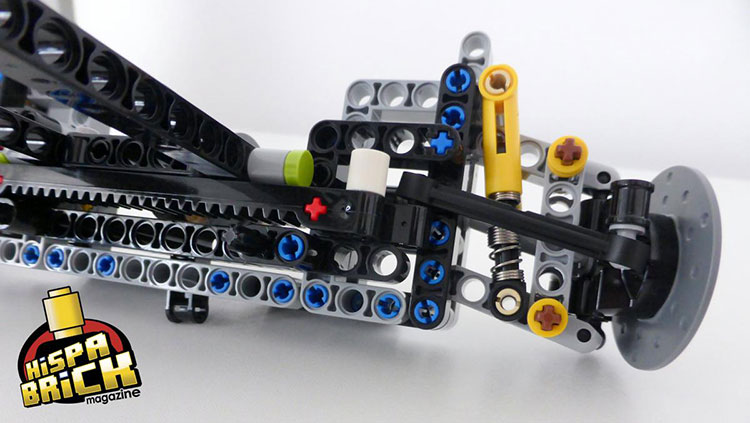
The steering rack is placed upside down, but otherwise has a standard configuration. No Ackerman steering or other fancy techniques in this setup. You can also see the white pin connector 1L that serves as a limiter and stops against the lime round plate. While removing the steering limiters in the Porsche 911 resulted in a somewhat smaller turn radius, in this model removing the limiters has the unwanted effect of making the tires rub against the shock absorbers and so is not recommended.
SCENE 2 – ACT 2
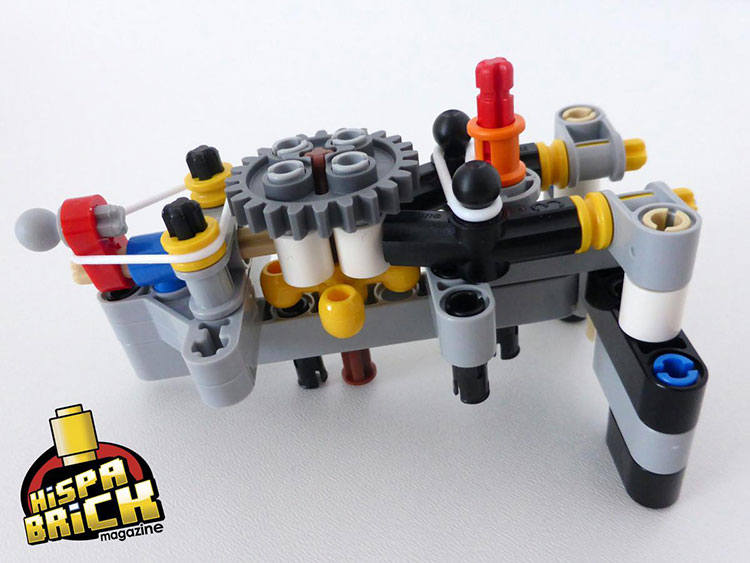
The second part of the front assembly contains the gear selector that will go between the seats.
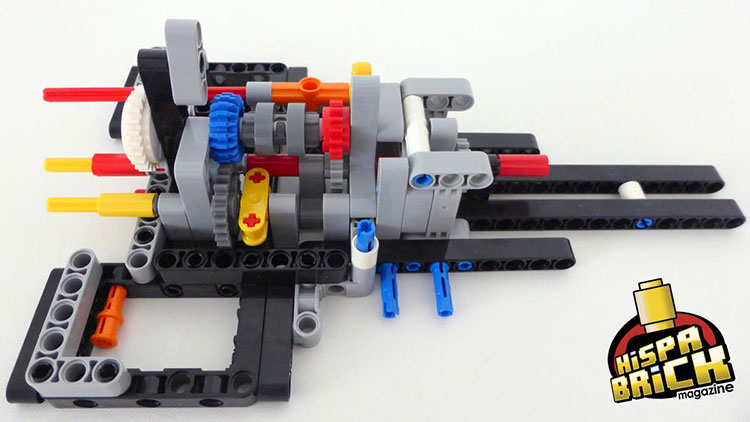
As you can see in the image, the selector moves between a red and a blue clutch gear but is always connected to the white slip gear at the left (back) of this part. This slip gear will then connect to the engine, ensuring that any possible (but rare) lock-ups in the engine affect the rest of the mechanics of the car.
Another interesting fact is that each clutch gear diverts power to a different axle. The red clutch gear meshes with a grey 16-tooth gear in the centre of the module. The glue clutch gear meshes with a 24-tooth gear that is 3 studs off centre. When you match this to the rear assembly it becomes clear that the blue clutch gear engages the gearbox, while the red clutch gear puts the car in reverse and bypasses the gearbox completely. This means the car has a true 8+R gearbox, as opposed to having 8 gears forward and another 8 backwards, making it much more authentic.

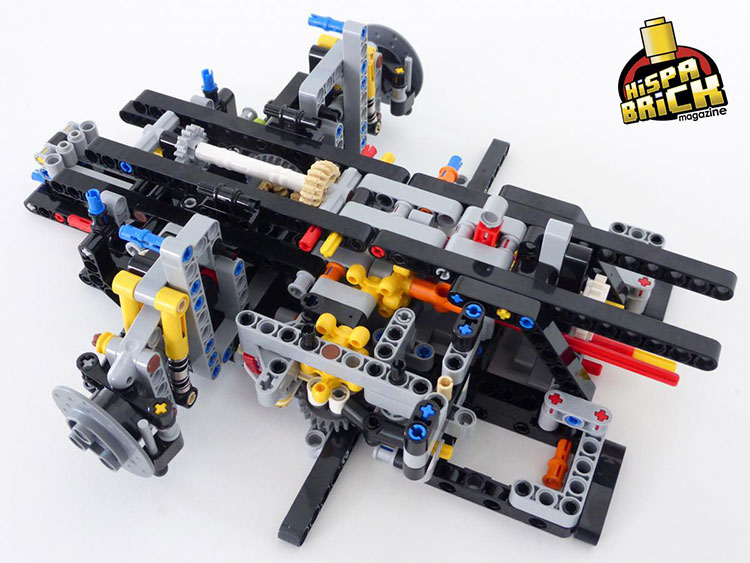
If we take a look from the other side of the module (and connect it to the front axle) there is a knob wheel that lines up with the gear selector on the gearbox. Something interesting is still on its way…
After the gear box, the front gear selector is one of the most interesting mechanical solutions in the car:
Don’t be fooled by how flimsy and unreliable it looks and feels when you first build it. The mechanism almost seems to fall apart if you try to use it like this. However, installed in its right place and properly secured and braced it works like a charm:
This gear selector works in series with the gear selector on the gearbox, so it takes four click (in the same direction) on this gear selector to make the one on the gearbox turn one quarter.

2349


