Set Review ➟ 10266 Lunar Lander
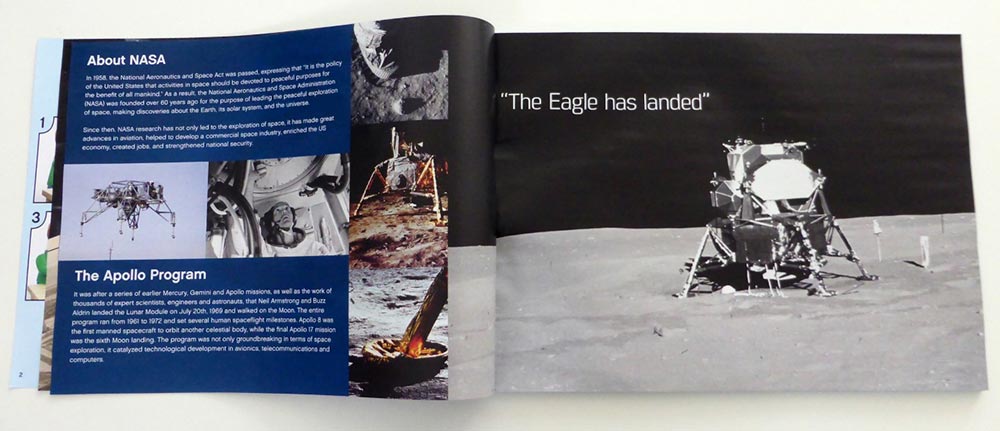
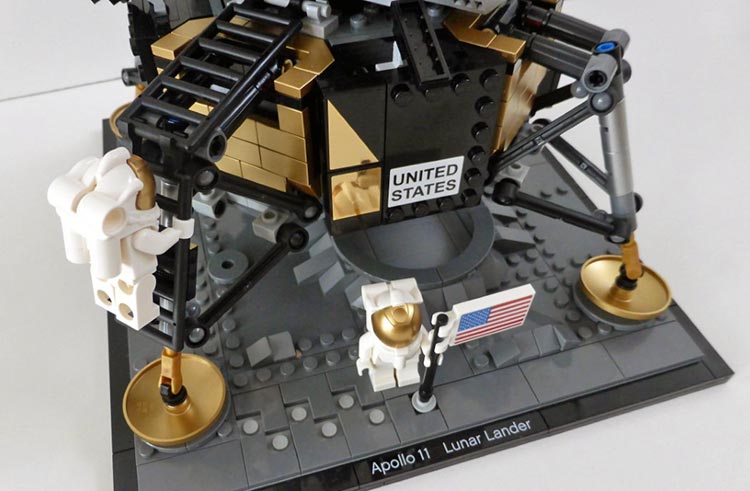
After the success of the Saturn V rocket (21309) which came out through LEGO Ideas, LEGO is adding to its historical series with a collaboration with NASA. Today it presents the Lunar Lander (officially called the Lunar Module) at minifig scale.

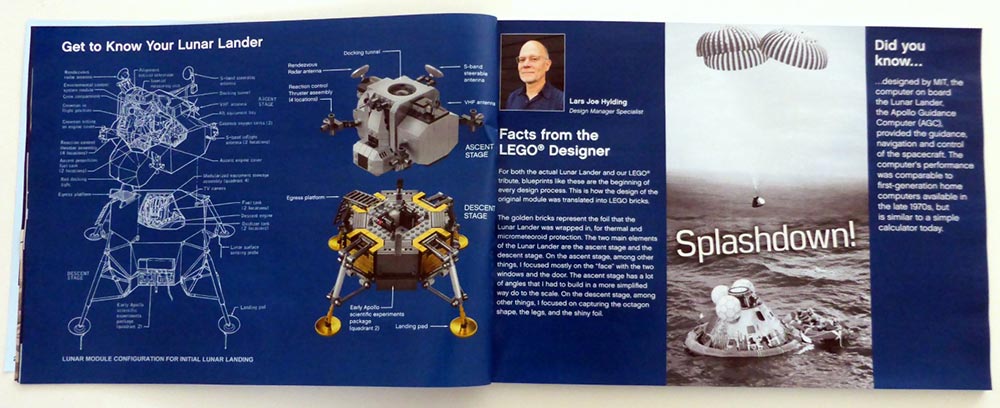
The set officially goes on sale today and it is included in the Creator Expert theme. Although the box fits the way this theme is presented, the set and instructions remind me a lot of LEGO Architecture and of the 21309 NASA Apollo Saturn V set. The first 12 pages of the instruction booklet are contain information and pictures of the origin of the set. This includes mainly historical information and some breathtaking images of the Lunar Module and the Apollo missions. There is also half a page about the set designer, Lars Joe Hylding. Additionally, all through the instructions booklet there are small texts explaining some of the elements you build.
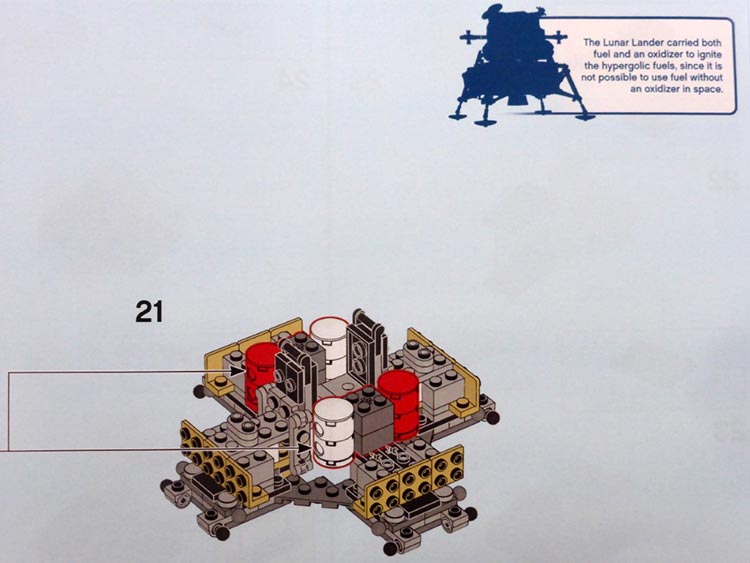
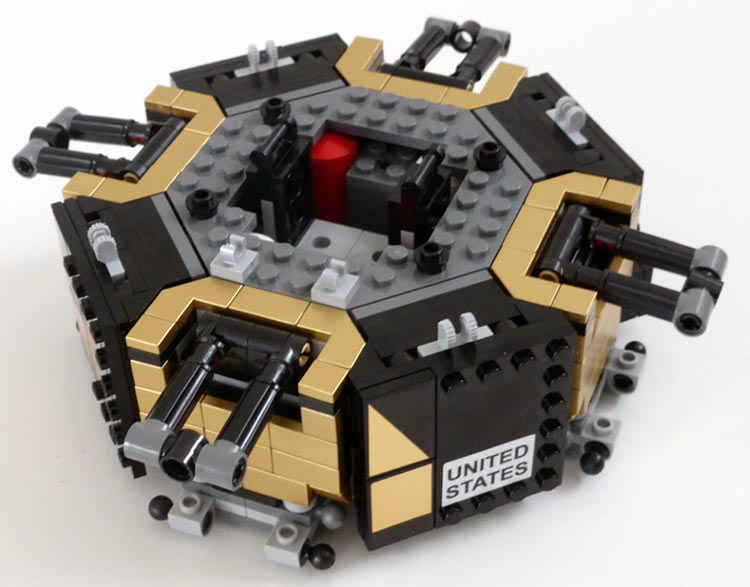
The set is full of details wherever possible. A good example is the inclusion of fuel and oxidizer tanks in the descent module:
But let’s not get ahead of ourselves…
The set is divided into three stages:
1 - a base that simulates a lunar landscape (bags numbered 1)
2 - the Descent stage (bags numbered 2 and 3)
3 - the Ascent stage (bags numbered 4)
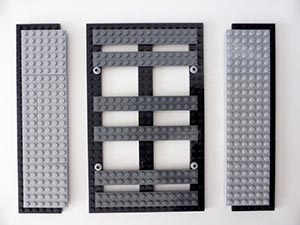
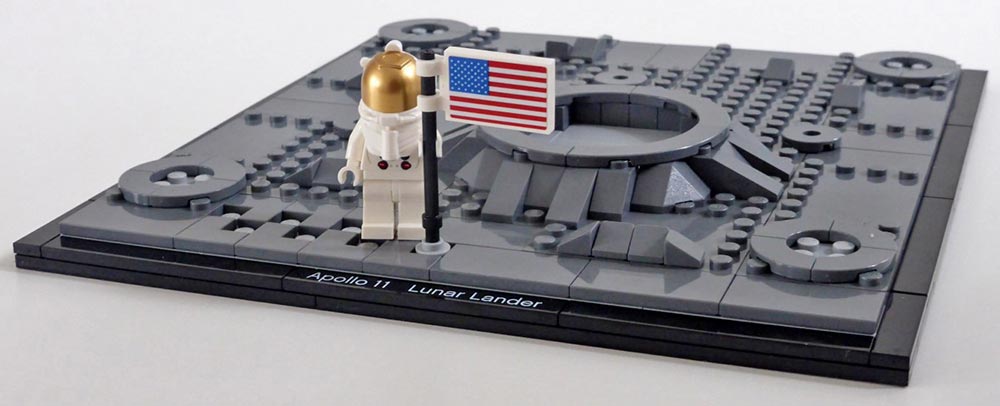
The way the moon landscape is built once again reminds me powerfully of LEGO Architecture sets. It is based on long thin plates that make up the skeleton of the base and are subsequently covered with plates and a rim of tiles including a tile with the name of the set. The landscape contains some craters and other elements.
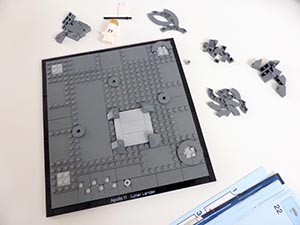
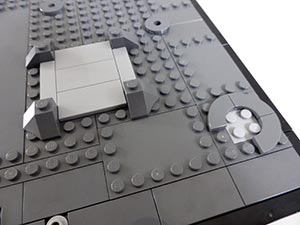
Despite the fact that LEGO lends itself especially to square building, the landscape is reasonably organic (if that can be said of the moon). The 4 small craters are for the legs of the Lunar Module and the larger crater makes it look more authentic and less monotonous.
Time to start building the next phase: the Descent stage.
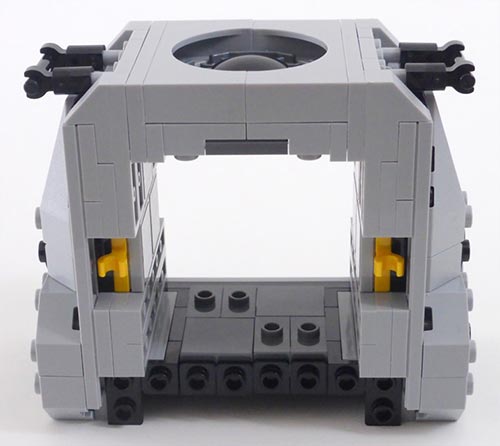
This stage takes up most of the parts and consequently it is divided into two sets of numbered bags. We start off with an 8-sided module and there are some interesting building techniques:
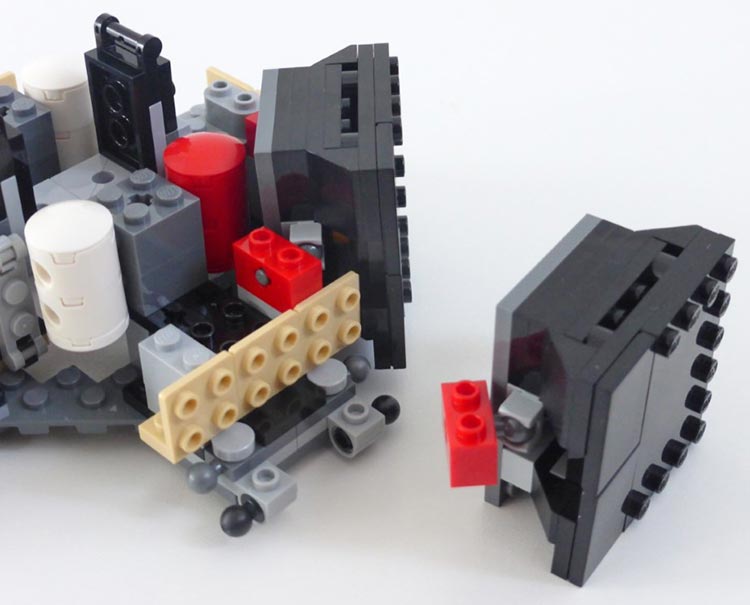
A first technique is related oto bracing using plates with clips and bars to make the model more robust. This way the connection is much stronger than if the bricks were simply stacked.
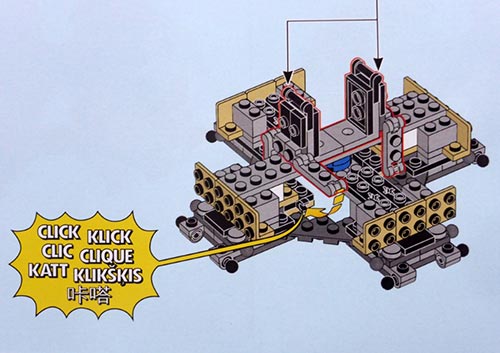
The base only has 4 sides and we need 8. In addition, those 4 sides need to have studs facing outwards. This where another interesting technique is used:
Two of the additional sides are identical. The other two have compartments for additional instruments: a reflector that was used to more accurately measure the distance between the Earth and the Moon and what looks like a recording device.
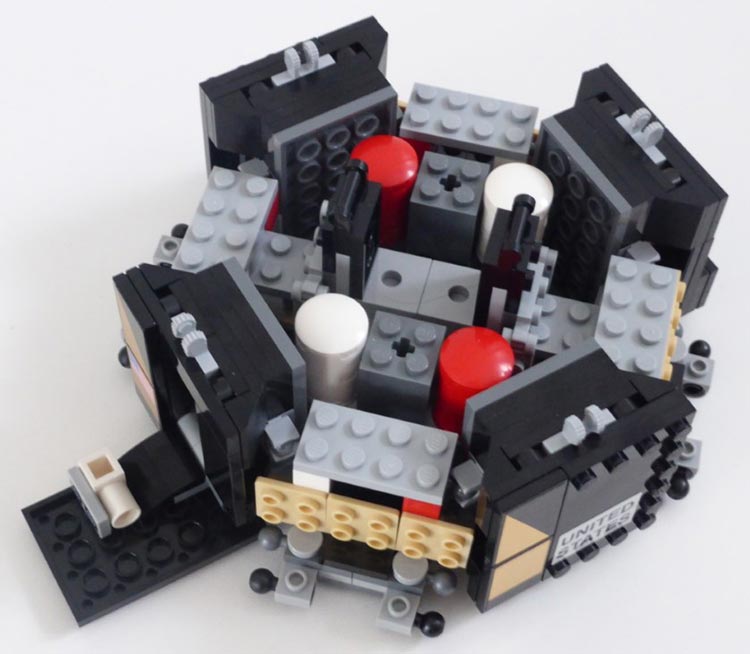
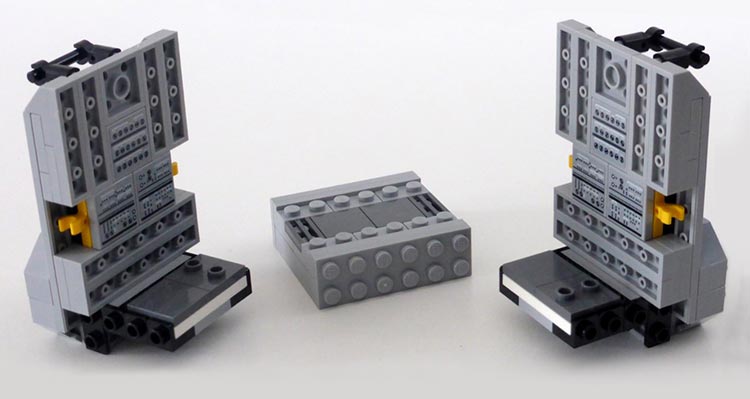
The second part of the build consists of covering the Descent stage in reflective elements which were originally designed as thermal protection and to ward off microasteroids. This part contains a curious selection of elements:


Except for the Technic Axle (used in the thruster) the rest of the Technic elements are used to build the legs for the lander. First all the gold coloured elements are used and the base of the legs is attached.
AThen it is time to build the legs themselves. The gold coloured disks are placed upside down and are a great way to adapt to irregular terrain. They don’t do well on a flat surface (e.g. a table) but fit perfectly in the small craters in the moon landscape we have built earlier.
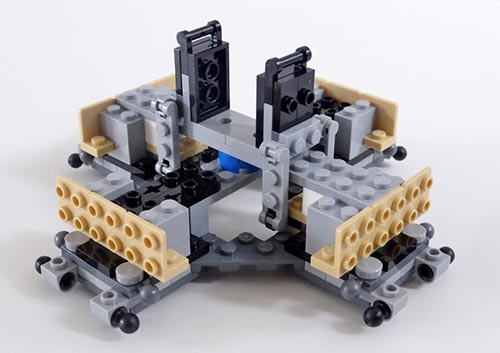
We arrive at the last part of the construction: the Ascent stage, which carried the astronauts.
This part is divided into three and several interesting building techniques are used. The first one is used in the central body. You build the roof which contains a hatchet that allows the astronauts to get in (and back out) while in orbit. This element consists of two arches that are placed in opposite directions and there are studs facing sideways to connect it to the sides of the module.
The black studs facing outwards at the bottom are covered with a plate and tiles, creating a robust central body.

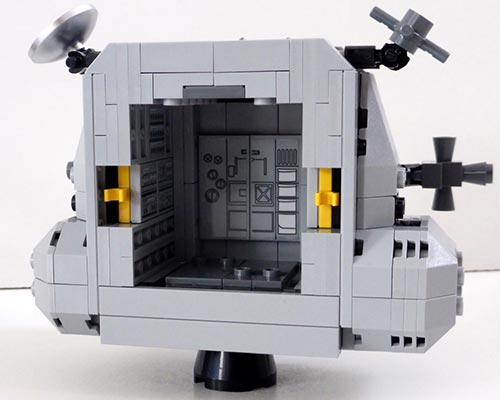
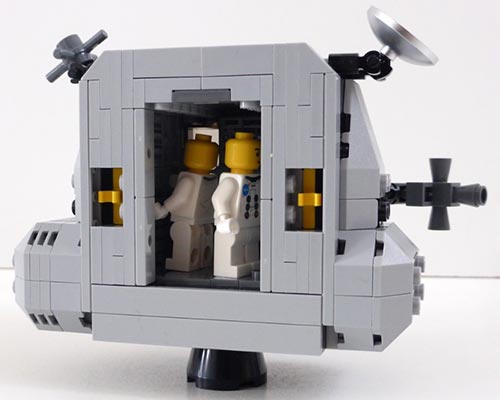
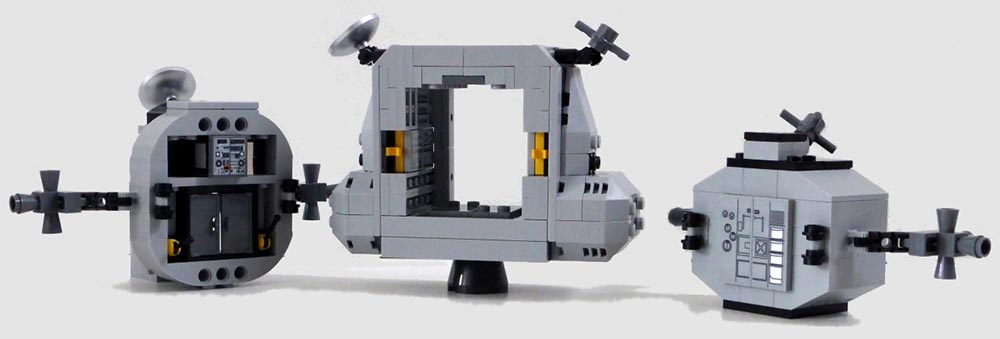
The other two parts (front and back) are connected using another interesting technique using clips (yellow) and bricks with bars. The round plates on either side of the bars serve to make sure the module is correctly centered. The advantage of this configuration is that this makes it easy to see the inside of the Ascent stage so you can 1) see the control panels and 2) place the astronauts inside. The Ascent stage consists of a pilot station (in the front) a luggage compartment (in the back) control stations in the centre. The module didn’t contain any seats so neither does the LEGO version.

Finally we need to take a look at the two astronauts in this set.
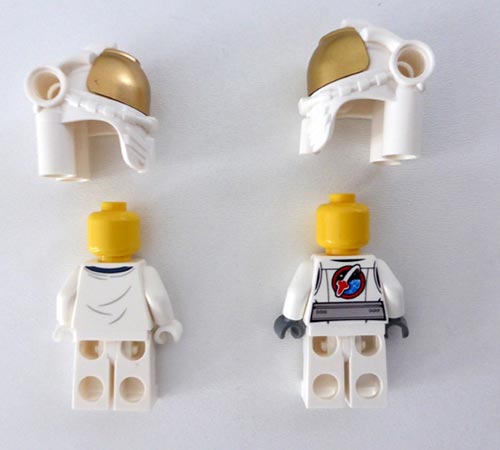
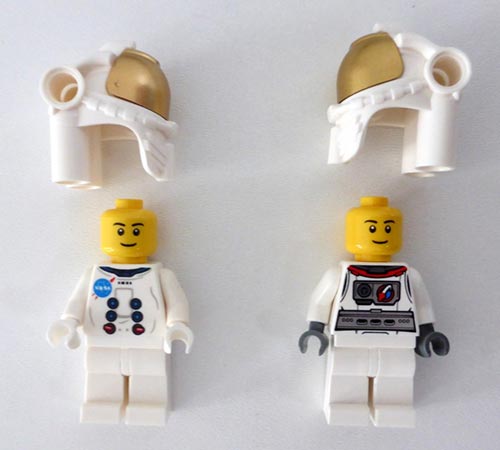
Compared to the astronaut from the 30315 Space Utility Vehicle (2015) the printing has changed completely. While the earlier set fit in nicely with other LEGO City sets, this time the uniforms carry the NASA logo and look very much like the ones used by the astronauts in the Apollo missions.
Conclusions
This set has been carefully crafted to look a lot like a LEGO Architecture set and it is obviously a showpiece rather than a play set (even though it is still possible to play with it). Just as with the NASA Apollo Saturn V, the set is perfect as a show piece for a science class, either in a school or elsewhere. The fact that you can see all the little details in both stages make it a set that is not just fun to build but also interesting to see and explain.
We would like to thank LEGO for providing us with an early review copy of this set. The opinions in this blog are not endorsed or approved by LEGO.
7466


