Set Review ➟ 31142 LEGO® Creator 3-in-1 Space Roller Coaster: Roller Coaster
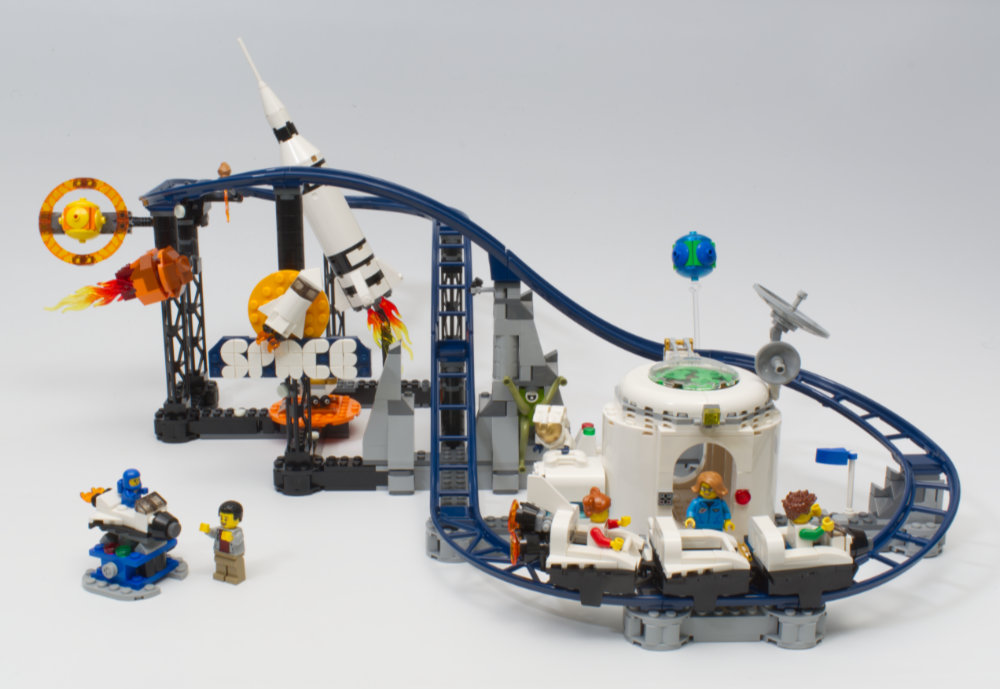
2023 brings us another Creator 3-in-1 fairground themed set. This time it is a rollercoaster/drop tower/carousel with an outer space motif. This review focuses on the Roller Coaster build.
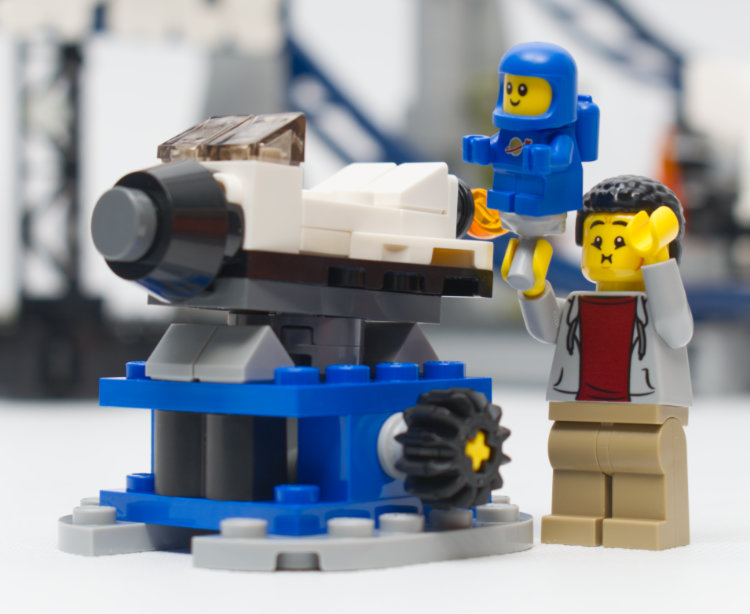
The first part of the roller coaster build starts with a kids’s coin-drop ride. The vehicle for the ride looks like a space shuttle and is essentially a barely smaller sibling to the spaceship ride found in the Creator 31105 Townhouse Toy Store. The ship rocks back and forth when the gear is spun.
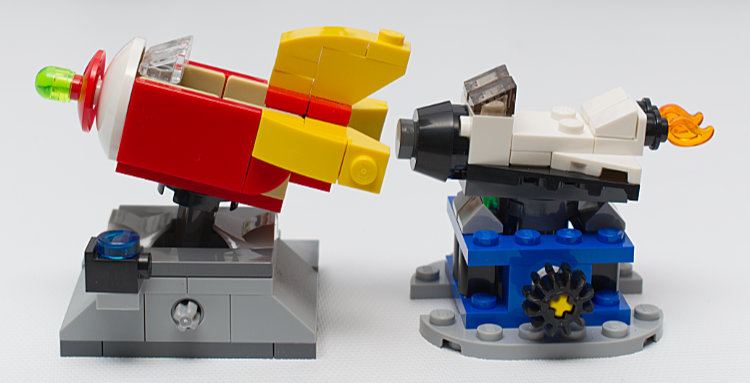
Left: 31105 version. Right 31142 version.
What I found perplexing about this build was the instructions and cover art show the space baby sitting centered behind the shuttle’s windscreen.
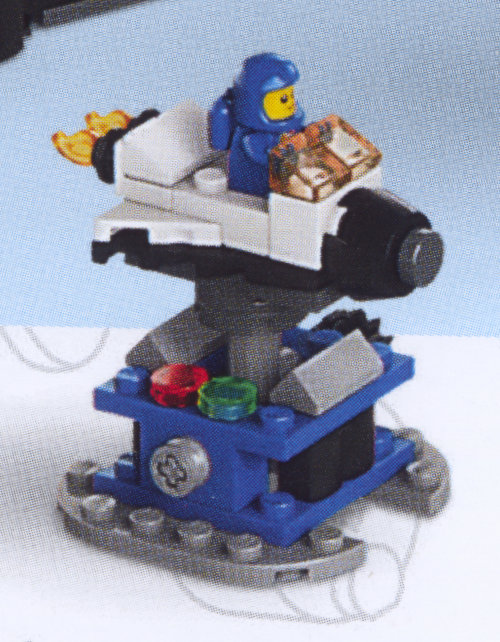
Spacebaby on the cover
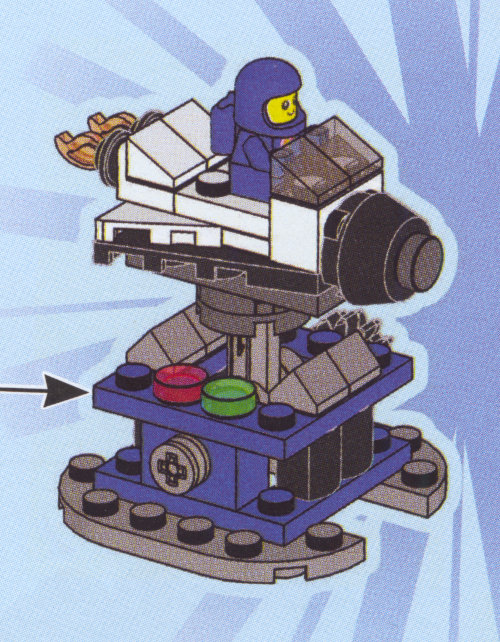
Spacebaby in the instructions
Why perplexing? Reason 1: the piece used for the seat area is a 33909 2x2 plate with two studs, so there is no centered stud for space baby’s bottom to clutch. Reason 2: Even if centered as shown in instructions, space baby will not stay put because of aforementioned lack of clutch, but space baby isn’t in system. Space baby’s hands protrude forward enough that baby ends up sitting on an angle. So…spacebaby gets thrown ass over teakettle from the ride if one spins the gear. This is provided you could get baby centered and balanced in the first place.
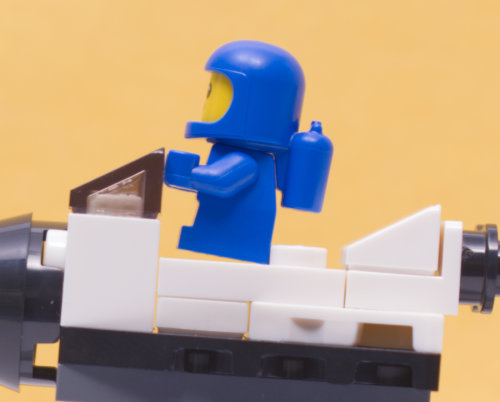
Spacebaby’s precarious seating position.
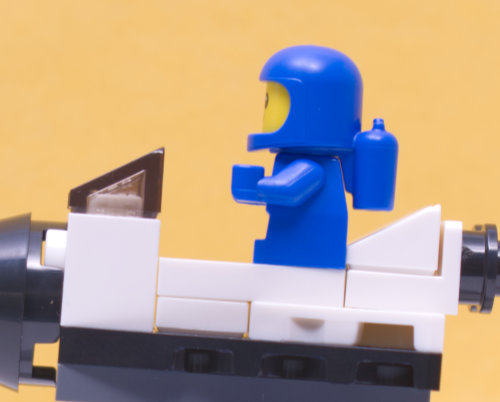
Spacebaby is safer seated on a stud.
Then, of course, in practice space baby would be placed on a ride the minifigure equivalent of about two meters above the ground…so is this irresponsible ride design or an irresponsible parent putting a baby on an irresponsibly designed ride?
Rollercoaster
The rollercoaster is an multi-level figure 8 whose base is 60x60 studs or 40cm/16in square. The track and some of the decorative add-ons extend the width by another 11 or 12 studs horizontally. LEGO gives the dimensions as 27cm/10.6in x 55cm/21.7in which is measured with the set positioned at a 45° angle. LEGO must be measuring by the footprint. I put the ruler to the set and came closer to 30cm/11.8in x 66cm/26in when counting the protruding track and decorations.
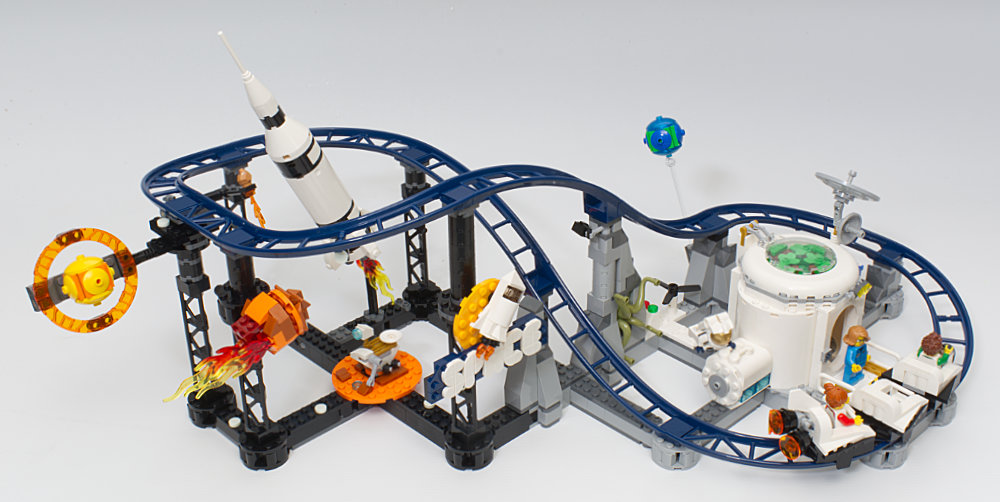
The cars have to be manually pushed to the top of the track at which point gravity takes over and the cars race downhill and slightly past the boarding platform then back up to just in front of the platform. The cars can be separated and used individually if so desired. Some other combinations of two cars are possible, but because of the engines on the last car and the nose on the front car, cars can’t be attached to the back of the last car nor the front of the first car without some design modification. The cars will fit one figure if it is seated wearing a space helmet and tanks, two figures will fit provided both figures are standing, and three figures will fit if one figure is Irresponsible Dad.
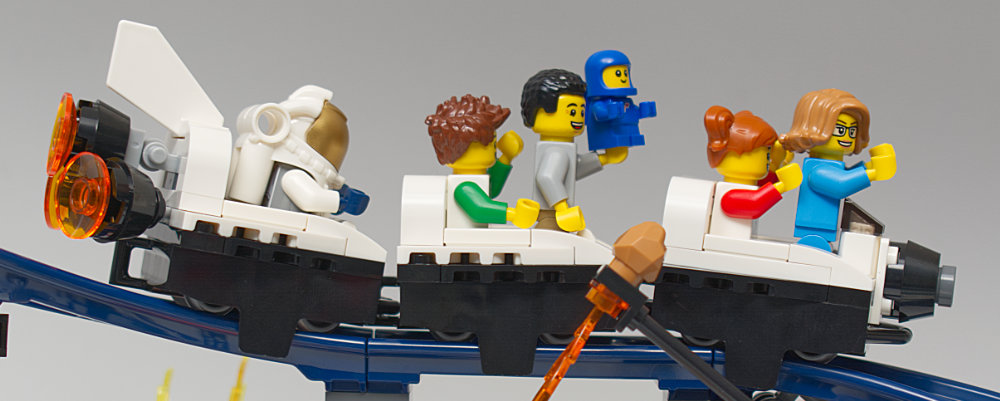
Many decorative elements add visual interest to the set. They are reasonably large and qualify as mini-builds unto themselves.
Ringed Planet
Working left to right across the set, the first element we encounter is a ringed planet. This gets attached to one of the track’s support columns with a technic hinged locking arm providing 360 degrees of rotation and 180 degrees of pivot…and therefore can be positioned as your imagination sees fit.
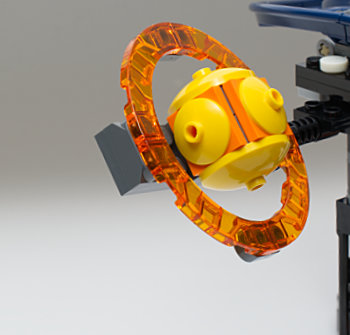
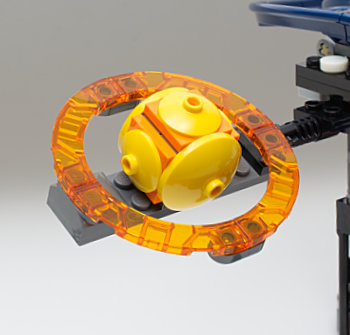
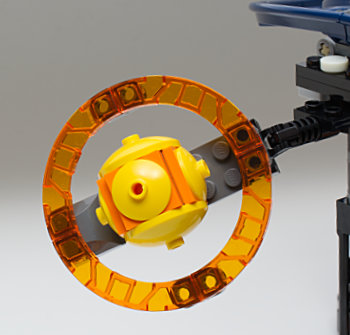
Large Meteor
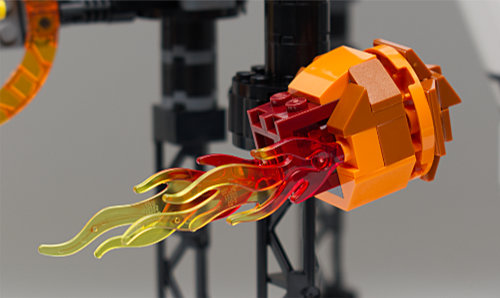
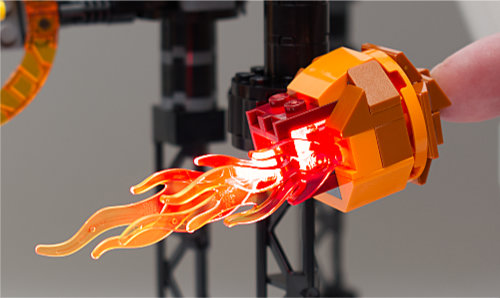
In front of the ringed planet is a large flaming meteor. It is attached to the support with a technic friction pin so it can be rotated around that point. You can’t get a full 360° as the flames will hit the track. Pressing the front makes the tail light up.
Small Meteor
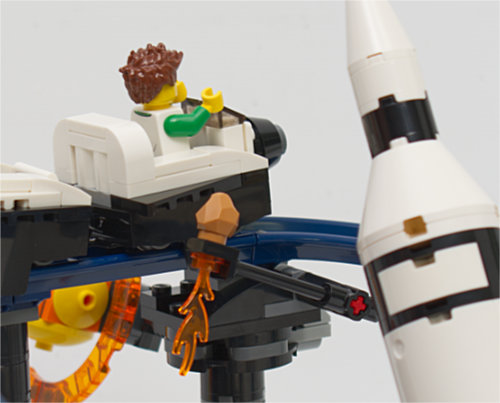
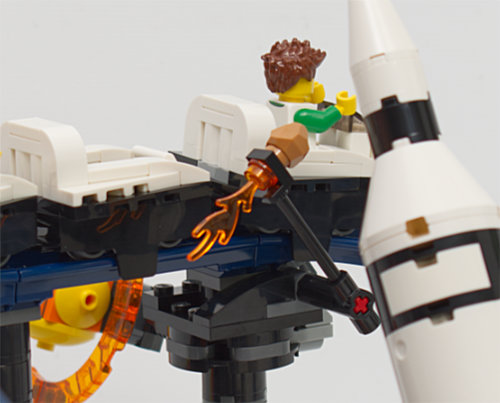
Opposite the ringed planet is a small meteor. It is attached to a lever mechanism and when the roller coaster cars pass over the switch is hit and the meteor moves back and forth.
Rover
Centered at the bottom of the back half of the roller coaster loop is a small planetary rover. It is mounted on a turntable and can turn a full 360°. See the note about the rover arm in the administrivia section.
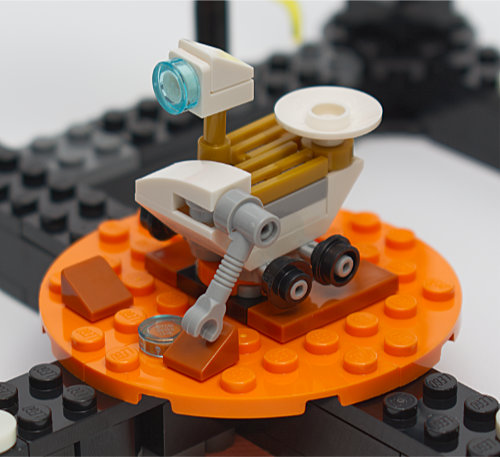
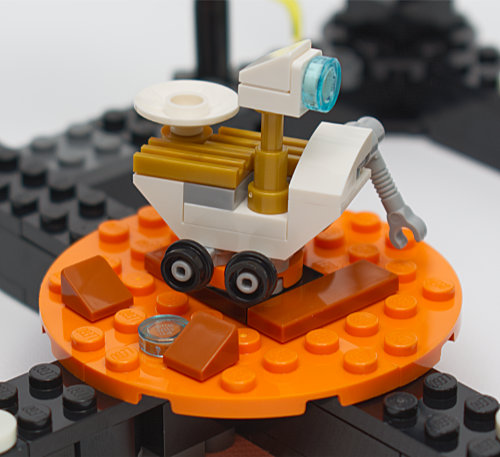
Rocket, Shuttle, Alien, and more
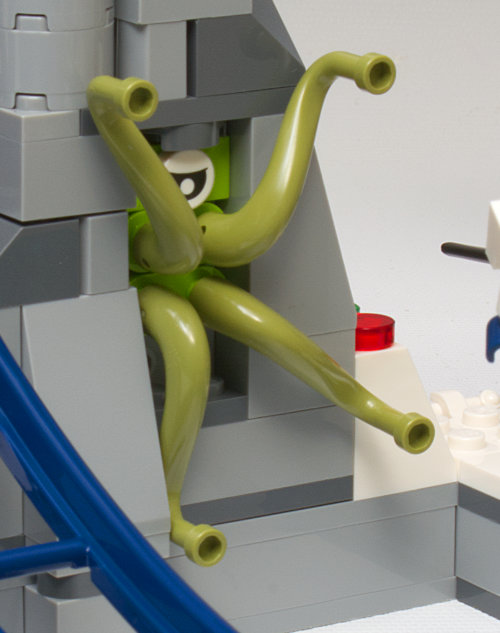
Purely decorative elements are the space shuttle sign, rocket, and alien.
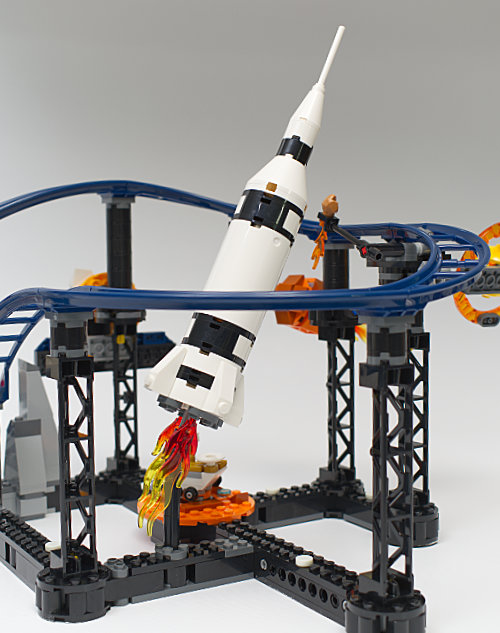
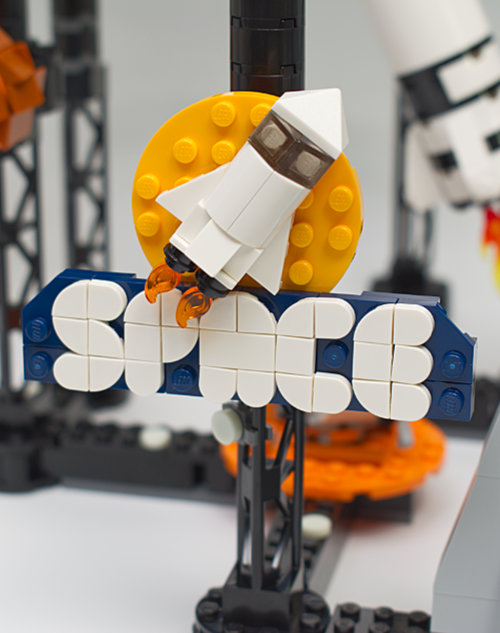
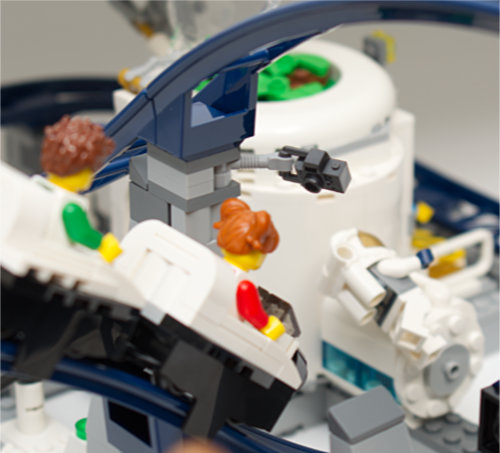
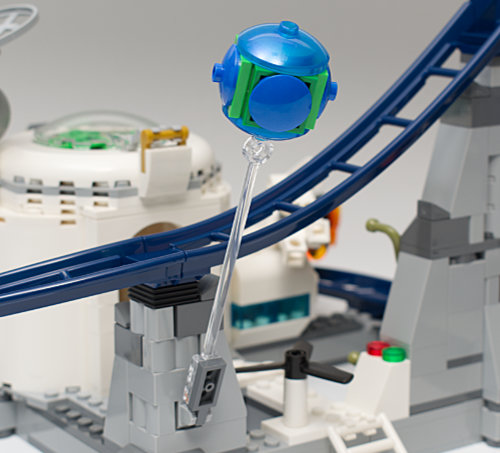
Nearly purely decorative elements are the camera, the blue planet, and the astronaut. The camera is mounted on a center track support and is used to capture the expressions of fear, joy, excitement, and nausea as the cars go down a steep incline. The position of the camera is somewhat variable due to its connection on a robot arm. Note that if the arm is swung too far around that the camera may be hit by the tail of the shuttle as it passes. The blue planet is attached to a clear rod which is hinged to one of the track supports. The hinge appears to be simply a convenient connector in this instance as opposed to being useful as a hinge.
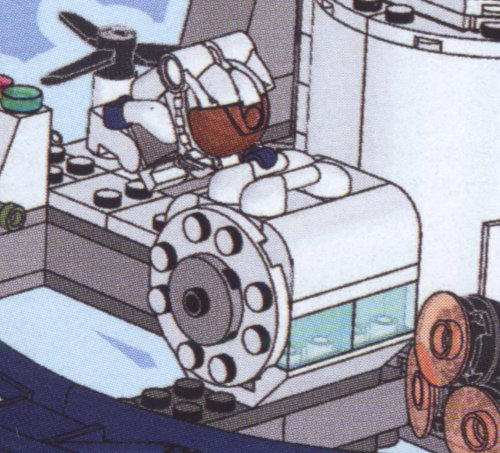
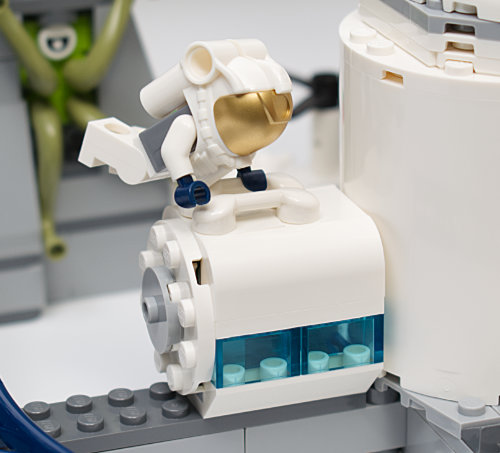
The astronaut is interesting as she shows up on the box cover, instructions cover, and last page of the instructions weightlessly grabbing a bar connected to the spaceport…but she is not implicitly placed there during the assembly sequence. Granted none of the other minifigures are implicitly placed anywhere during the assembly sequence, but astronaut either has some supernatural upper body strength or she is used more as an elective decorative element in this interpretation than as a character.
Ride Entry
It was clever to use an airplane propeller as a turnstile. It was a case of malicious compliance to mount it at minifigure throat level. Also the orientation of a slope as a stop/go indicator prevents a minifigure from actually being able to stand in the gateway. Reversing the slope allows for clearance of a minifigure’s arm and a figure will fit in the space. It does not alleviate the threat of imminent decapitation, however.
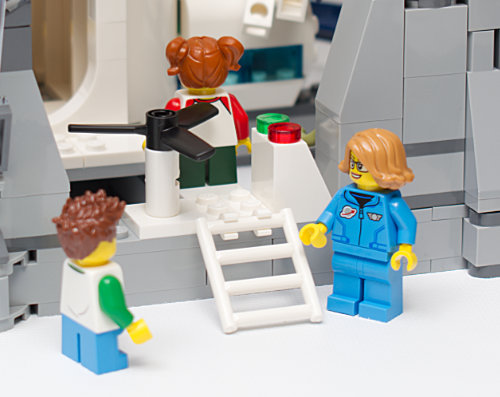
The orientation of the slope prevents a minifigure from being able to fit between the turnstile and the slope.
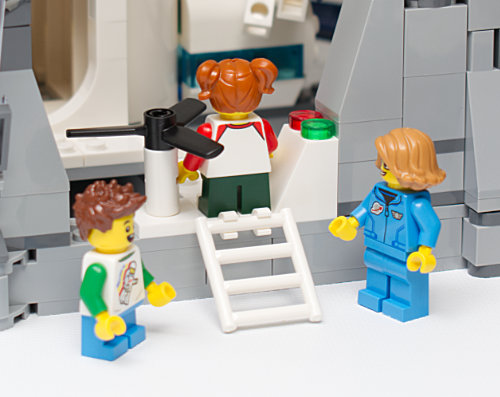
Rotating the slope 180 degrees solves the problem.
Spaceport
Provided the passengers kept their heads going through the turnstile, they pass through the spaceport and onto the boarding platform where they can get into the cars and begin their ride.
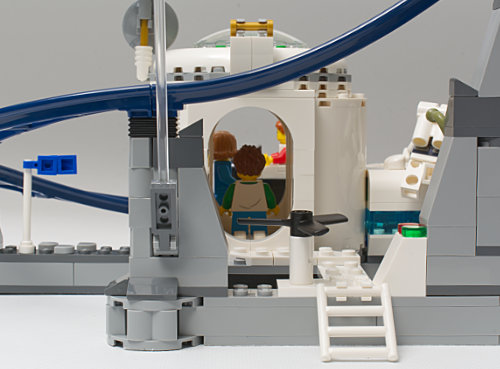
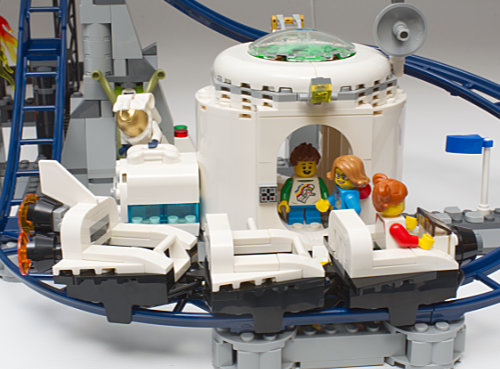
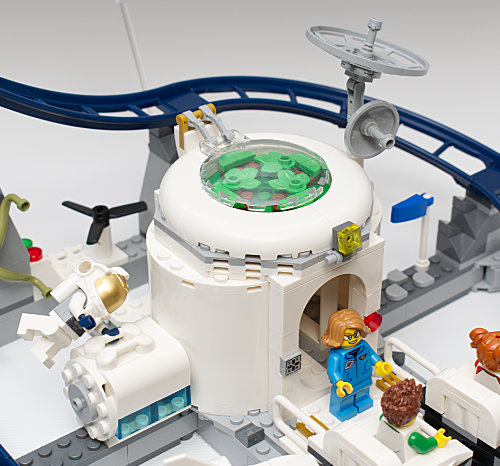
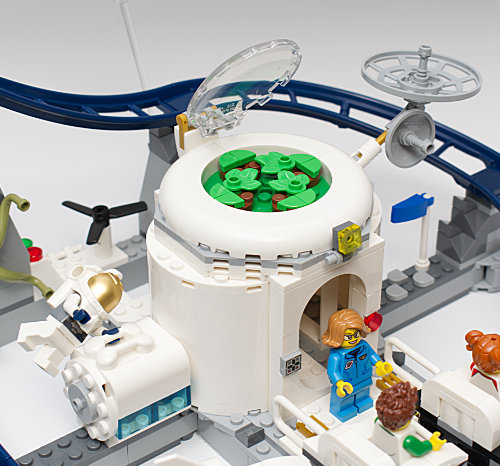
Other features of the spaceport are opening dome over the solar garden and repositionable antenna.
Some curious bits
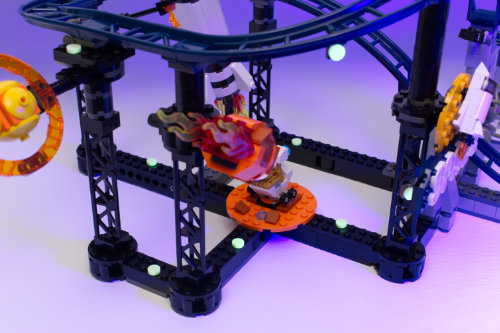
The back half of the track area is peppered with glow-in-the-dark DOTS which one may consider to be stars as part of the space theme. But as there are no other parts of the set which fluoresce…save the barely sort-of-glowing of some of the transparent parts…one wonders why bother. The set would absolutely be magical if some great portion of it did shine under blacklight, fitting in so well with the space theme, but achieving that would probably require next-level inventory management.
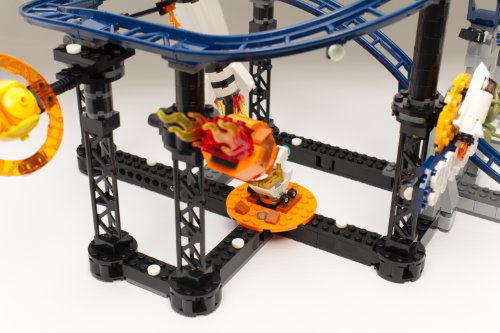
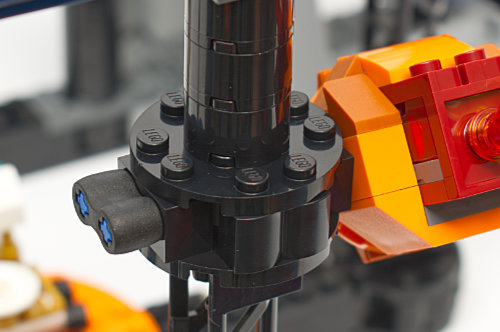
I don’t have any idea why the rubber double axle connector is attached (apparently arbitrarily) to the top of this track support, but maybe it gets used for something appropriate in one of the other builds.
Minifigures
The set contains six minifigures with no exclusive parts. The parts will have alternate distribution in subsequent builds to create different characters as is typical in the Creator 3-in-1 sets.

The Randolph T. Fielding Absolutely Administrivia Section
Girders
Let’s start with a comparison of girder pieces. This set makes use of piece 95347 and it has some remarkable points of differentiation with its predecessor 58827. Starting at the base on the underside we find the 95347 has a less recessed bottom and an axlehole that is in a keyhole shape. The top side of the base exhibits a complex geometry with a sloped section where the 58827 is a simple block.
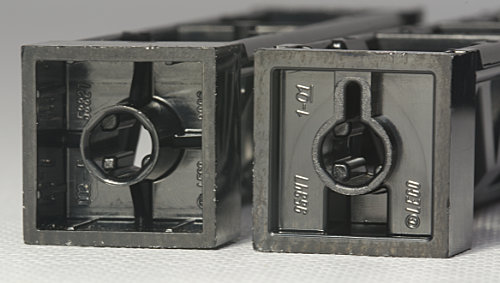
58827 left, 95347 right
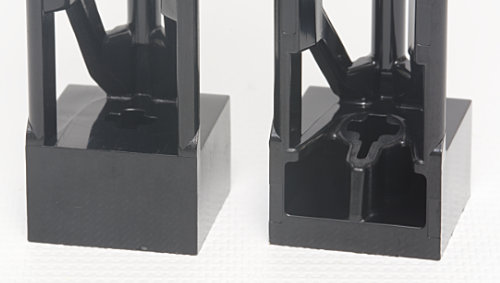
58827 left, 95347 right
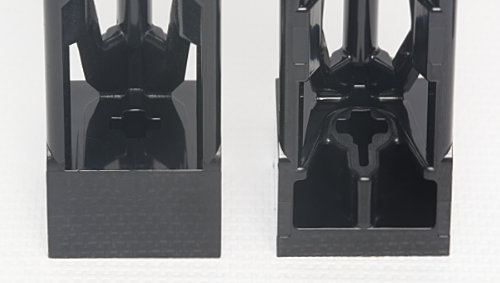
58827 left, 95347 right
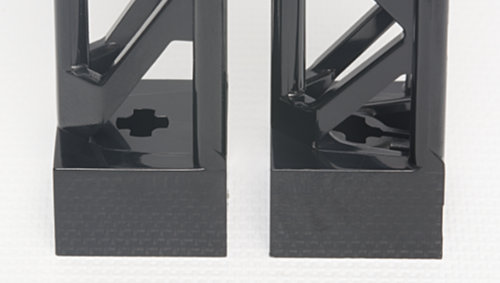
58827 left, 95347 right
95347’s center struts portion is designed in three sections where 58827 has two. The two horizontal plates separating the sections of 95347 are smooth where the one plate in 58827 has a rib running through the middle of it.
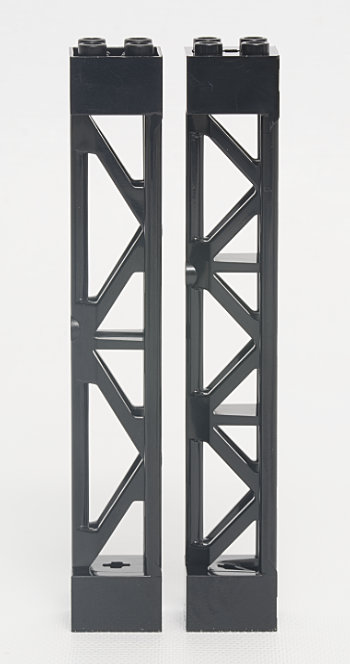
58827 left, 95347 right
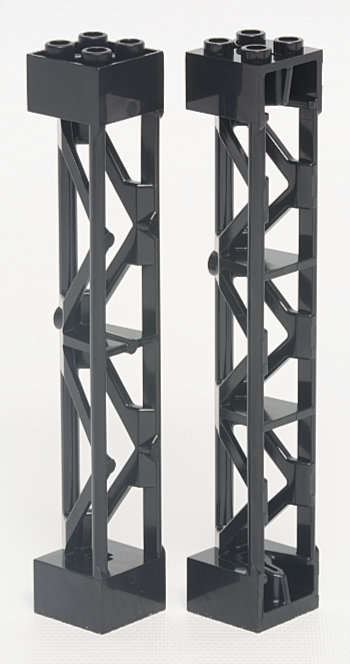
58827 left, 95347 right
The top portion of 58827 is completely recessed and, like its bottom part, has a standard axle hole. 95347 has a flush top with a single front side recess and again a keyhole shaped axle hole. The bottom side of the top essentially reflects the top side of the bottom.
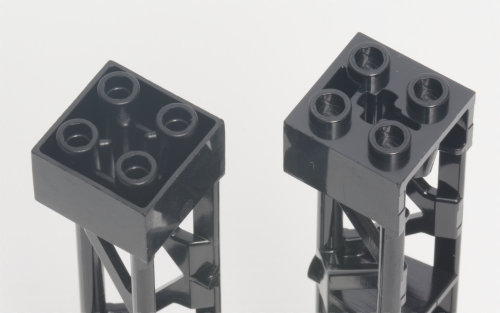
58827 left, 95347 right
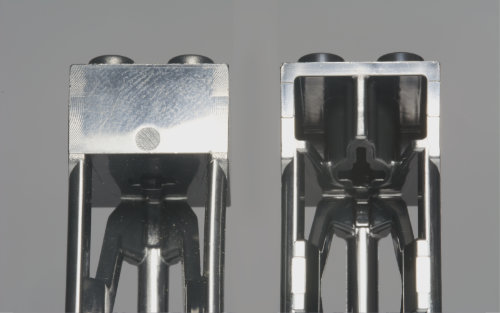
58827 left, 95347 right
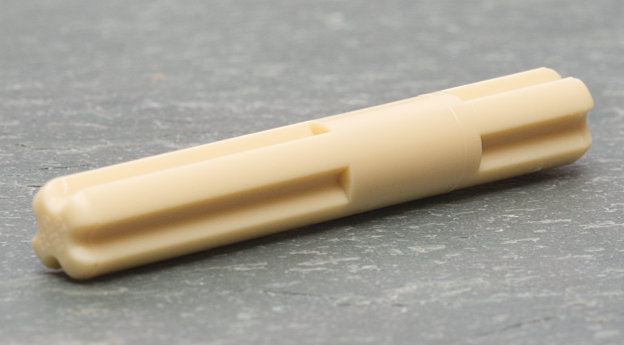
4L axle with center stop
Next up is part 4666999 which has been around for more than ten years but is mostly occurs in large sets and Technic vehicle sets. It does not have a part number on it but does have the lego logo on one end.
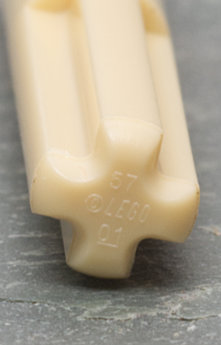
2L notched axle
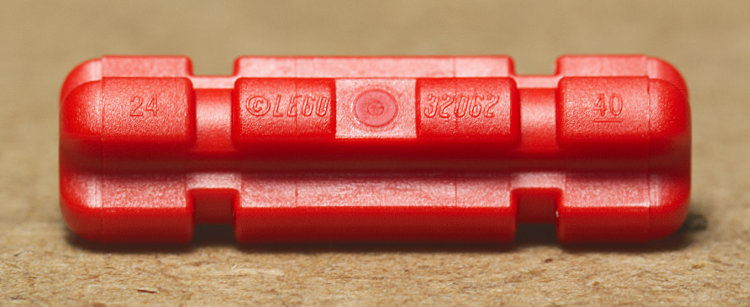
Then we have the 2L notched red axle which does have a part number.
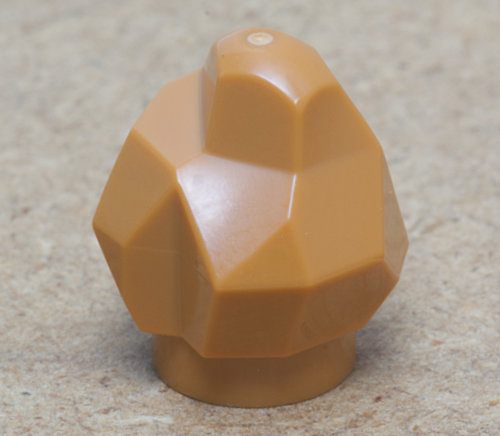
A rock
There is a new rock piece in medium nougat, 35646, used in the roller coaster build for the small meteor.
Light brick
Holy Cow! This set has the brightest LEGO light brick I have ever encountered. Maybe it is just new batteries, but it is definitely brighter than an older light of similar make.
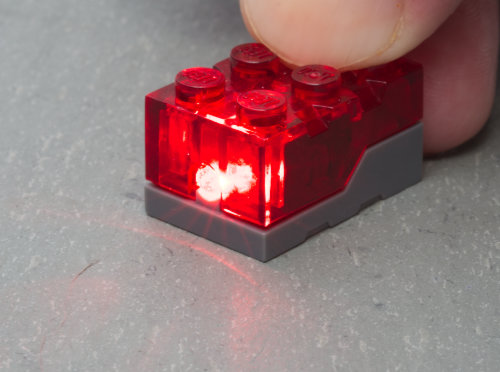
Older light brick.
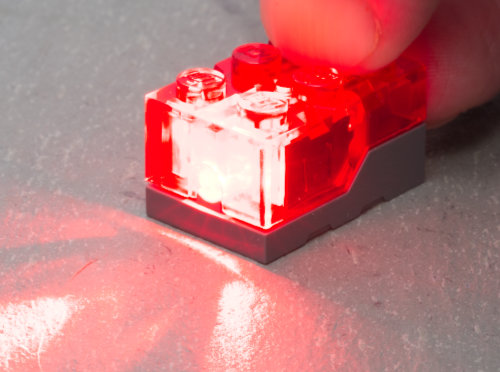
Light brick from set 31142.
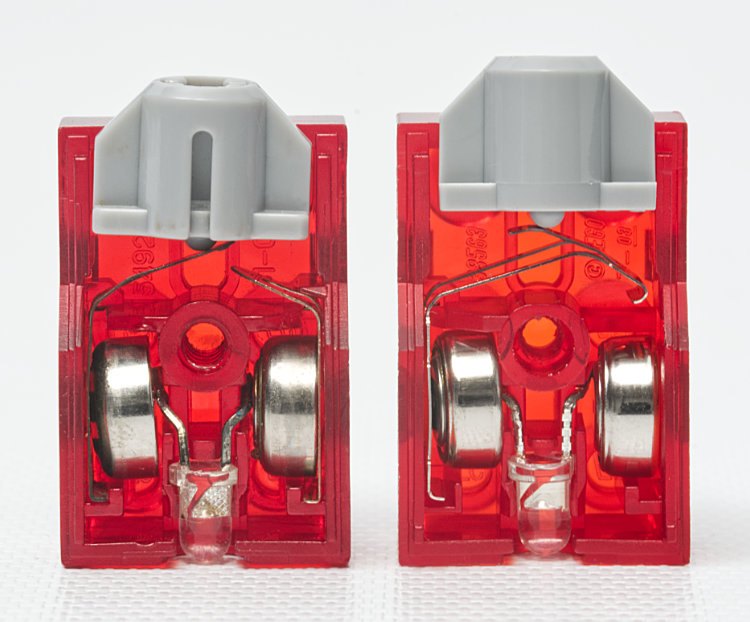
The light itself is red, as well as the housing. And I believe the component parts on this light are all new designs. At least I’m not coming up with them at Brickset or BrickLink as of this writing. While the exteriors have either no discernible or relatively insignificant differences old to new, the interiors are a different story. In the images following, the left side of the photos have the older light parts and the right side of the photos have the parts found in this set.
The first image shows interiors of the assemblies with just the bottom part removed. The gray button has changed in design with the barrel slot missing from the newer part. The contacts are also different with the old design having one contact on either side of the brick with the circuit being completed when the left contact is pushed to touch the right contact. The new design has a single contact on the left that bends over and the circuit is completed when the contact touches the right side battery. The same LR41 button cells are used in both. The lamp is similar looking in both.
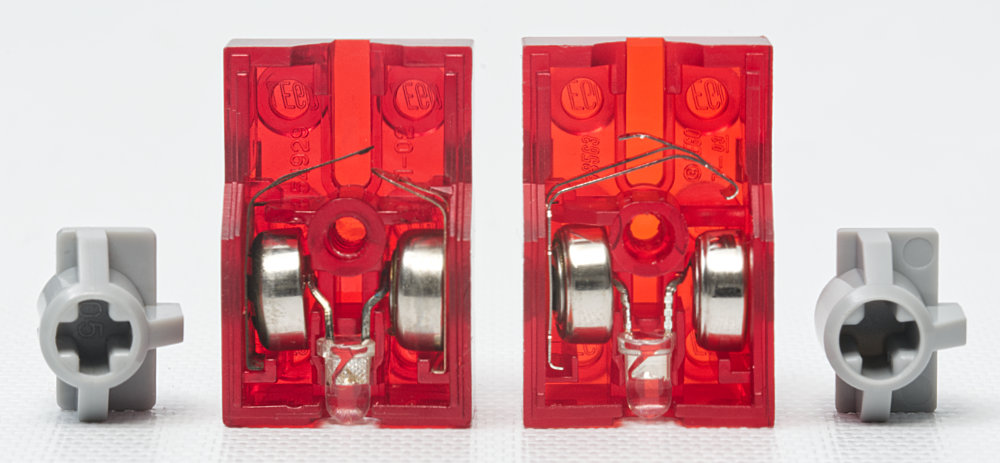
With the gray buttons removed from the assemblies we can see the part number 54929 on the left and 38563 on the left. The older button displays symmetrical prongs in the axle holder while the newer button displays alternating thick and thin prongs. The older button has a mold number at the bottom of the axle cavity.
The gray bottoms have some minor differences. Part number 54930 is shown on left and part number 38566 is shown on right. The older part has a black screw and a vent slot set diagonally below the screw. The newer part has a silver screw with a vent slot horizontal beside the screw. The polarity of the batteries is more clearly noted on the newer part with + and - symbols on the battery diagrams. The older gray button has no markings on the back while the new button has the copyright, year, logo, mold, and part number.
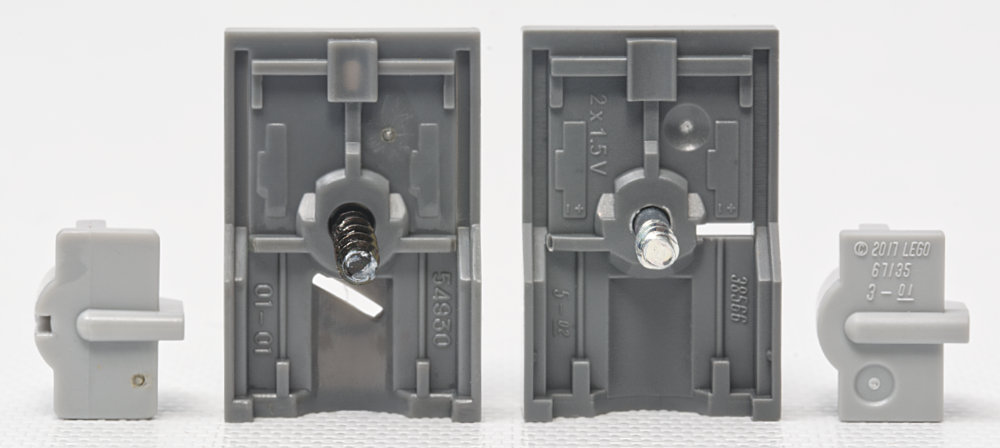
I have the bulb and battery end at the top of the base in this photo because it was easier to stand the parts that way.
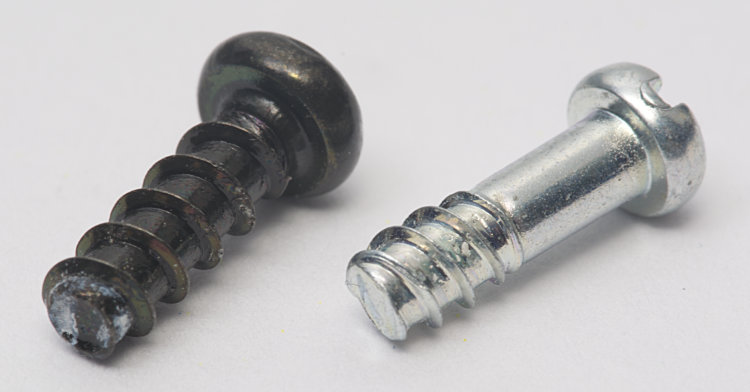
One final note. The screws are significantly different at the thread end, so I wouldn’t recommend swapping one for the other.
Robot arm
I found the robot arm used on the rover to have virtually no clutch power and while it barely stayed on the stud it would not hold position and eventually ended up pointing straight down as gravity dictated. Meh. I thought, “well, I have a bunch of other robot arms, let’s try them.” Unfortunately they all behaved pretty much the same. Then I figured I would solve the problem by sticking a bar through the open stud on the robot arm and that should provide sufficient friction to hold the arm where I placed it. Nope. And to my surprise the robot arm swing freely, very freely, around the bar. Geez Louise. I know I have older robot arms that hold just fine. But these new ones…I don’t know if the manufacturing tolerance is off or these are supposed to be loose on purpose or if I just have a big old bad batch of arms, but I would think these things ought to grip a stud.
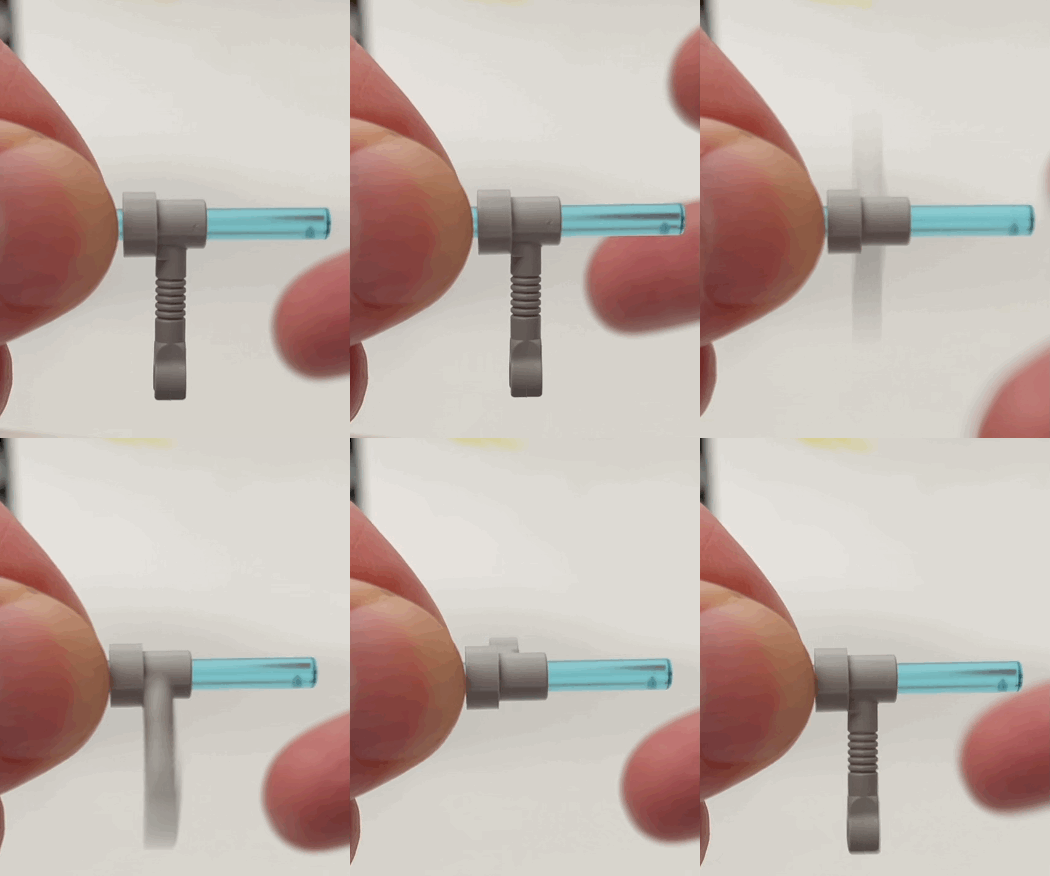
Mmmyeah. I don’t think it’s supposed to do this.
Also apologies for the endless looping gif.
Summary
While I will save a complete set summary for the last review in this series, the roller coaster is full of the decorative whimsy I usually associate with these larger Creator 3-in-1 builds. The roller coaster makes a good companion to set 31119 Creator 3-in-1 ferris wheel.
Disclaimer
Thanks to LEGO for providing the set. No hallucinogens or other outside influences contributed to this review.
33599