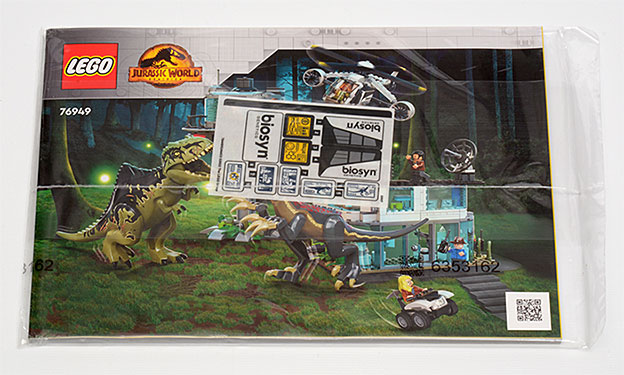
Set Review ➟ LEGO® 76949 Giganotosaurus and Therizinosaurus Attack

Warning: do not confuse Gigantosaurus with Giganotosaurus. Repeat after me Jy-guh-NOH-tuh-SOR-us. Dinosaur names are so confusing that even the folks who name them name them incorrectly and identify their remains incorrectly, and it is one big mess. Now that you are informed, you may be forgiven one time. But, really, we should get to the review of this LEGO set and not get sucked into the dinosaur identification vortex of confusion and doom. This set rated for ages 9+ consists of two big dinosaurs, six minifigures, a quad bike, a helicopter, and two buildings.
There is a thick instruction book polybagged with the stickers. It is always good when the sticker sheet doesn’t come curled or pre-peeled.
Instruction Book
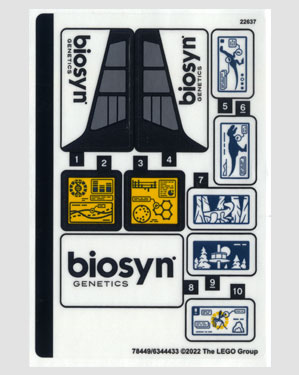
Stickers
Dinosaurs
As in other Jurassic World Dominion sets, the large dinosaur parts in this set are individually polypagged.
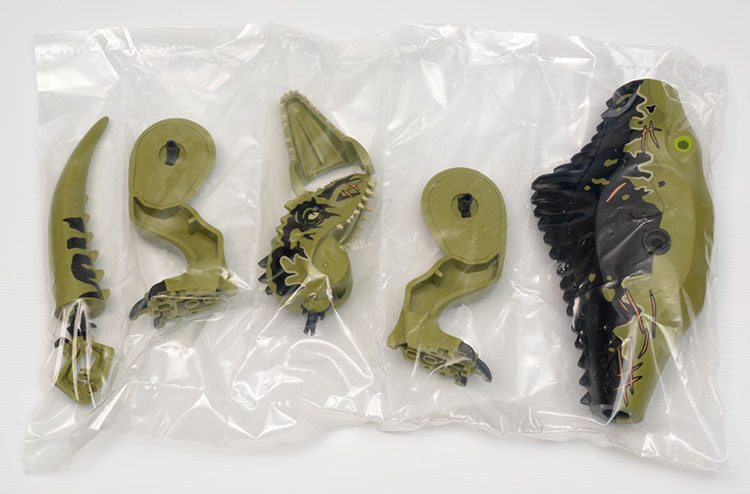
Bagged Giganotosaurus
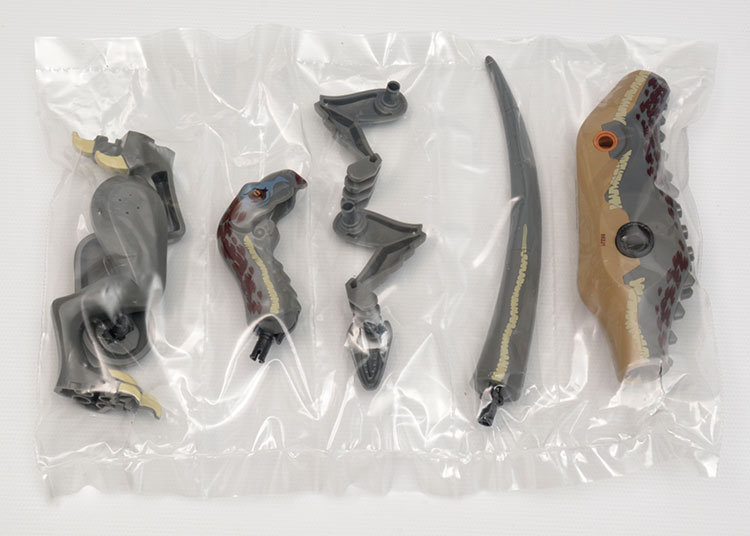
Bagged Therizinosaurus
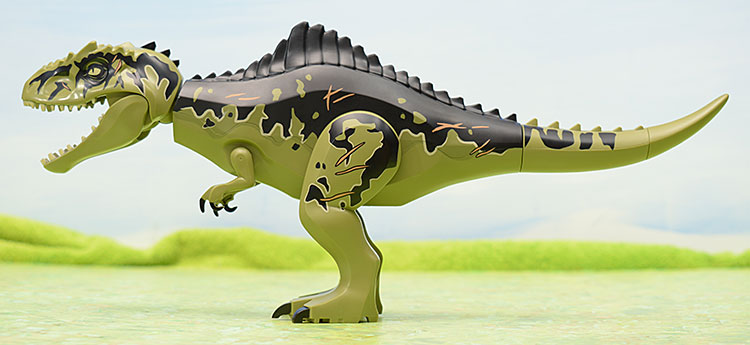
While Giganotosaurus has the advantage in overall size, Therizinosaurus has a distinct advantage in size of arms and front claws. Let’s take a closer look at these two bad girls. All the dinosaurs in Jurassic Park are females, you know.
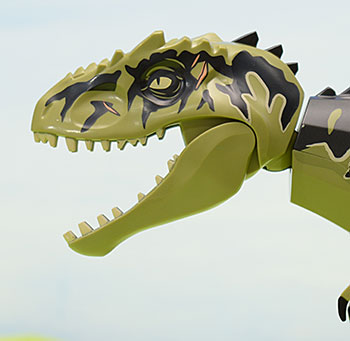
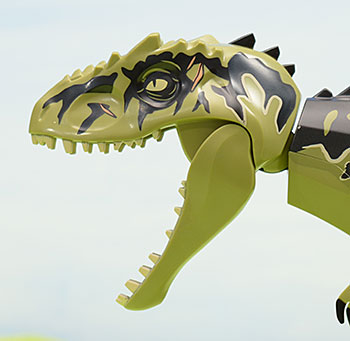
Undoubtedly due to it’s massive head, Giganotosaurus holds the distinction of being the one dinosaur in the LEGO 2022 Jurassic World series whose mouth can be placed in three positions: closed, partially open, and fully open. Therizinosaurus is limited to two: open and closed.
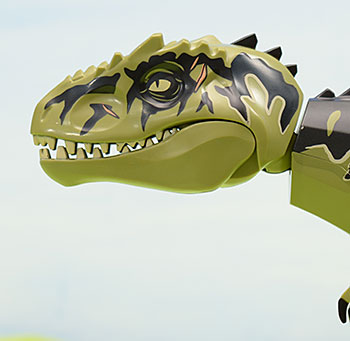
While Giganotosaurus is a new Jurassic World dinosaur, it is comprised of the head and tail pieces from the earlier LEGO Indominus rex, the arms and legs from T. rex, and a new torso. The torso has a black molded top part and an olive green molded bottom part fused together (along with sockets for the tail, legs, head, and arms) and painted to form a single piece. Other parts (minus the ratchet joints and arm sockets) are all olive green, be they single molded parts or multiple molds combined into one part.
Therizinosaurus is similarly composed by including parts of previous LEGO dinosaurs mixed with new. From the baryonyx it borrows the legs, tail, and torso. From the raptor it borrows the jaw. New parts are the head and arms. Similar to giganotosaurus, the therizinosaurus torso is two-colored with dark stone gray on top and dark tan on bottom.

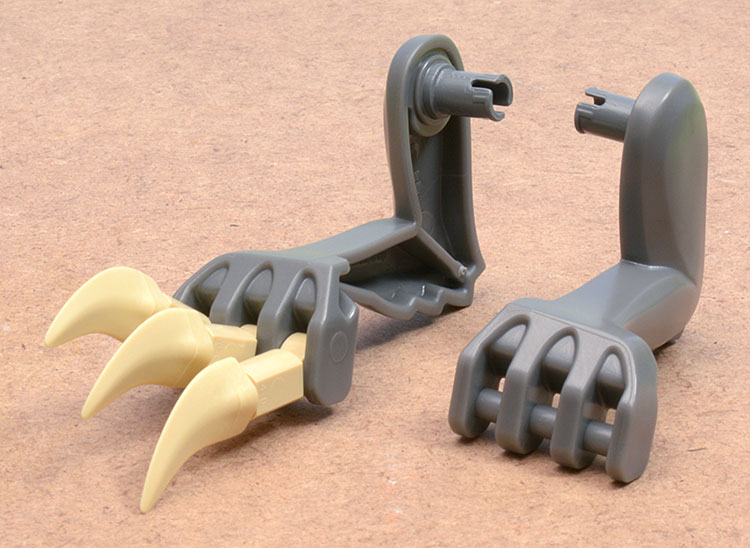
Therizinosaurus has some seriously weird hand design to accommodate the claws.
As with similar large LEGO dinosaurs, posability is somewhat limited. When the legs are not positioned side-by-side, the model will lose balance. Therizinosaurus can take more positions than giganotosaurus because therizinosaurus can use the front limbs for balance. For dramatic poses, the dinosaurs will need a foot attached to a large plate or other substantial studded surface.
Minifigures
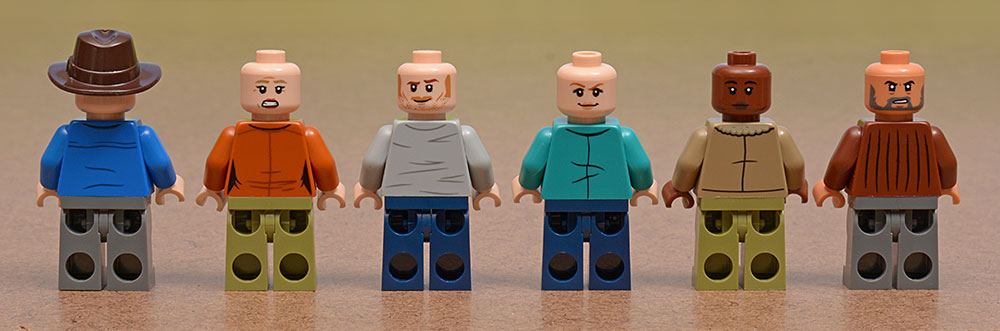
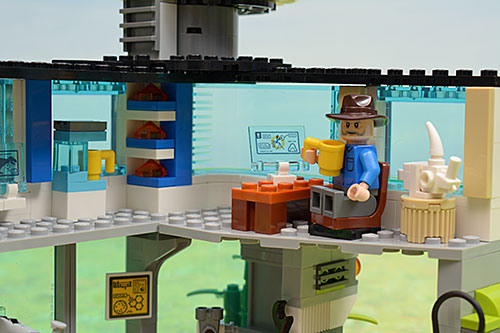
There are six minifigures in the set representing Jurassic World Domination characters Alan Grant, Ellie Satler, Owen Grady, Claire Dearing, Kayla Watts, and Dr. Henry Wu. The Grant and Wu figures appear to be exclusive to this set. All figures have dual-sided torso prints and all heads except Grant have dual faces. The set has no additional or alternate headgear for any figure. Speaking of headgear…in the movie trailer we see Dr. Wu with long hair graying at the temple and clean shaven. Here he has a combover and a full gray beard. Can somebody explain to me LEGO’s recent love for this combover hairpiece and can I put in a formal request for LEGO to change the official name of this piece from MINI WIG NO. 22 to “the Sam Donaldson”?

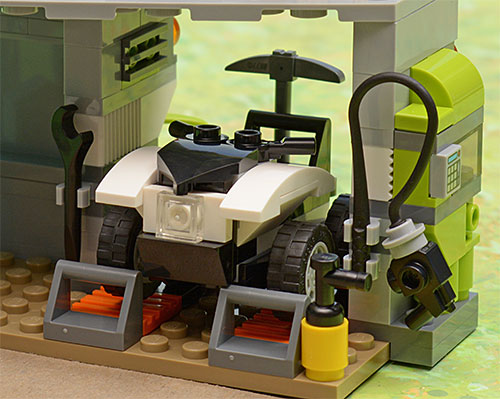
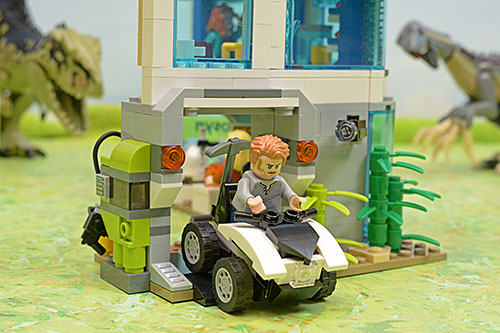
Quad bike
The quad bike in this set is stylistically similar to, but less passenger-capable than, the quad bike in the 76950 Triceratops set. There must’ve been a rookie purchasing agent working for Biosyn when cutting the deal with Quad Bike Fleet sales, otherwise all the bikes would be the same. I digress.
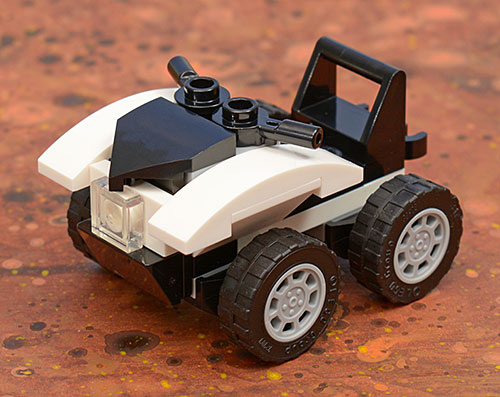
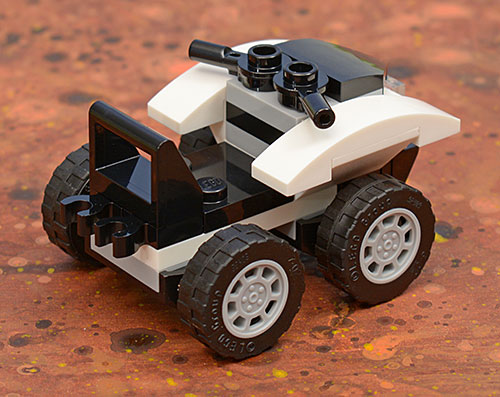
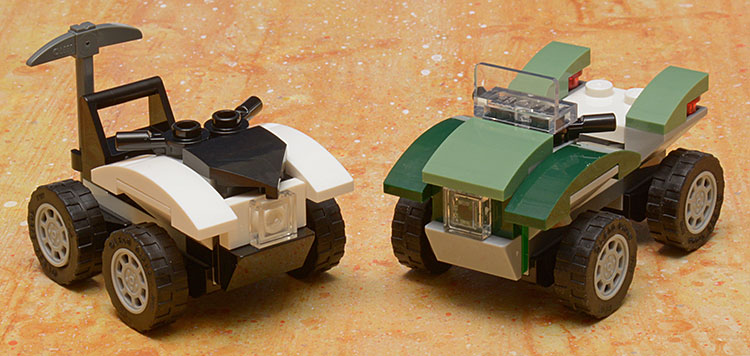
Left: 76949 quadbike. Right: 76950 quadbike.
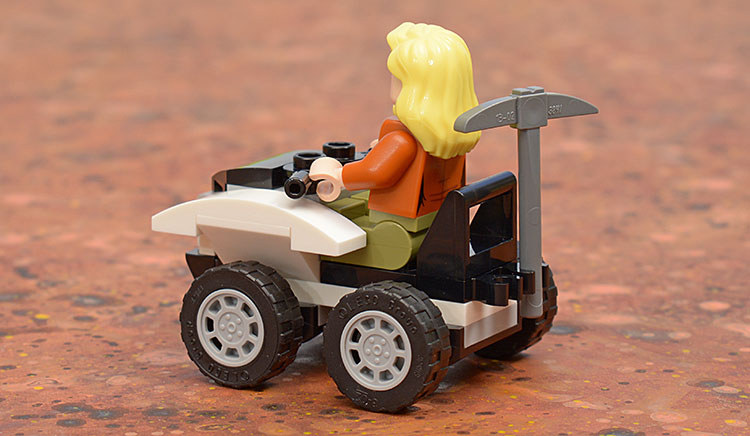
Proper LEGO quadbike etiquette: Attach your pickaxe by the handle with the heavy business end up as this will prevent interference with the wheels. Be sure the head of the pickaxe is directly behind the driver’s head. The driver should not wear a protective helmet when driving.
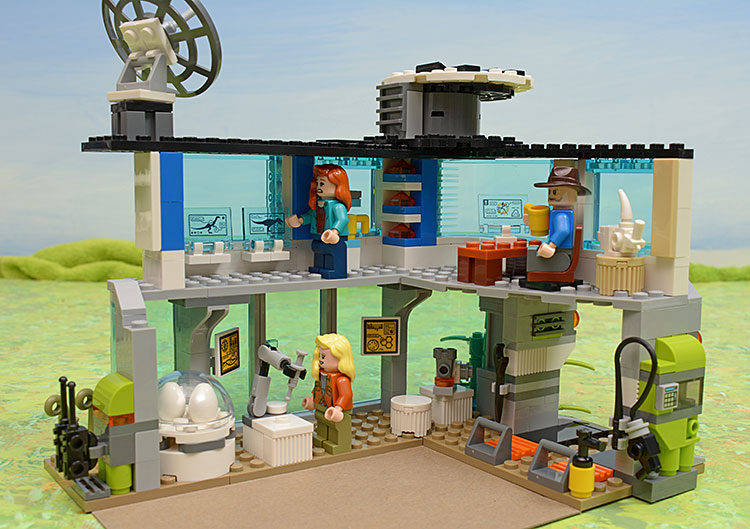
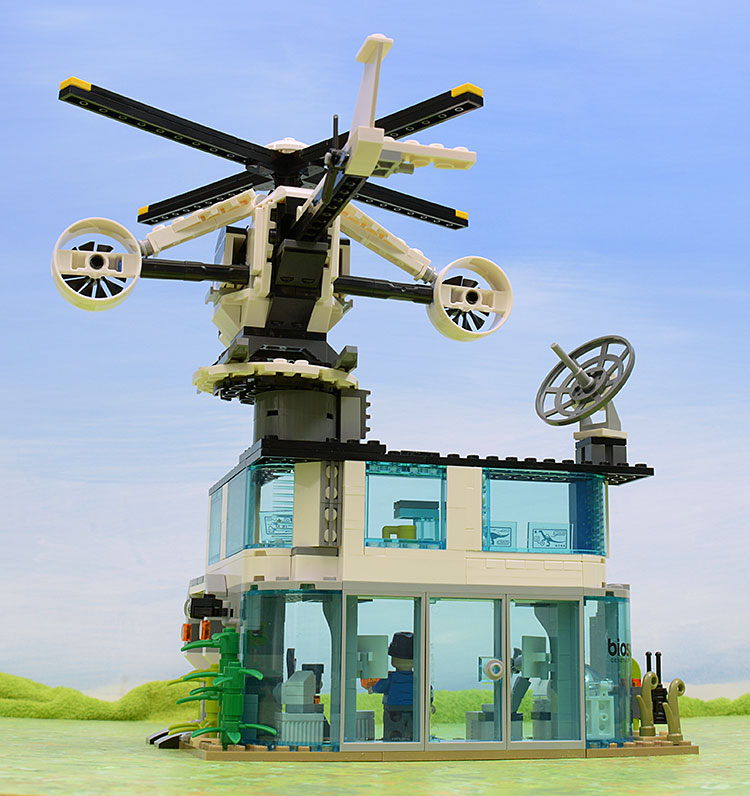
Buildings
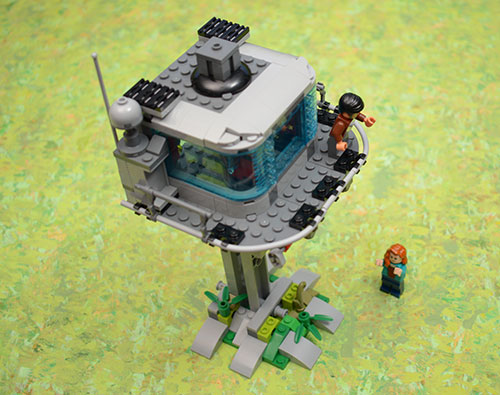
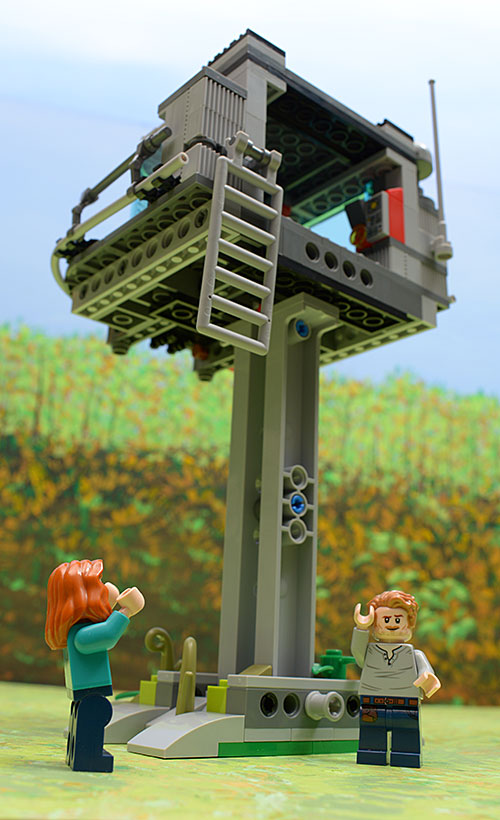
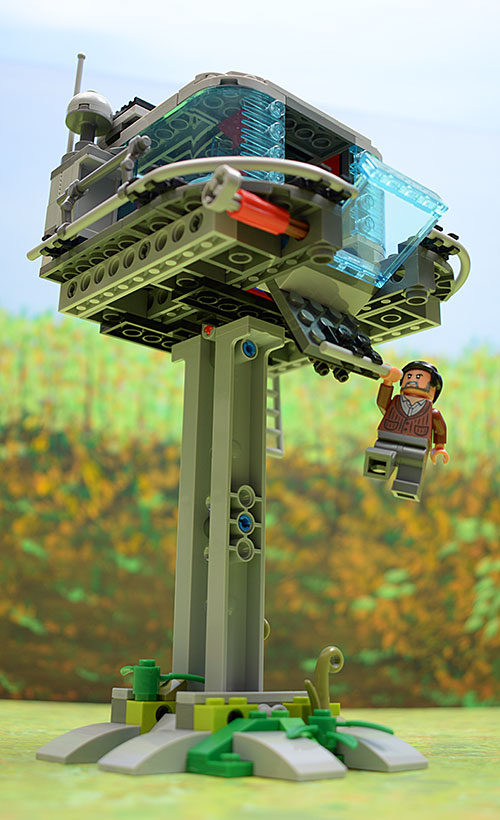
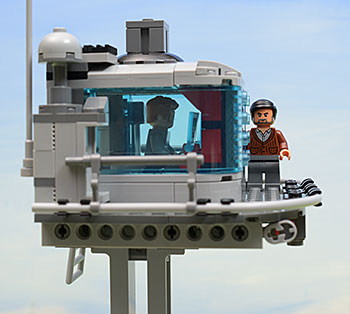
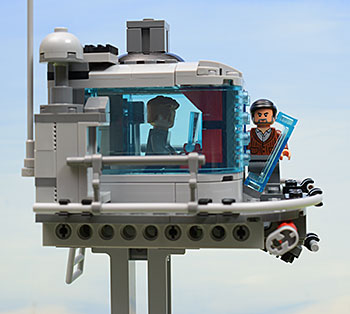
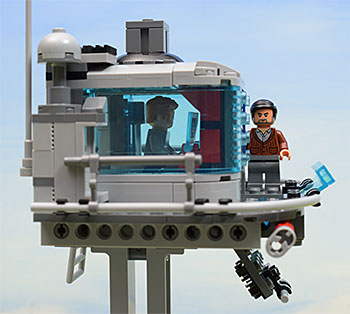
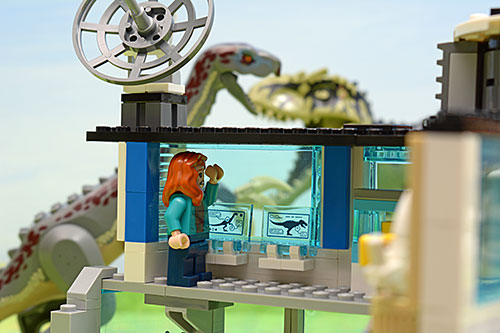
For purposes of the review, I am going to refer to the two buildings as the skybox and the lab. The skybox is a box-shaped room on a stick, and the lab is a two story building with a raised helipad on the roof.
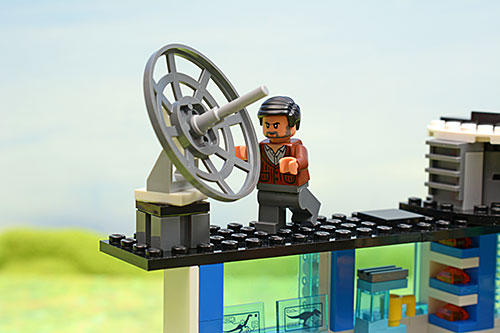
The skybox
The skybox is, apparently, some sort of fancy observation platform. It features an outside deck for the minifigures to stand on. Part of the roof also easily detaches so minifigures can be placed inside, but the opening in the back is large enough that removing the roof really isn’t necessary. What the skybox does not feature is any obvious way for the minifigures to get onto the deck from inside the building. It also has a ladder on the back side which is too high for anyone on the ground to reach, but that is not a problem because we can use our imaginations to transport our minifigures from the ground to the skybox and from the skybox to the skybox deck.
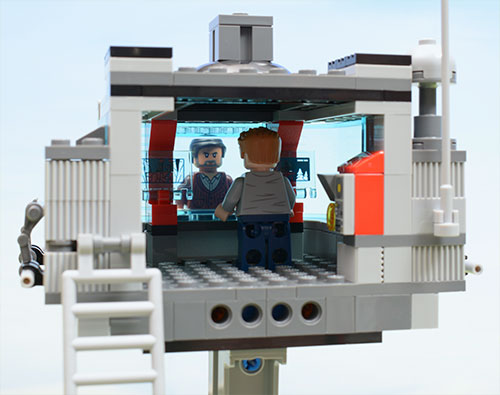
Claire: Dammit Owen Grady! Give me a boost. I cannot reach the ladder! Owen: I will call for the helicopter.
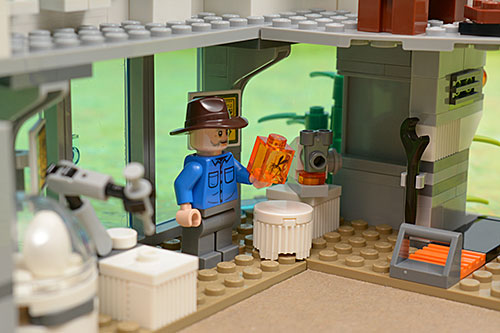
Dr. Henry Wu: A little assistance please!
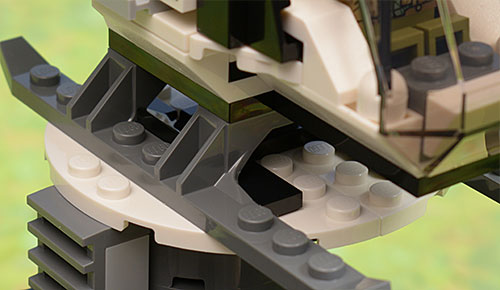
Woohoo! The skybox features a gimmick! A pull stick under the deck releases a portion of the deck which will swing down. Trap doors never get old.
Two build notes here:
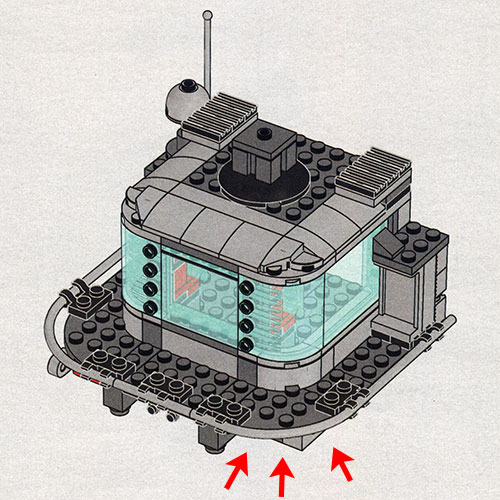
One. The external…footrail(?)…on the skybox deck. LEGO provides two hard flexible tubes for these pieces. They really did not want to flex into that corner curve. While I did eventually get the tube to conform to the shape prescribed by the instructions, the tube popped out of the clips or popped the clip pieces off the platform a few times. Warming the section that needed to bend helped it not keep trying to straighten out.
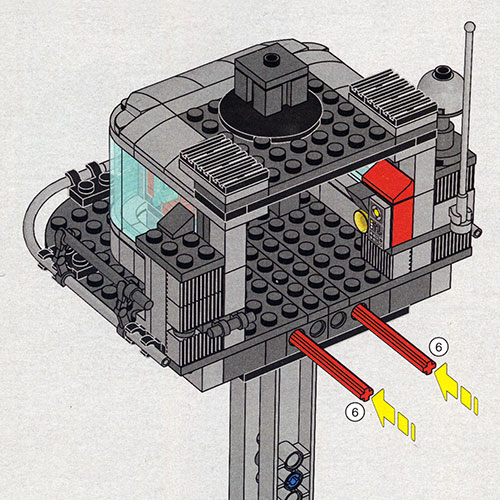
Two: The next-to-final step of instructions wants you to place two red axles through pin holes in the back technic brick…which then go into some other technic bricks with axle holes that are hidden up inside the assembly…to hold the skybox on top of the pillar. Yeah. I did not do that. If that is done, because of the complexity of the construction, you will never be able to disassemble the model. Okay. That is hyperbole. You will need a swat team of dedicated nine-year-olds hopped up on Mountain Dew and Twizzlers to disassemble the model. The good thing about using the red axles: it is engineered to stay together. The bad thing about using the red axles: it is engineered to stay together.
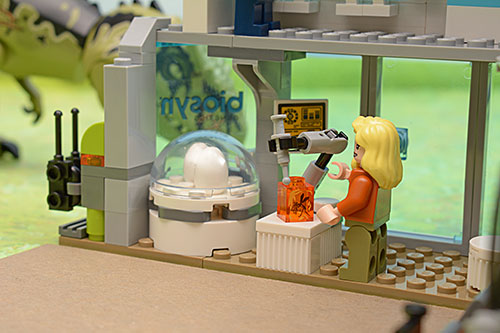
The lab
The lab, like virtually every no lab ever constructed, is two floors of nearly floor-to-ceiling glass walls with an open-to-the-outside bay for parking a quad bike. Strict environmental control is not requisite for this lab!
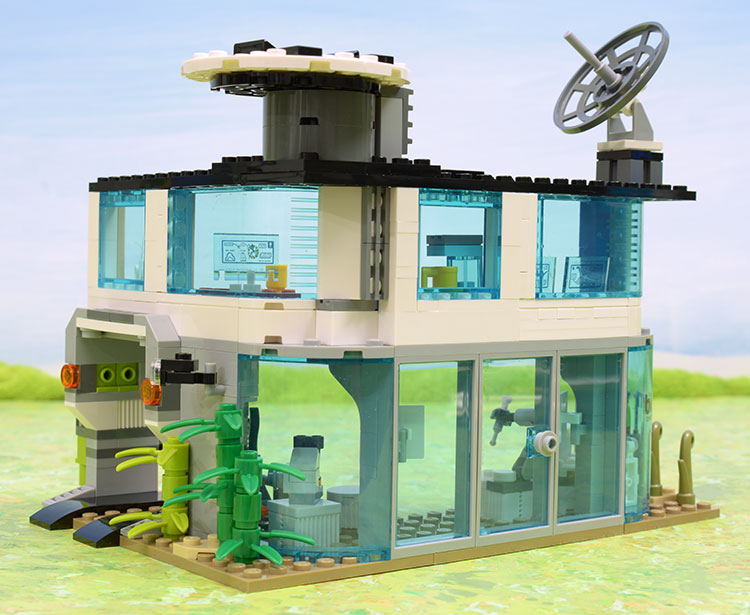
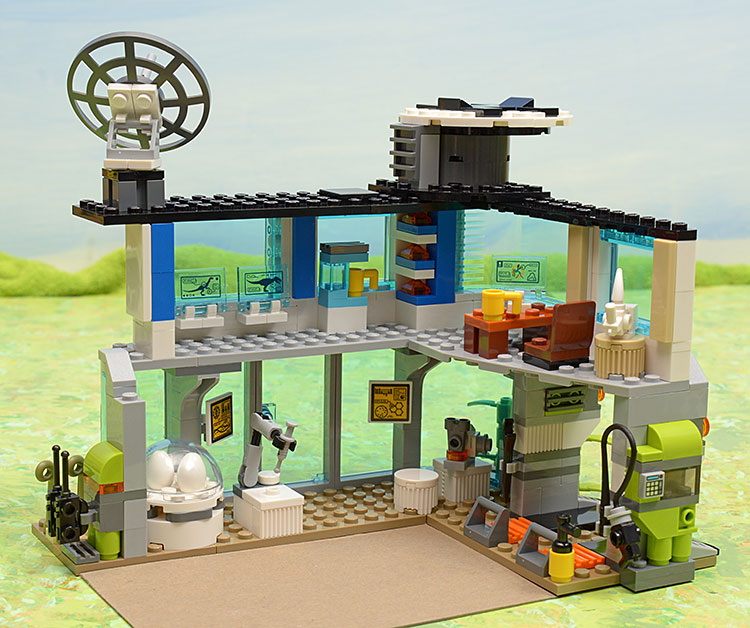
Another awesome feature is a helipad on the roof. The size of the helipad is so generous that an errant fart could…well, let us just say that any pilot attempting a landing on this tiny button would have to be super excellent, especially in any wind whatsoever. Helicopter security is a consideration, though. Strategically placed slopes on the pad interlock with the helicopter struts for a secure placement.
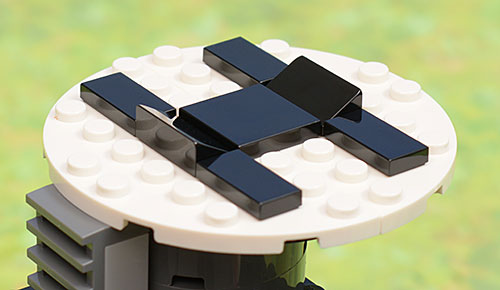
And, of course, in another marvel of architectural planning, the communications dish is conveniently located right next to the helipad, you know, where it can be subject to repeated heavy buffeting from a helicopter with turbo jets.

The obvious real-world shortcomings aside, the interior is nicely decorated with many fun details and offers plenty of opportunity for play scenarios.
Helicopter
This is a nicely designed helicopter. The canopy lifts via a clip-and-bar connection and a figure can be inserted into the cockpit easily. Two side doors, also clip-and-bar hinged at the top, open to reveal a storage area. Into this area slips a tray full of dinosaur-subduing technologies.
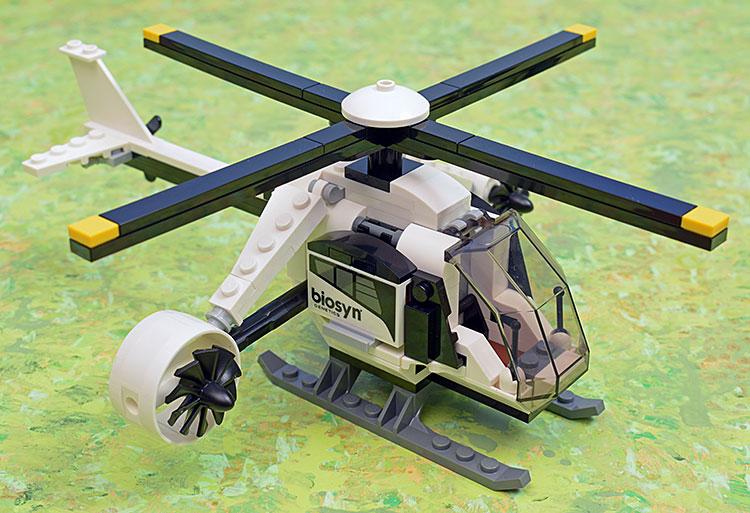
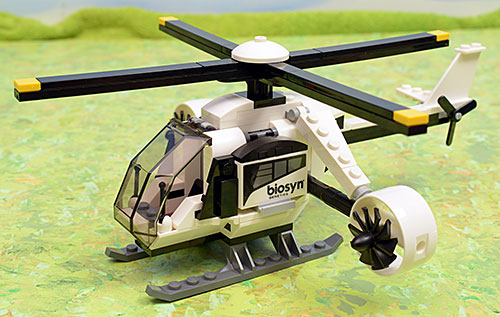
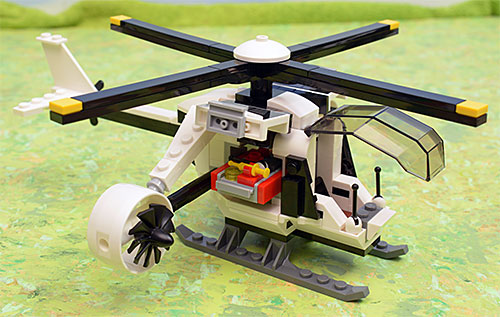
Side-mounted turbojet fans spin easily and smoothly, as does the tail rotor. The main top rotor spins, but it is a little clunky in comparison. There are some angled “struts” connected to the body of the helicopter with clip-and-bar which extend out to the turbos. These are freely hinged at the body and can move, but the intention here must be cosmetic. Having these pieces move in a functional manner would make little sense as they would raise up into the area occupied by the top rotor and interfere with it.
Size-wise, the helicopter is larger than the lab in both length and width. Just the kind of vehicle you would want perched precariously overhanging the edge of your building on a cantilevered platform.
The Randolph T. Fielding Absolutely Administrivia Section
While the other sets in this current series of Jurassic World sets have a trivial amount of trivia, this set contains more than a trivial amount of trivial trivia.
As with other sets in this series, anywhere a prong shows up on the underside of a part, it is the pentagonal version, the 2L black friction pins are the no-hole-in-the-side version, and the syringes are the two-hole-in-the-side version.
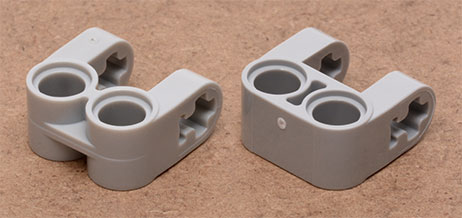
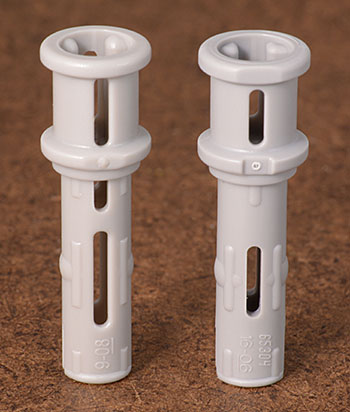
We have the 40146 remold of the 6536 single axle-pin cross-axis connector, the only real noticeable differences being in a circular depression around the injection point on one side and the axle-holding ribs extending all the way to the edge of the axle hole. There is also the updated version of 41678 double axle-pin cross-axis connector being the 69819 with a smooth filled perimeter around the pin holes.
Left: 6536. Right: 40146.
Left: 41678. Right: 69819.
There are at least four iterations of the turbo fan…un-part-molded (x577 at BrickLink, 46667 at Brickset), 46667, 18753, and 49148…the difference being on the front in a small depression on two opposite fan blades. The earliest version does not have this depression; subsequent versions do have it in slightly different forms. In this set, we get the latest version, 49148. Other than the aforementioned depression in the blades, this version has a matte finish versus the other versions with shiny finishes. Possibly this is a newer, slightly softer, plastic formulation.
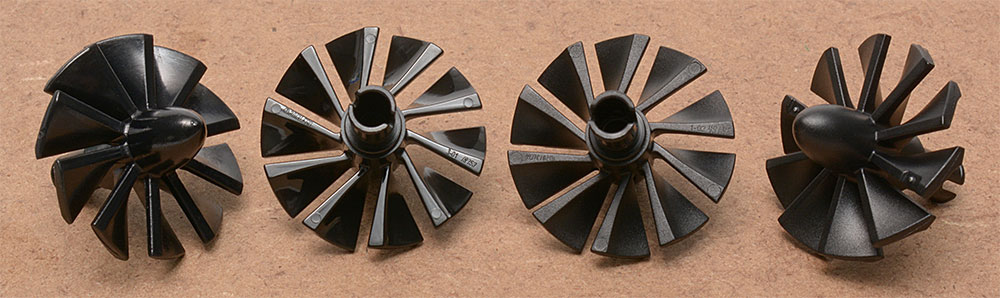
Left to right: front of original unnumbered version, back of 18753, back of 49149, front of 49149.
Note the difference in surface sheen between the 18753 and the 49149.
The propeller is the newer 67737 mold with solid circular collar to hold the pin.
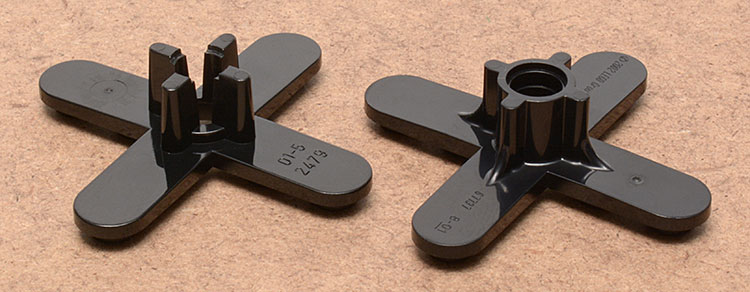
Left: 2479 propeller with split collar. Right: 67737 propeller with solid collar.
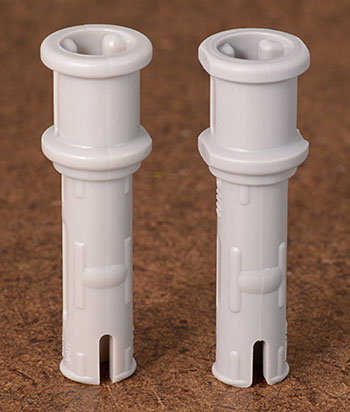
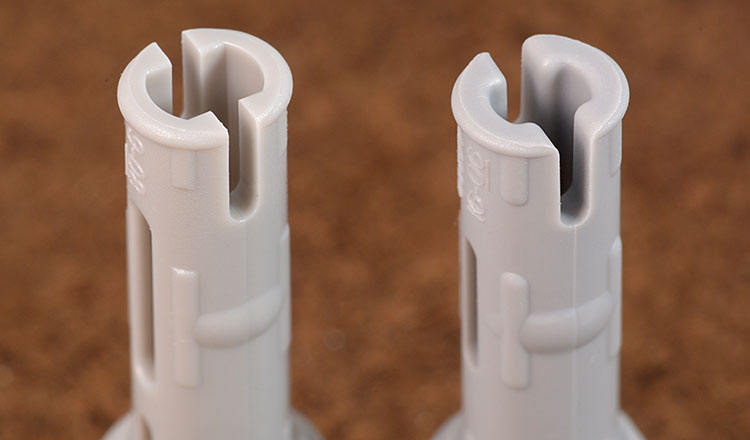
The quadbike’s axle plate is the 39767 which has replaced the 6157.
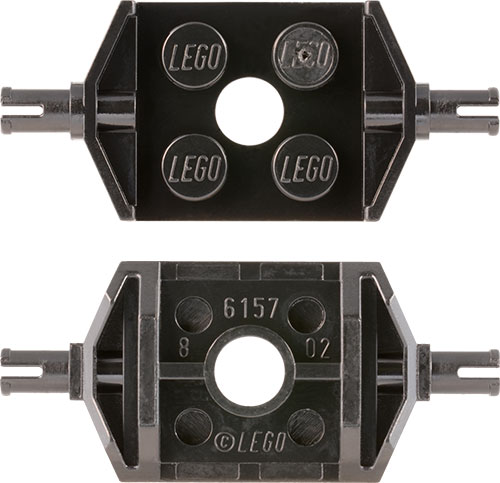
6157 top and bottom views.

39767 top and bottom views.
It seems of late that all the technic pins have been undergoing changes. In this set we have updated 3L blue friction pins with mold number 42924. The design, compared to the earlier version, is missing the slots that bisect the stop ring. The ring is now indented on one side and flattened on the opposite. The edges of the pin holes where they transition into slots are now more rounded.
Left: 6558 pin. Right: 42924 pin.
Left: 6558 pin. Right: 42924 pin.
Left: 6558 pin. Right: 42924 pin.
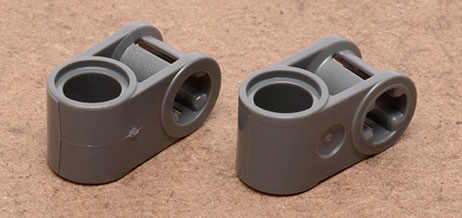
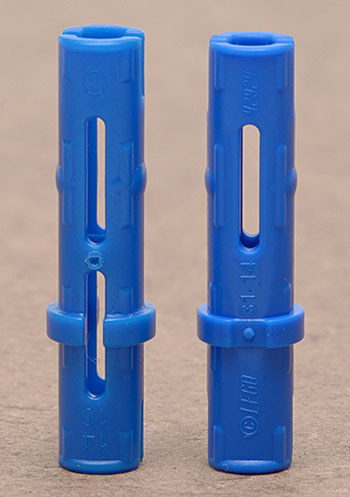
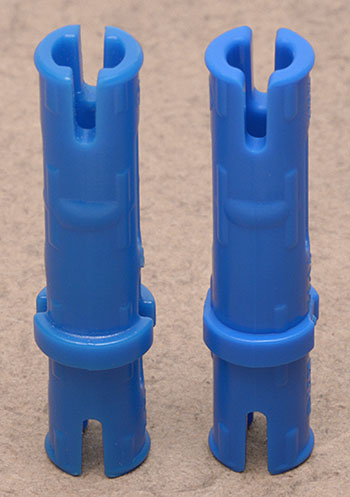
Another updated pin in this set is the 3L friction pins with bushing, mold number 65304 which updates part 32054. The design, compared to the earlier version, is missing the slots that appear directly beneath the bushing end and the other slots are shortened. The 65034’s inner ring is indented on one side and flattened on the opposite and the outer ring is flattened on two sides. By comparison, 32054’s inner ring had one side flattened and the outer ring was a complete circle. The edges of the pin holes where they transition into slots are similar to those of the newer 42924 blue pin. The pin wall appears to be thicker on the 65304 than on the 32054.
Left: 32054 pin. Right: 65304 pin.
Left: 32054 pin. Right: 65304 pin.
Pin ends compared. Left: 32054 pin. Right: 65304 pin.
The strut in this set is the 19798 which has replaced the 3940. Topside differences are in the stud and center holes which are rounded-octagonal on the 19798. Underside pay attention to the edge wall where the 3940 has barbs on a flattened arc and the 19798 has a solid arc.

Left: 3940 strut. Right: 19798 strut.
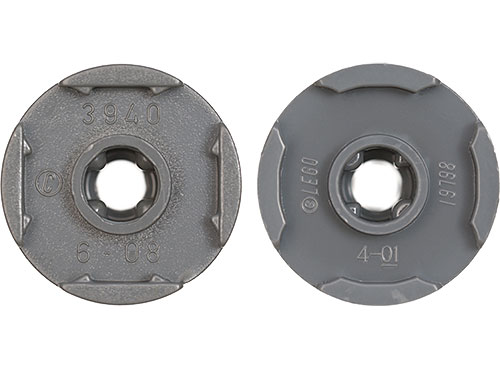
Left: 3940 strut bottom. Right: 19798 strut bottom.
Summary
This is a really wonderful play set. The build is fun and in places just a little challenging, which makes for a not boring time of it. The buildings provide great options for play scenarios; the helicopter is absolutely one of the nicer designs for LEGO helicopters that I have come across with its opening doors, storage compartment, and multiple spinny bits. The dinosaurs are handsome and sufficiently different than those that have come before as to be new. The buildings have many little details that are appreciated, and there are sufficient minifigures to keep the various locations and vehicles populated. Recommended.
Disclaimer
My huge thanks to LEGO for providing the review set. Opinions expressed herein are mine and unfettered.
33524


