Set Review ➟ 10279 Volkswagen T2 Camper Van
Love at first sight…that is the feeling I had when I saw the box for the first time. Then you see the details, those chairs, the surfboard, you sense the interior of the camper, that blue that brings back memories of Lost and the DHARMA Initiative…


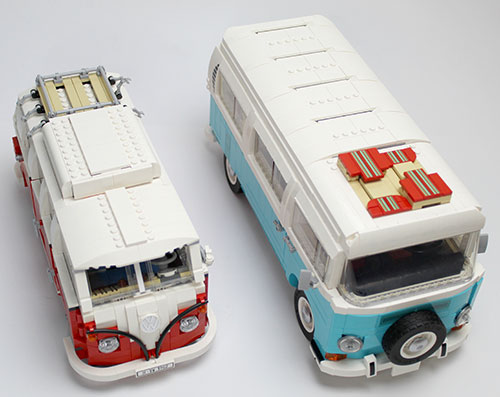
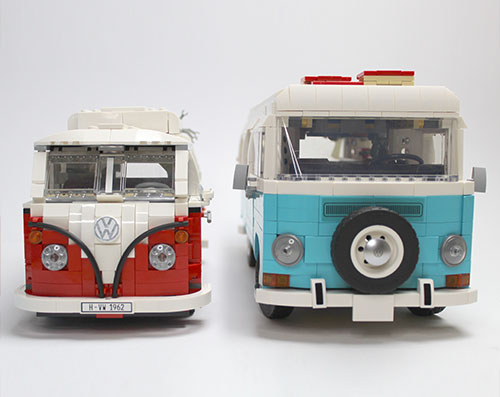
It was normal that after the launch of the VW T1, the next step was the arrival of the T2 model. One of the main differences, apart from the color, is that this new model is bigger than the previous one. We see how the characteristic three-color “V” shape disappears from the front, the divided safari-type windshield changes to the panoramic windshield (Bay Window) in this new version and the side doors go from being folding to sliding doors.
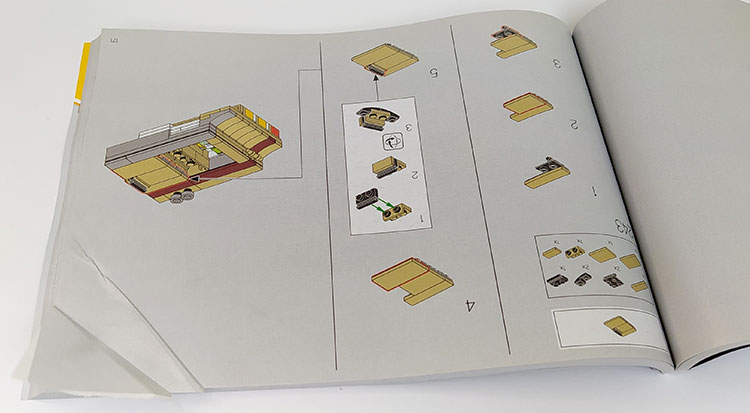
When we open the box we find the different bags full of parts, the instruction book and the already classic stickers sheet that we find in most of the sets. One of the sticker sheets will be used to decorate the T2 with hippie motifs. Remember that the popularity of the kombi grew suddenly in the seventies, when it became the symbol of hippie culture. This fame came thanks to the owner of a Type 2 having it decorated in a psychedelic style, with the idea of being exhibited at the 1969 Woodstock Festival and the image of the van ended up going around the world when photographed by Associated Press.

It is surprising to see that in a set of these characteristics the instruction book comes with a defect in the cutting of the sheets. It would be interesting to know if it has happened in more sets of the Volkswagen T2 Camper Van 10279.
CONSTRUCTION
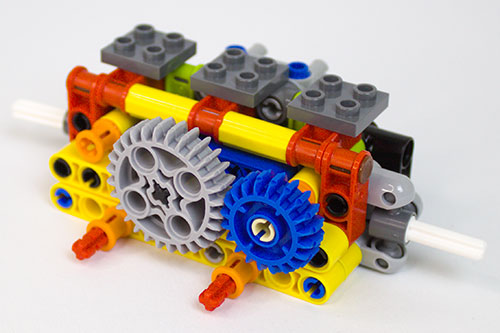
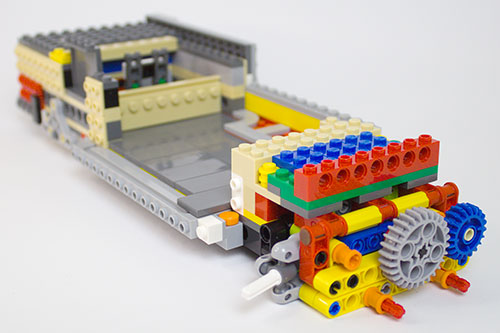
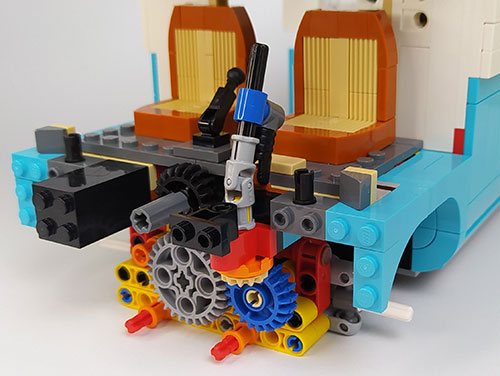
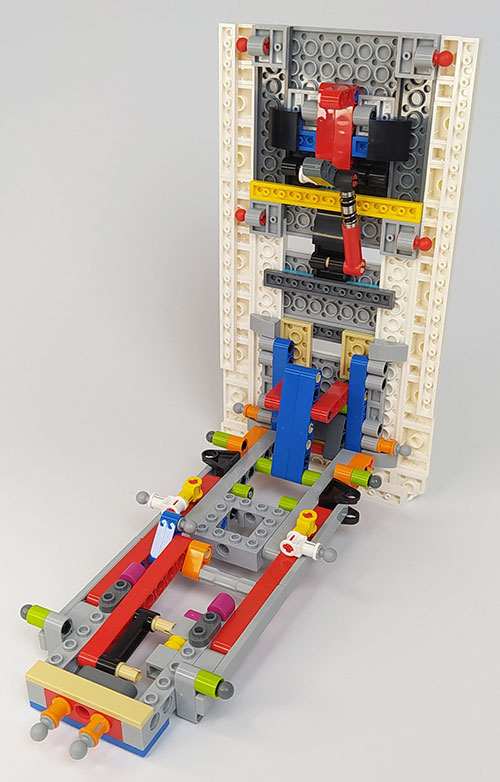
We begin the assembly of the model by building the chassis. Once we have the main structure, basically made with technic elements, we go on to make the floor and the steering mechanism of the van. With a series of gears and technic parts, the wheels are connected to the steering wheel allowing the wheels to turn from left to right.
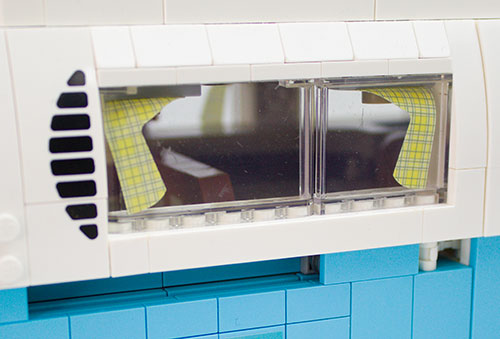
We continue with the sides of the van. We are building the structure and the windows that surround the entire vehicle. In these windows, we put some small fabrics with checkered decorations that simulate curtains.
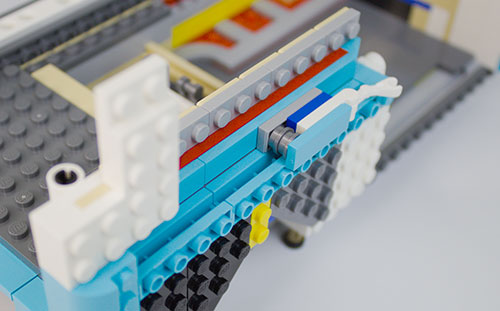
It’s time to make the sliding door system. With a small mechanism made with liftarms, axles, pins and the help of a white rubber, we achieve that when the mechanism is activated, the door comes out and we can slide it through the rails that are mounted to facilitate movement.
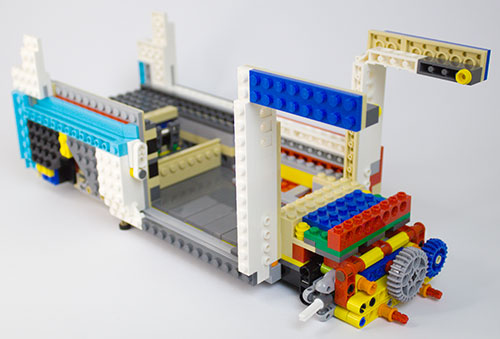
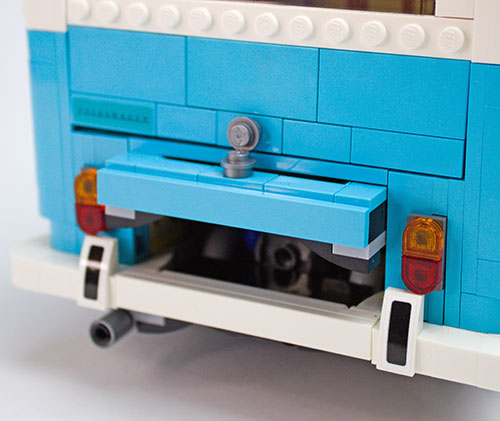
The structure in general is quite solid, necessary to be able to fit the windows well and prevent the construction from breaking when it is picked up. We continue with the rear bumpers and lights.
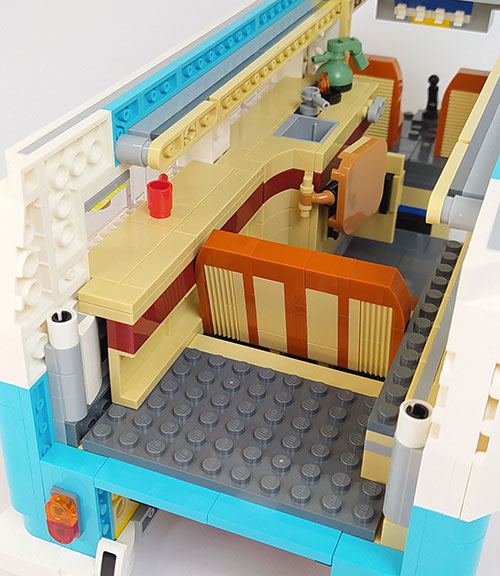
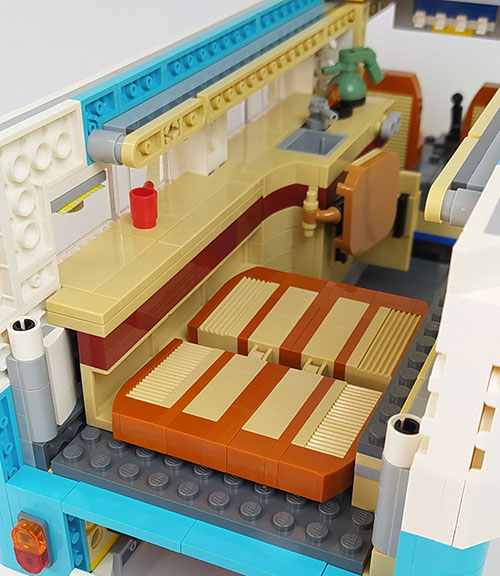
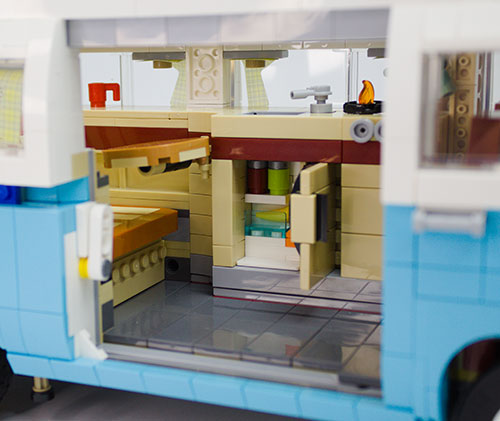
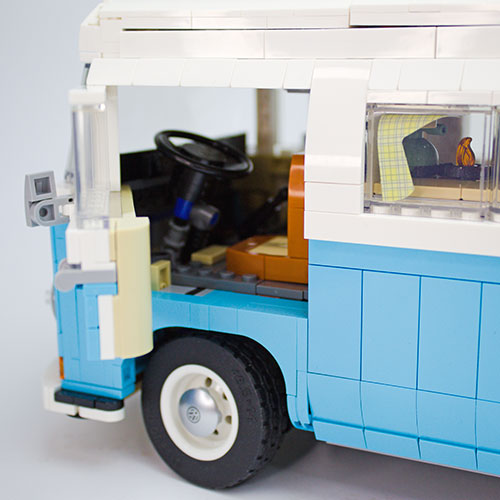
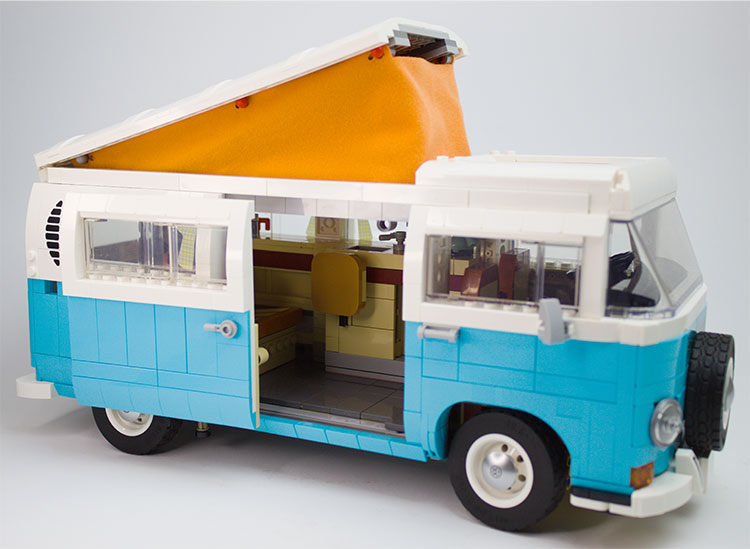
It’s time for the interior, what I like the most and where we see the level of detail of this set. We start by assembling a Tan cupboard, with a red stripe and on the countertop we will place a glass to finish off the set.
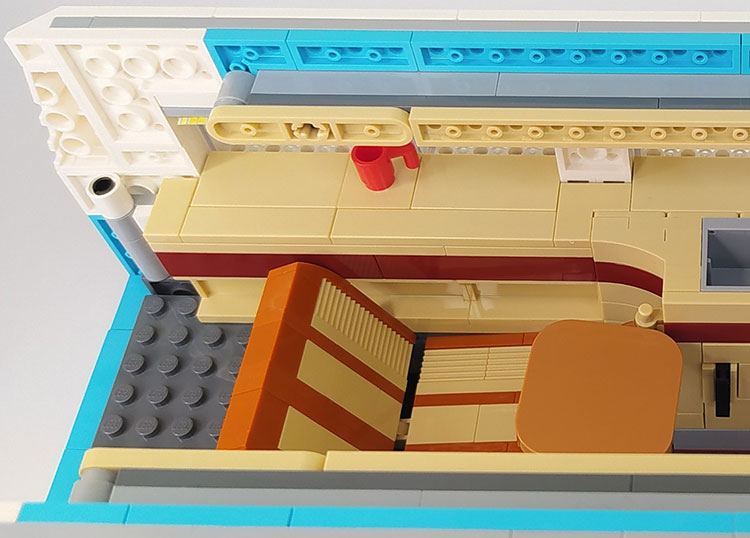
Next we make the rear sofa bed known as Rock’n’roll Bed. To recreate the texture of the upholstery, Modified 1x2 with Flutes/Fluted bricks are used, building the grooves helps to give realism to the piece, apart from the combination of the two colors.
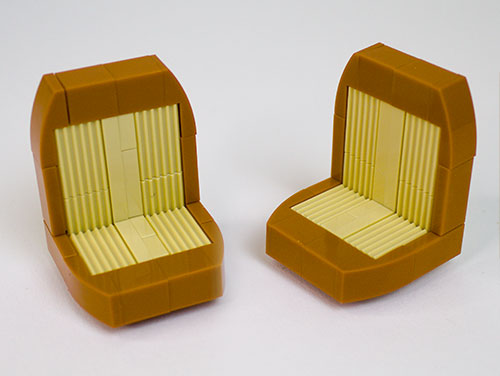
It is time to work the front. We place the structure and the floor where the seats and the steering wheel will go. We will also be shaping the front fenders. For the assembly of the front seats the same colors and parts are used as the sofa bed. We finish off with the gear lever.
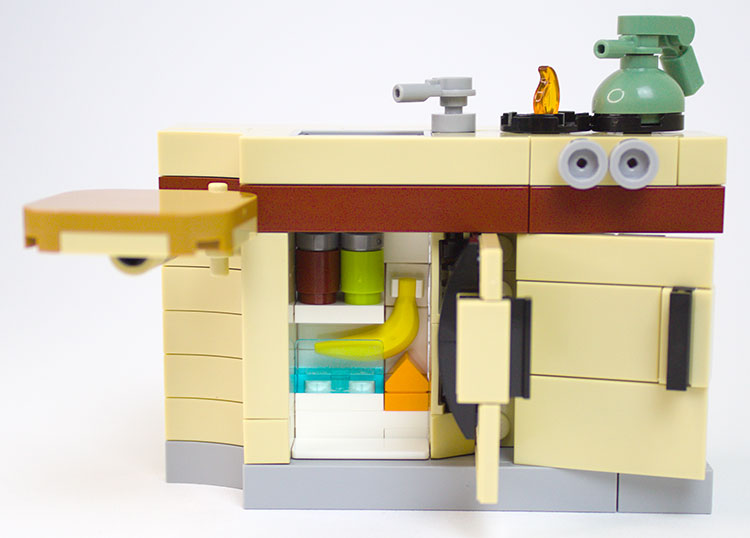
We go back to the rear. The kitchen has cabinets and a gas stove, with its control buttons. Above the stove, we see how a flame of fire comes out, indicating that it is ready to heat the kettle. If we open the closet door, we can see the gas cylinder.
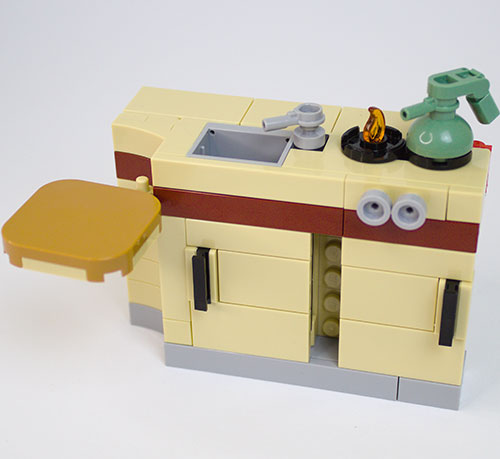
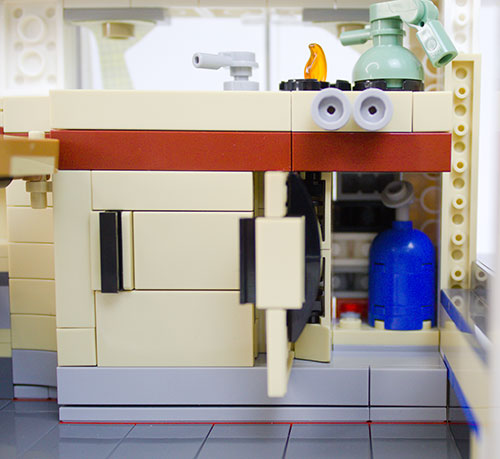
The kitchen also has a small sink with its tap, a small refrigerator with food and drink cans and an extendable table that can be folded.
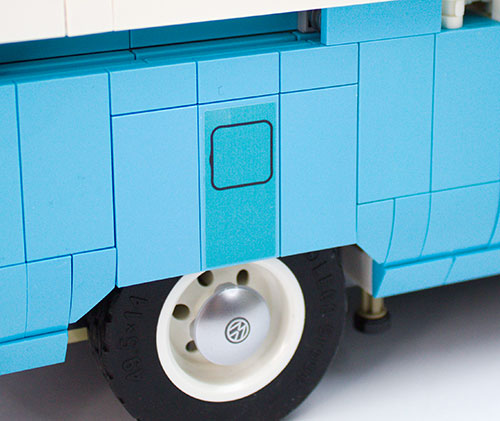
The interior is spectacular, exhibiting a very successful level of detail and realism. In addition, as we add all the tiles in blue, the camper begins to come to life. A small detail that I did not like is that for the entrance to the gas tank you have to use a sticker whose color was a bit out of tune with the general blue.
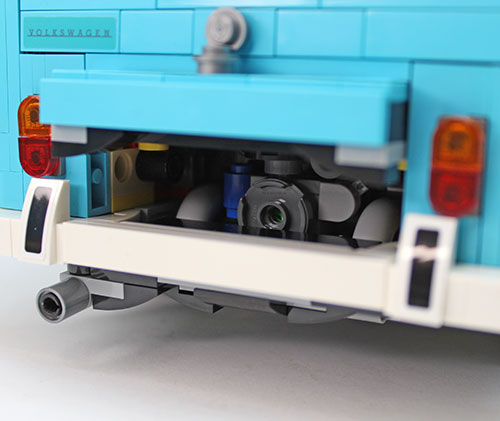
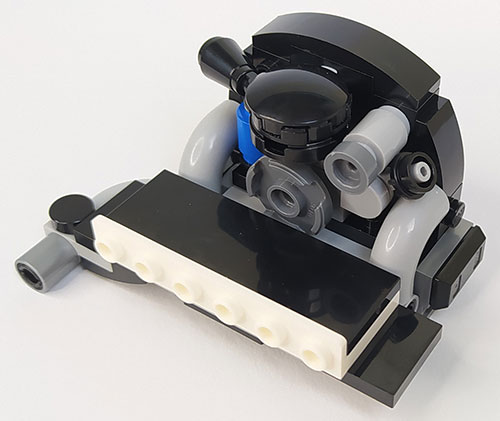
We move on to the motor, which is mounted at the rear and which we can access since it has a door with a mechanism that allows us to close and open it. Recall that the engines of both the T1 and T2 were 4-cylinder air-cooled boxers. This characteristic allowed them to lack water, a radiator (they only have one for the oil), a water pump, hoses and even a cylinder head gasket, in addition to having a very recognizable sound. To simulate the crescent-shaped air intakes at the rear, stickers are used on curved slopes. A folding door at the back allows us to access the interior of the trunk.
It is the turn of the front doors, fully functional, with their knobs and mirrors.
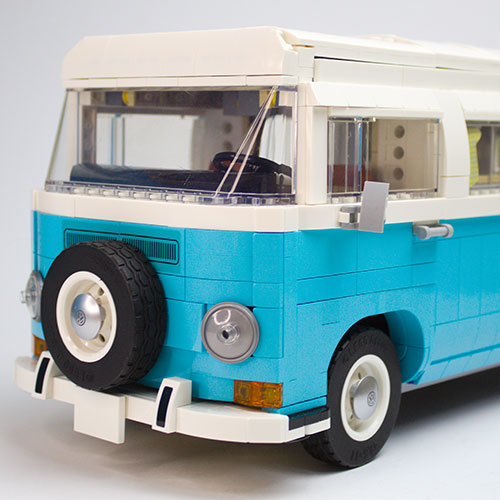
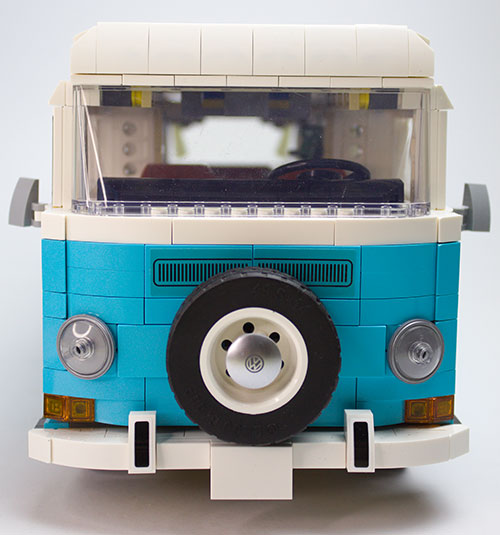
Now the front bumper and the characteristic round lights. The placement of the elements, with the indicators at the lower ends of the front and the rounded bumper with a footboard under the doors to help in the maneuvering of getting on and off the vehicle, gives us clues to know that we are facing the T2a model (Early Bay).
We finish off by adding the spare wheel to the front and the panoramic windshield, for which a new part has been manufactured, specifically the transparent 3x14x4 Windscreen.
As a good Westfalia prepared to go camping, the next step for us is building the lifting roof. For this we assemble a fairly elaborate technic mechanism, with the use of a shock absorber, which allows us to keep the roof up or down. This entire system will be covered with the orange cloth that is placed to simulate the roof canvas when it is raised. I do not see very advisable to be using this system very often, so if you want to expose the T2, you should decide if you want it with the roof raised or not.
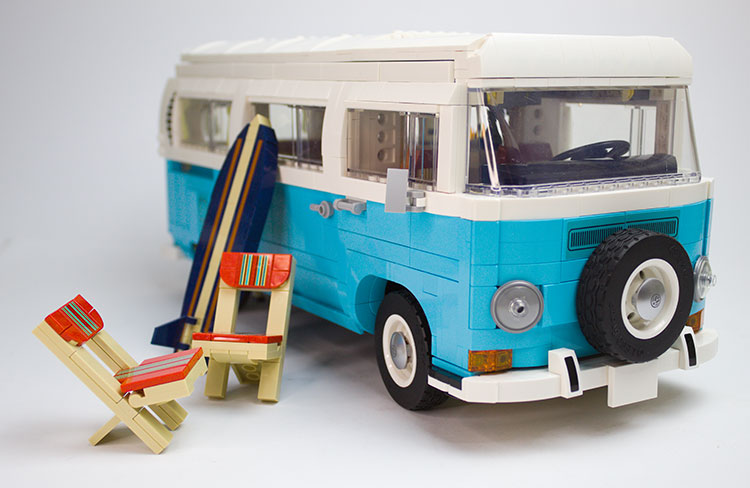
To finish the assembly of the set, we add the 4 wheels, with the metallic hubcaps with the VW logo. We also build a surfboard and two folding camping chairs. The level of detail of these elements is the icing on the cake for the whole of the camper, both for the choice of colors and the level of detail.
CONCLUSION
It is without a doubt a set for lovers of large-scale vehicles and especially for lovers of this type of vans.
The construction is quite enjoyable and you will love the levels of detail. The stickers give you the possibility to personalize the van and make it one of the symbols of hippie culture, as well as being able to choose German or American license plates. All doors are functional, so you can see the entire interior of the kombi at different angles.
The upper part of the roof is made to be able to store the two folding chairs without problem. On the other hand, there is no space designed to store the surfboard, which has disappointed me a bit.
Although the overall set is quite robust, the part of the bumpers is quite weak and sometimes with a small bump, it is possible that some part is dismantled.
We thank LEGO for providing the set for review. The opinions expressed in this review are our own and are neither endorsed nor supported by LEGO in any way.
33493


