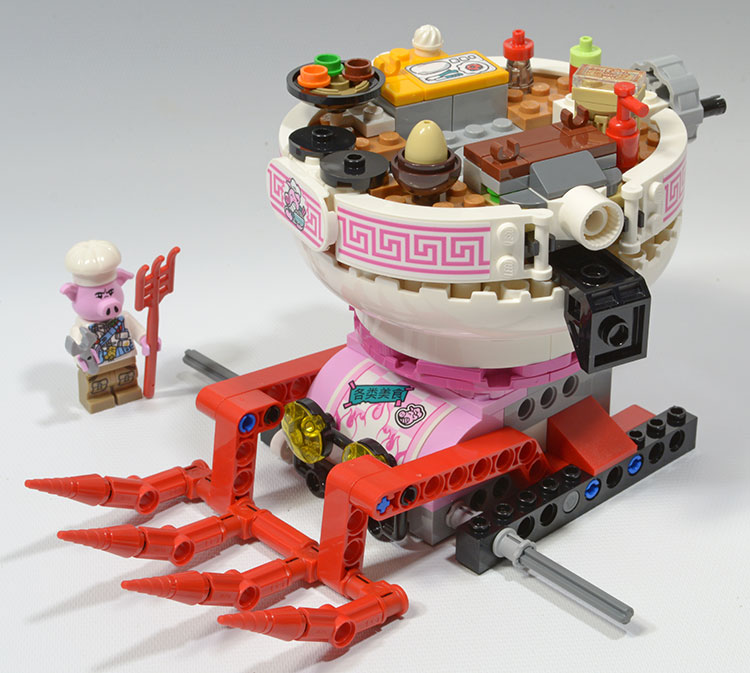
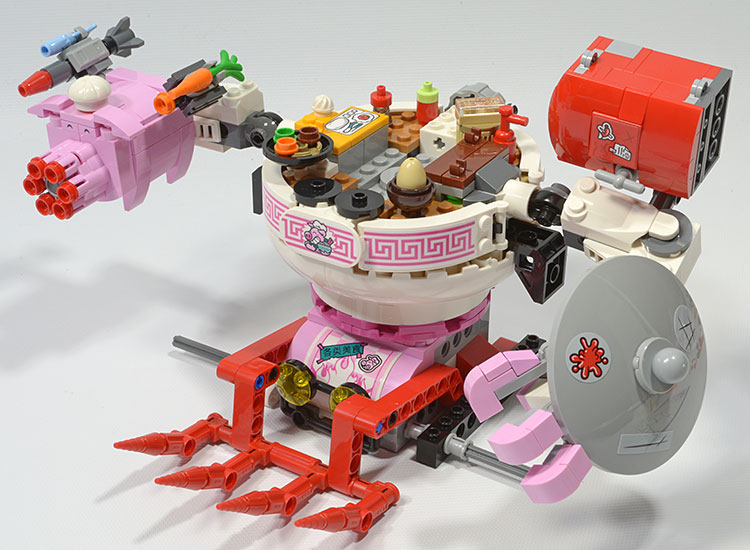
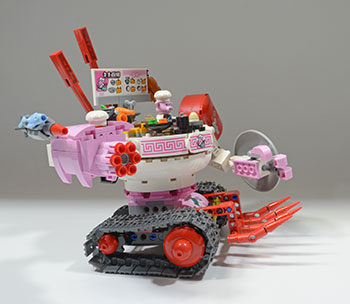
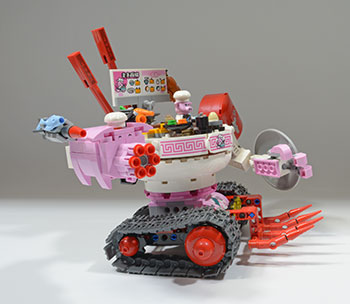
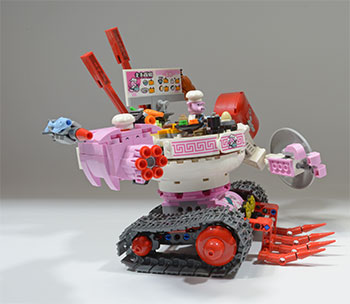
Set Review ➟ LEGO® 80026 Pigsy’s Noodle Tank

Again, as with most larger LEGO® sets, Pigsy’s Noodle Tank comes in an unnecessarily large box. The packaging specialists at LEGO clearly have their roots in the United States’ potato chip industry.
With a price of $60 US and 662 pieces 80026 Pigsy’s Noodle Tank set is slightly smaller than Pigsy’s other war wagon, 80009 Pigsy’s Food Truck, which has a price of $70 US and 832 pieces. Both sets are rated for an age of 8+.
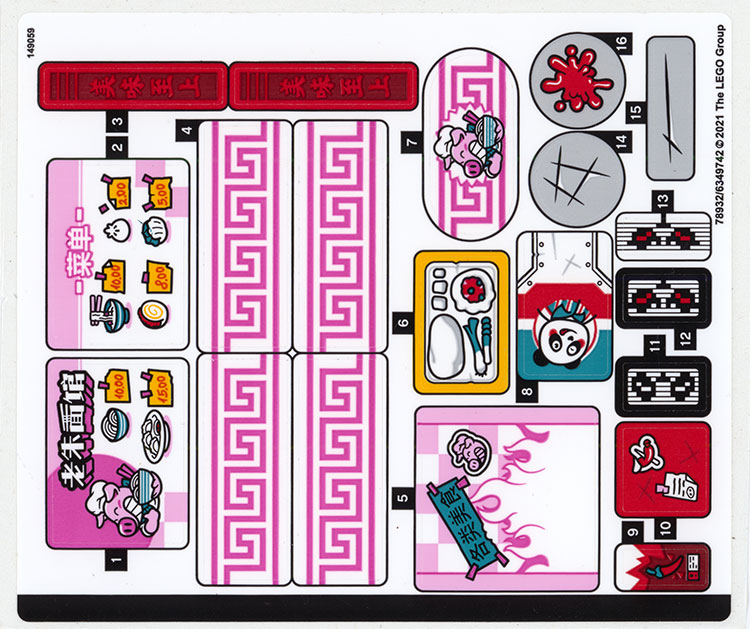
Inside the too-big box are six bags of parts, a loose manual and sticker sheet. With what seems to be one hallmark of the Monkie Kid sets, this set has plenty of stickers. Given the number of stickers and the complexity of proper orientation and application of some of these stickers, I have to wonder just how many stickers an eight-year-old will be able to apply as intended by the manufacturer. Perhaps more than get applied with the absence of pet hair and cookie crumbs. Perhaps.
Minifigures
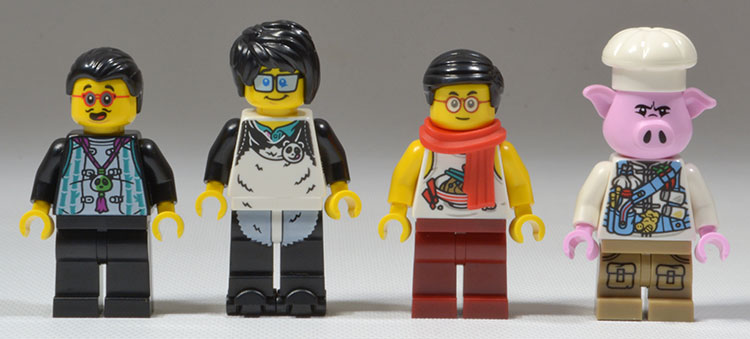
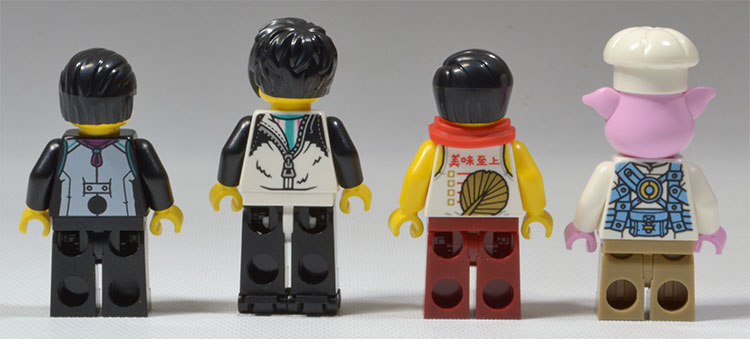

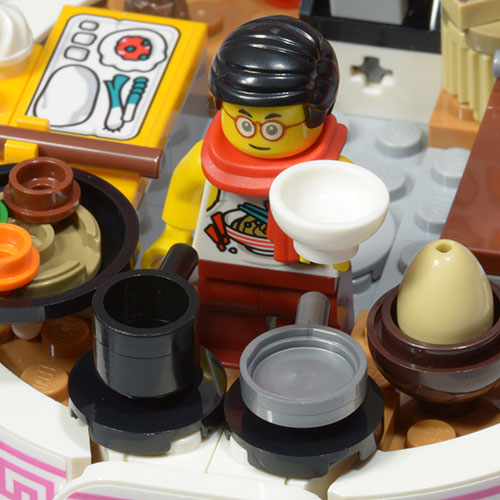
The set includes four minifigures: Pan, Lee, Mr. Tang, and Pigsy. All have dual-sided prints on the torsos. Pan, Lee, and Mr. Tang have dual-sided prints on their heads. Lee and Pigsy have printed legs. Pigsy has the shorter movable legs assembly and the others have the standard legs assembly. Lee is wearing a panda costume and has skates. Mr. Tang has a scarf. All four figures come with some hand-held article: Pan has a drone controller, Lee a Panda costume head, Mr. Tang has a rice bowl with rice, and Pigsy has his customary red pitchfork and a bar with clip which serves as a cooking fork, I guess.
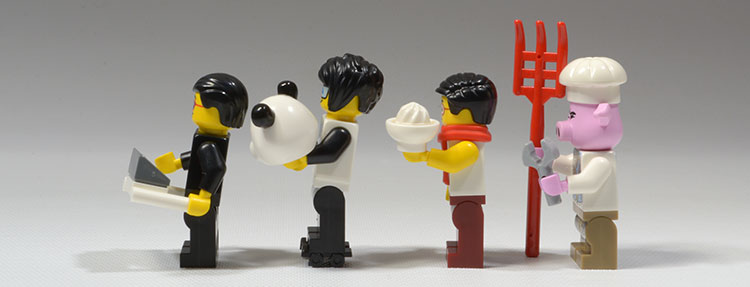
As is almost always the case when minifigures have a utensil…or anything…to be held in front of them, their center of balance is shifted far forward and without the benefit of a stud under foot, they tend to face plant.

To stand upright Pan and Lee need to back-bend at the torso. Mr. Tang’s rice bowl and rice are insufficiently heavy to make him tip. Pigsy can use his pitchfork as a stabilizing point.
Build
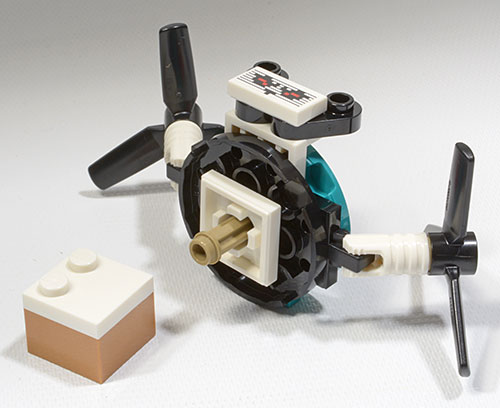
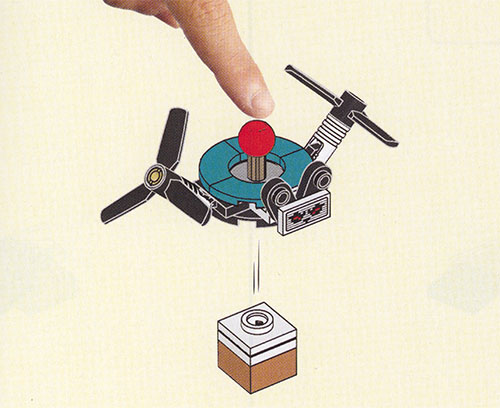
Bag 1 has us assemble Pan, his controller, a drone, and a Pandabot robot.
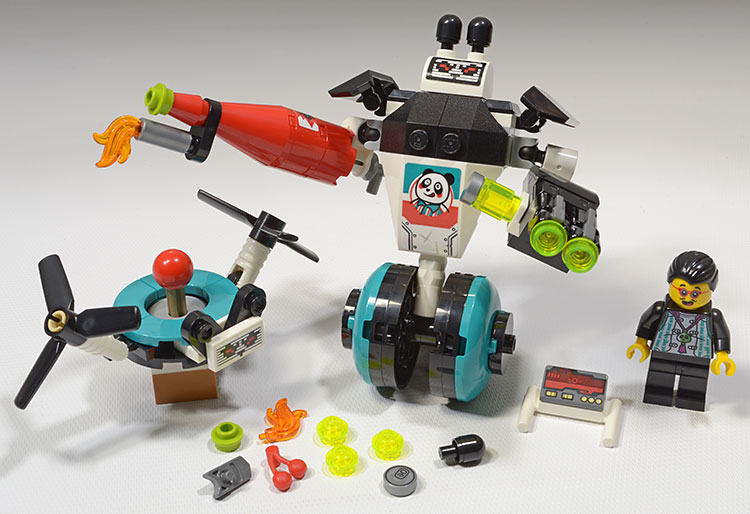

The Pandabot has moveable arm-weapons. The left arm sports a double, as LEGO calls it, “lemonade” stud shooter so the kids can shoot both eyes out at once. The drone has articulated arms, spinning propellers, and featuress a gimmick where you can push the plunger and the drone will drop a lunchbox. Two notes on the lunchbox drop.
One, the lunch box is held under the drone by two studs and, if the box plate is affixed tightly to the supporting plate, it takes a significant amount of force to pop the box. Two, the instructions incorrectly show the supporting plate dropping from the drone. This is impossible as the studded axle used for the plunger passes through and additionally holds the support plate.
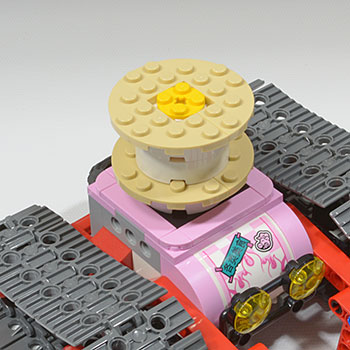
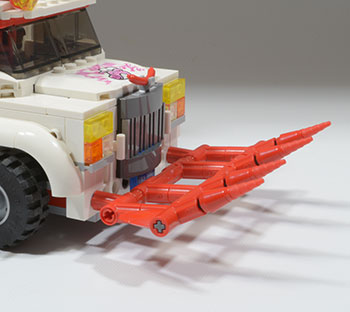
Bag 2 has us assemble Lee and the bug-looking base for Pigsy’s tank. The tank sports a fork similar to the one on Pigsy’s Food truck.
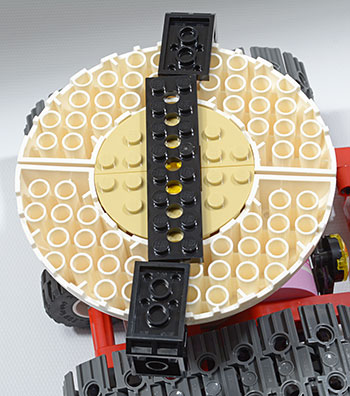
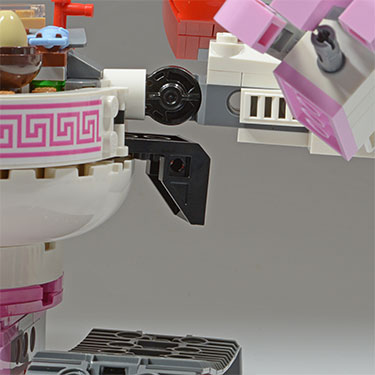
The top section here shows the toothed turntable base.
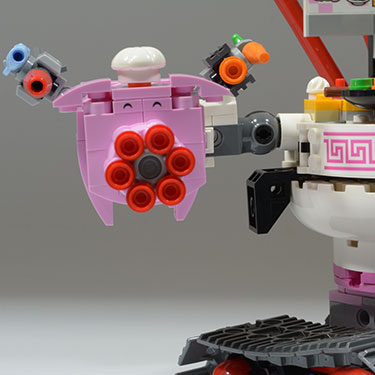
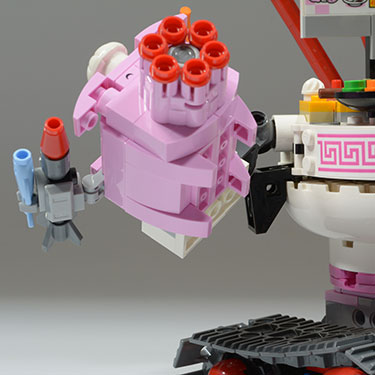
Bag 3 contains the Pigsy minifigure and parts for the bowl section of the tank.
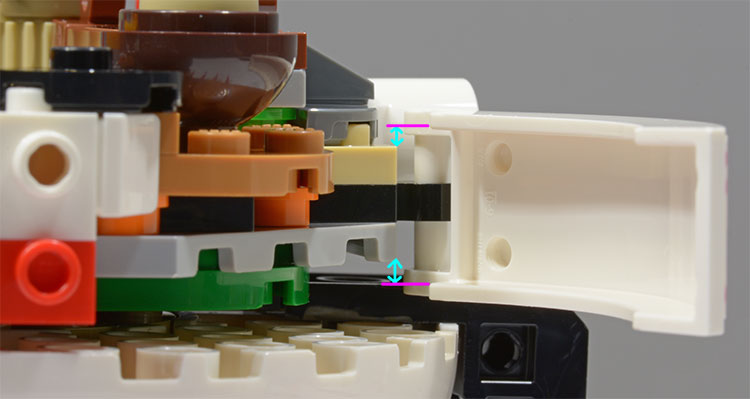
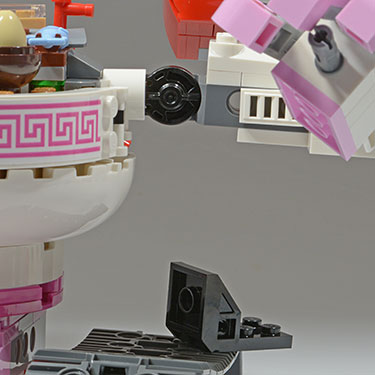
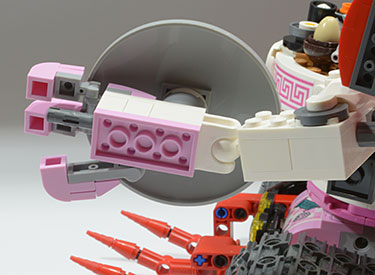
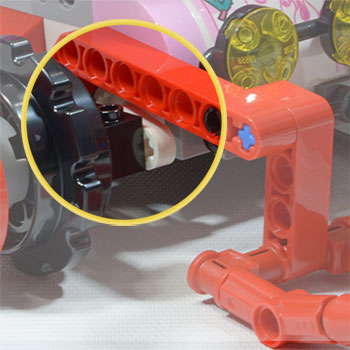
The bottom of the bowl section is interesting in its build. A cylindrical core is installed on top of the turntable base in the normal stacked manner. Then the outer bowl shape is constructed with a open center topped by tiles, and the “dome” is then inverted and placed over the core, simply held in place by the core and gravity. There is no studded connection to the rest of the assembly. An inverted space seat bracket is attached to either side of the bowl top. These brackets will limit the downward positioning of the arms, to be attached at bags 4 and 5, from interfering with the tank treads.
After the brackets are attached, a 2x8 technic plate is attached to the center column and across the center of the bowl between the brackets. This leaves some degree of free play between the plate and the brackets. When the free play limit is reached, the friction between the 2x8 plate and the inverted space seat brackets is the only thing other than what little friction there may be between the inverted dome and the center column at work causing the bottom of the bowl to spin with the rest of the bowl assembly which will be built atop the 2x8 plate.
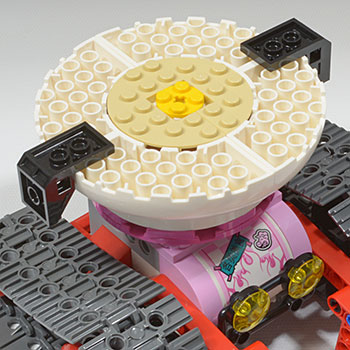
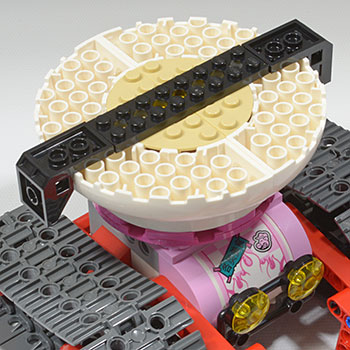

If the bowl had additional connections across the axis perpendicular to the brackets this free play would have been lessened. In the next build steps, the base of the kitchen will sit upon the technic plate. This base has some supporting structure that fits on either side of the technic plate. Had those supporting elements extended to ten studs instead of eight, thus effectively trapping the space seat brackets as well as the technic plate, the brackets would have been supported on either side, lessening the free play. This free play, while certainly not severe, will come back to haunt the build a little later.
The bowl section gets topped off with a circular kitchen area. There are some curved pieces that cover up the foundational plates, attached bar-in-clip, to give the bowl a clean curved finish. These pieces are a bit fussy to position as they need to fit over some plate edges at the sides and come under some round tiles in the front. If these curved pieces are attached either too high or two low they can’t swing into place because the side supports of the curve will bump into the plates.
While most of this kitchen area is assembled with parts from Bag 3, it doesn’t get completely finished until Bag 6.
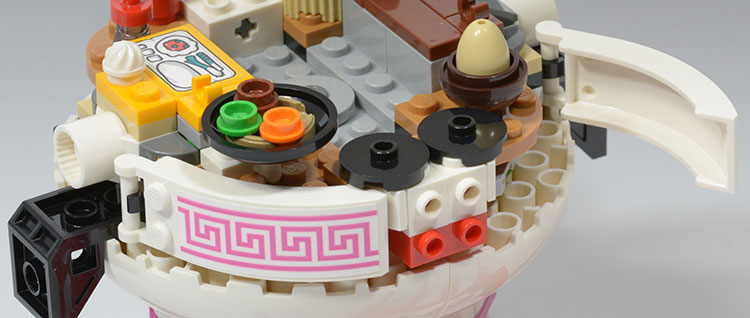
The curved pieces that make for the sides of the bowl need to be carefully aligned to clear plates both top and bottom and to fit under plates at the front of the tank.
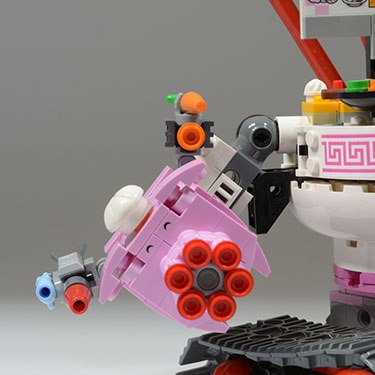
When completed, the bowl section can rotate a full 360˚ atop the base section. The addition of the kitchen area adds some weight and presumably some friction contact with the outer inverted dome portion of the bowl. And an axle runs down through the kitchen assembly into the cylindrical core, adding contact and stability between the kitchen and the core. But there is no studded connection between the bottom inverted dome and the kitchen top, so it is only friction at play to spin the bottom outer portion of the bowl when the entire unit moves. If both space seat brackets come off, then the bottom dome portion of the bowl can move freely and independently from the upper kitchen portion.
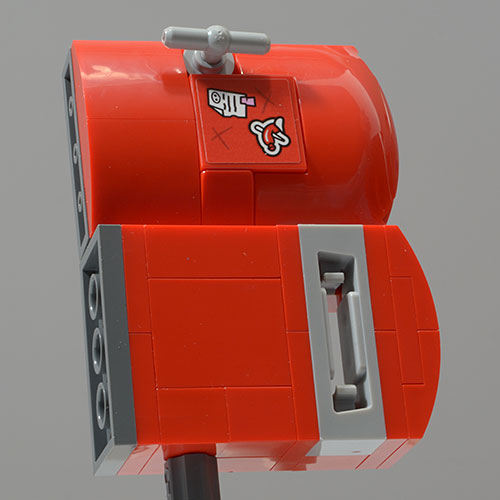
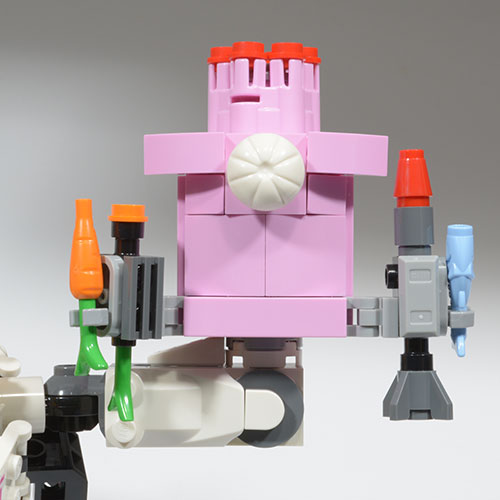
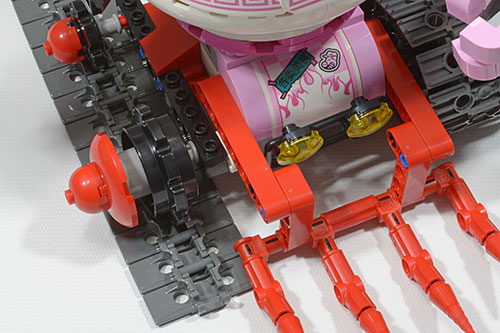
Bag 4 contains parts for the Mr. Tang minifigure and the tank’s left arm. The arm holds two whimsical design elements: a pot lid shield and a refrigerator shooter.

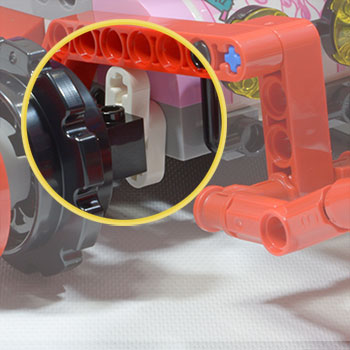
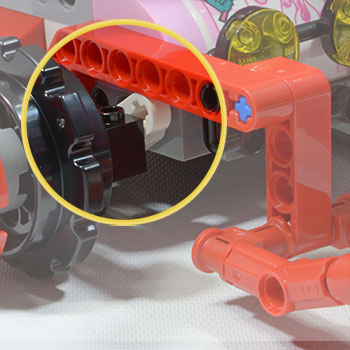
Both left and right arms are connected to the bowl section with Technic rotation joint assemblies, providing for the possibility of 360˚ of movement on the bowl side and 180˚ on the arm side. Practically, though, the space seat bracket restricts full downward rotation of the arm to prevent interference with the treads. Depending on the arm position, full rotation at the bowl/shoulder may be limited by the relative position of the refrigerator.
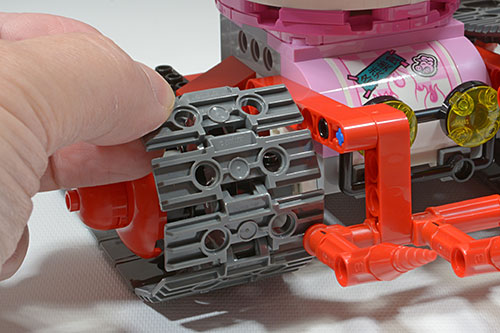
Positioning and repositioning of the arm during play will, in all likelihood, cause some portion of the arm assembly to contact the space seat bracket, causing the bracket to frequently loosen and become partially or completely detached. On the positive side, I suppose, the bracket is fulfilling its intended purpose of preventing the arm from coming in contact with the treads. On the negative side, it does so at the expense of regularly becoming unseated and occasionally falling off.
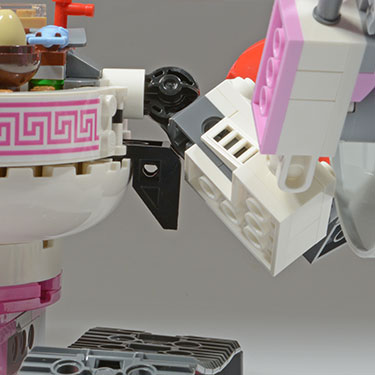
Bracket gets bumped…
…and gets loose…
…and falls out.
The elbow of the arm is fixed at a 90˚ angle. Below the elbow, the wrist is attached with a ball-and-socket joint. Attached to the wrist is a pot lid shield; an amusing decorative touch. We may infer that the tank has been in other battles given the scarring and red splotch on the lid shield and the fact that the Pandabot is shooting trans-neon-green lemonade studs. The hand has a pin in the palm…which might represent some sort of gun…or it can be used to hold the chopsticks that get built at Bag 6. The fingers and thumb are articulated: the fingers with clips-on-bar and the thumb with small ball-and-socket plates. The pot lid top limits the movement of two fingers away from the palm.
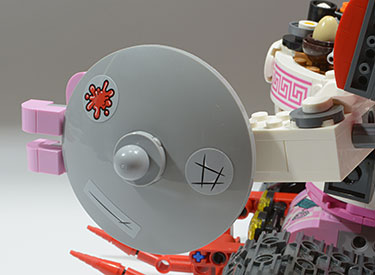
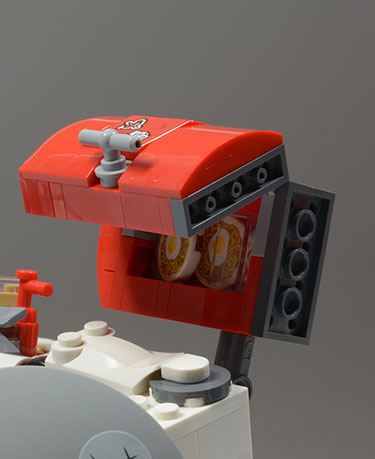
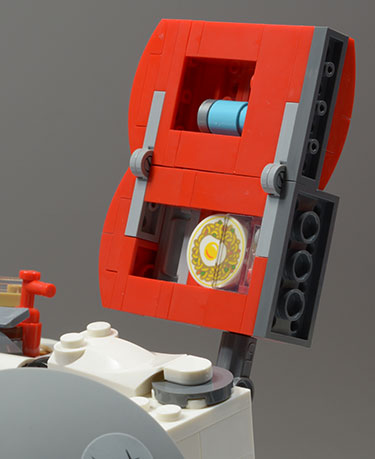
The refrigerator serves as a disc shooter. Open the door to reveal a beverage can in the door and a couple egg-noodle discs, 2x2 round tiles, held in a "bin" created by a 1x2 trans clear panel. If the arm is positioned such that the elbow is higher than the shoulder and the refrigerator door is opened, expect the discs to roll out of the bin. The hinge plates used on the refrigerator provide sufficient friction for the door to remain open to whatever position you set it.
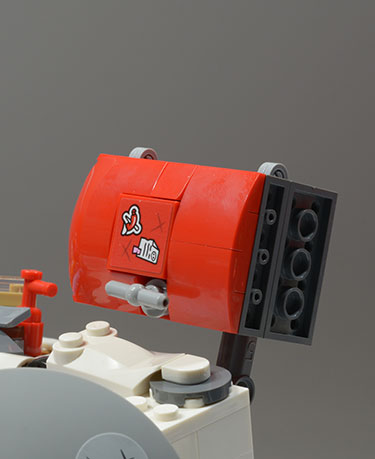
Refrigerator door closed.
Discs have slid around within the fridge.
Door opened; discs tucked back in bin.
Your mileage will vary on just how far the refrigerator disc shooter will shoot discs. If the disc is grabbed by the solid sides of the disc you get more distance than if the disc is grabbed at the side cutouts. In general I find the discs to travel much farther from this mechanism than from the pig shooter. All the projectiles have a similar loss-to-recovery ratio after being shot.
Refrigerator shooter slot.
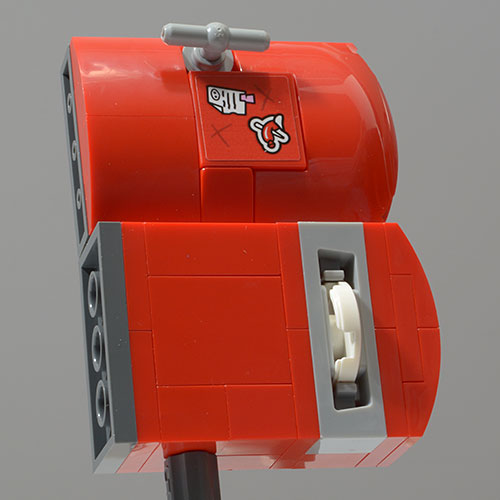
Ready to fire!
Parts note: I did not get a 1x1 round tile with poptop decoration in bag 4, used at step 123 (the top of the can placed in the refrigerator door), but there was an extra in bag 1, so I used that.
By the way, if you happen to leave an actual plate of noodles uncovered in a refrigerator for long enough it will harden into a disc suitable as an offensive projectile. Just so you know.
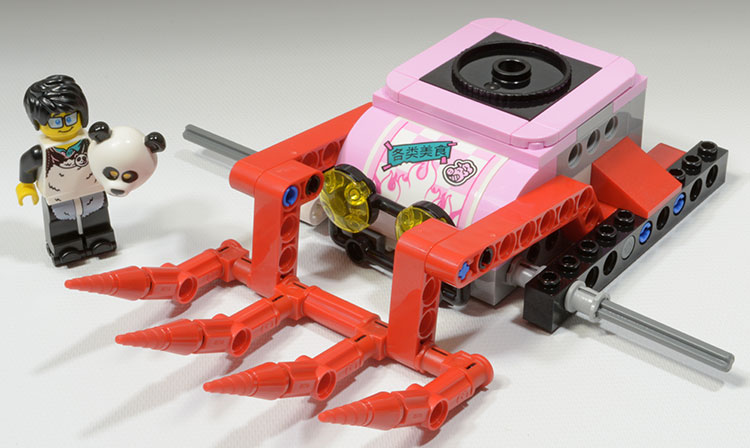
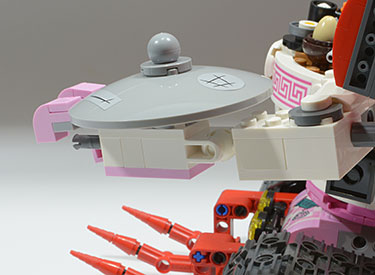
Bag 5 contains parts for the tank’s right arm and the pig shooter.
Positioning of the arm is restricted to the possibilities offered by the technic connector assembly at the shoulder and is limited by the space seat bracket. Again the elbow is a static 90˚ angle, but instead of having a bricks assembly like the left arm, the pig shooter is attached to the elbow by a long axle. The space seat bracket under the arm on this side is susceptible to the same loosening issue as on the other side.

Left arm.
Right arm.
The pig shooter is further adorned with a fish-missile and a carrot-missile. These elements are decorative and can be positioned somewhat as they are attached with clips.
Bag 6 adds the tank treads, chopsticks, and final touches to Pigsy’s bowl-top kitchen. Some assembly elements at this stage are a little bit fussy.

First added is a menu sign that is positioned at the back of the bowl. At the bottom of this assembly is a sort of kitchen sink element consisting of a 2x2 dish and a tap. The dish can seat on the wider edge of the tap or it can be pushed far onto the tap, past the edge. If the dish is seated farther onto the tap, it becomes a little wobbly. This assembly nuance isn’t critical, but it’s not obvious where the intended position is either.
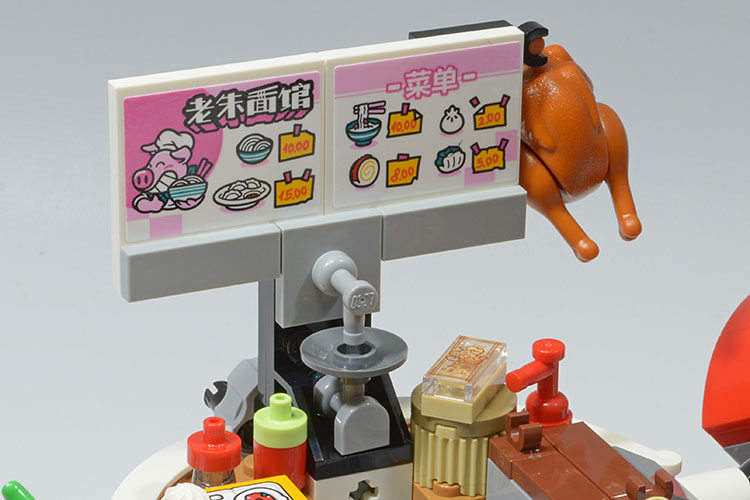
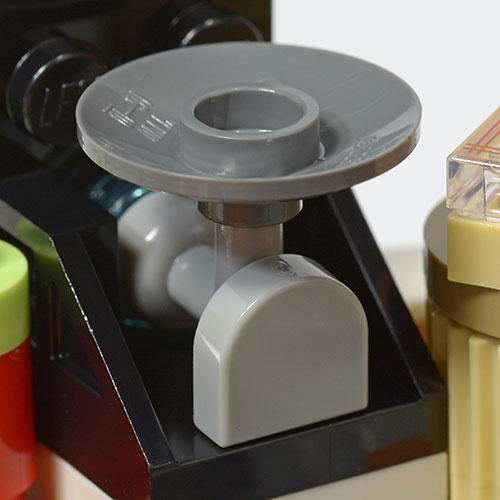
The dish can be firmly set high on the tap…

…or it can be positioned lower where it is looser.
Wheels are added after the menu assembly is completed. Both front and back wheels are sprockets onto which the tread assembly is placed. At the front, the tread needs to be threaded between the wheel and the big red fork.
Cleats need to align onto sprocket teeth…
…and pass behind the fork assembly. A wee bit fussy.
Next to last is making the chopsticks. The technic elements used to create the sticks have two rounded sides and two flattened sides. You will need to pay attention to the subtle differences in profile and align similar forms when building to get a smooth assembly. Again, the assembly isn’t critical, obvious, nor specifically indicated by the instructions.
Flattened sides top and bottom, rounded sides left and right.
Left: flattened and rounded sides aligned in assembly. Right: flattened side aligned next to a rounded side.
The assembled chopsticks are added to the back of the bowl. Alternately they can be placed in the left hand.
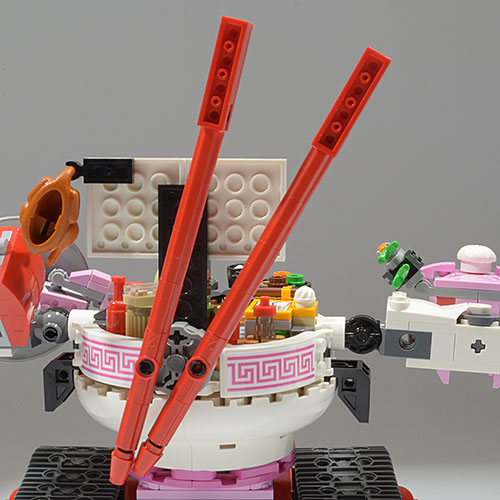
Chopsticks can be placed on the back…
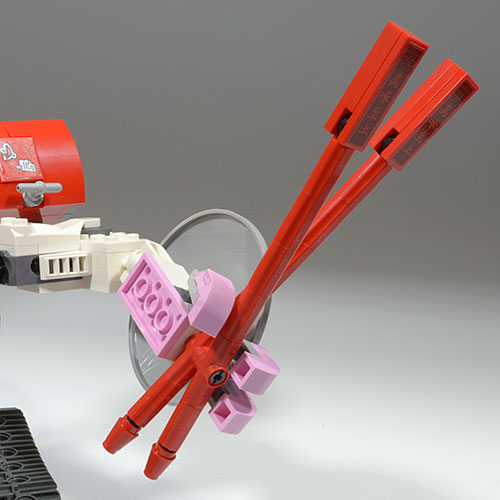
…or in the hand.
The last step is to add decorative elements to the kitchen area. In a very un-LEGO-like move, the rice ball and fried egg are simply placed loosely into the pot and frying pan, respectively…no stud, no attachment…just loose. So, yeah, that egg falls out easily and frequently. Mr. Tang’s rice ball sits similarly unattached in his bowl. It should then come as no surprise that these pieces free themselves, roll away, and hide during play.
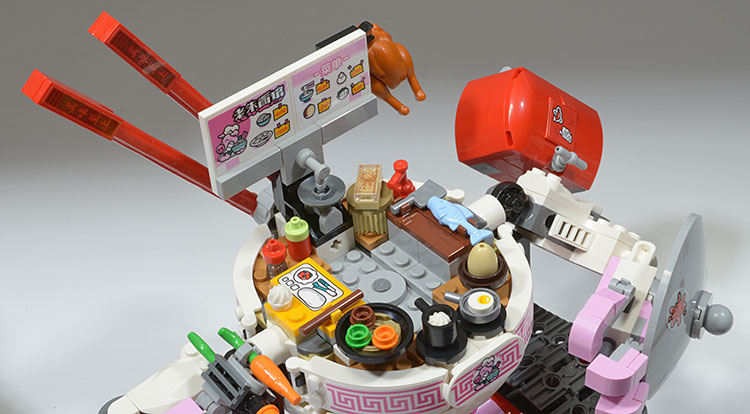
Finishing touches of cleaver, fish, pot, pan, and stick are added to the kitchen.
Into these empty receptacles…
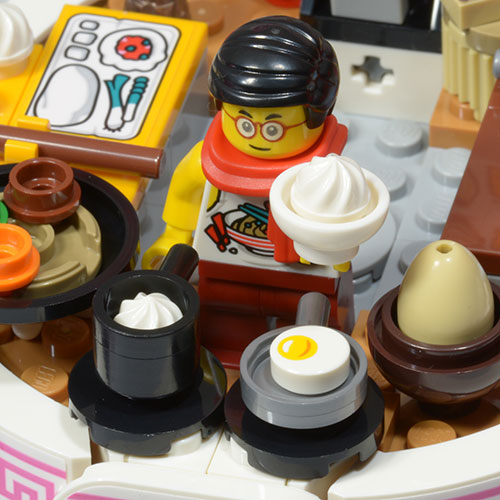
…the food elements are loosely placed.
A couple comparisons
Two portions of this build strongly echo portions of the Food Truck build. Let’s take a closer look at the big red fork and the pig shooter.
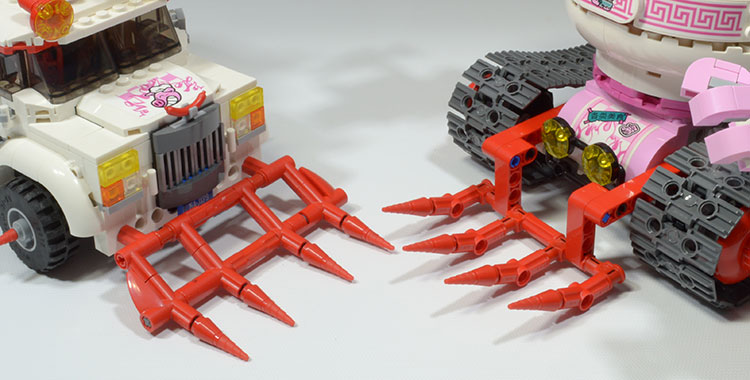
Fork it over. The fork on Pigsy’s Food Truck is manually operated and can pivot about 120˚. Friction pins as part of the build allow for gentle positioning…and the fork will remain fixed in position unless weight is added to the fork.
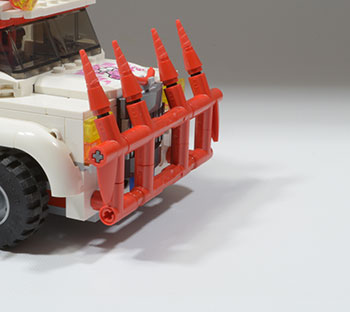
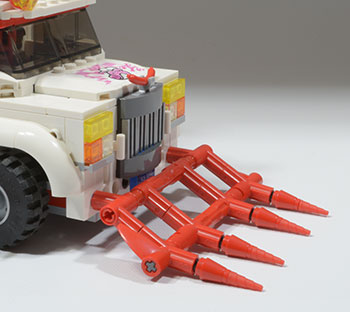
The fork on Pigsy’s Noodle Tank moves up and down as the vehicle moves. A cam on one axle moves the fork up and down every half revolution of the front wheel. The fork can be manually positioned higher than what the cam will move it, but it will not remain in position because it is freely hinged on axles and does not use friction pins at the pivot point.
Pig Shooter. The truck has a slightly larger pig shooter than the tank. The truck’s shooter is operated by turning the pig’s butt. The tank’s shooter is operated by turning the pig’s snout. Operation of the truck’s shooter is much easier, just grab the pig by the butt and you can pivot it on the underlying turntable and twist the butt to shoot. The tank’s pig is mounted to the arm by a long axle and fixes the pig in position. Repositioning the pig has to take place at the shoulder, making positioning both imprecise and limited. Turning the snout to shoot is also relatively clumsy and the rear-mounted missiles can be knocked off or mispositioned during the process if adequate care is not taken. The truck’s shooter can be operated with one hand where the tank’s shooter requires two hands.
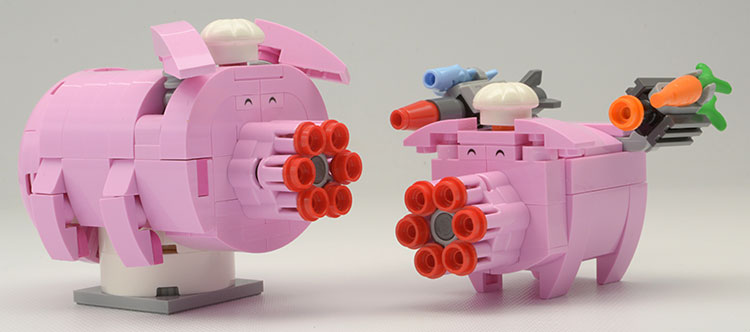
Truck pig shooter left, tank pig shooter right.
The Randolph T. Fielding Absolutely Administrivia Section
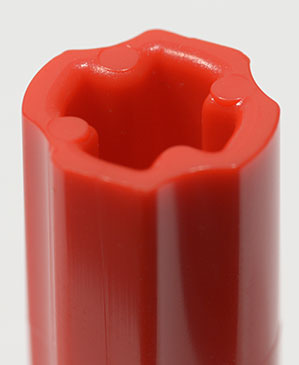
The set uses the newer 61332 2L black friction pins without the side slot and newer 42924 3L blue friction pin with single-slot sides. Comparing the old and new blue pins, 6558 has a wider throat than 42924 and has a center-located stop in the throat on either side, at the point between the side slots. 42924 has a continuous-width throat. Neither 6558 nor 42924 will accommodate a bar as the throat endholes are squared.
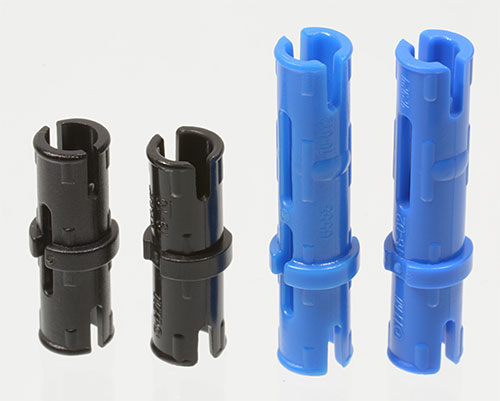
Left to right: 2870 2L friction pin, 61332 2L friction pin, 6558 3L friction pin, 42924 3L friction pin.
The set uses the 4459 taps without the spout hole.
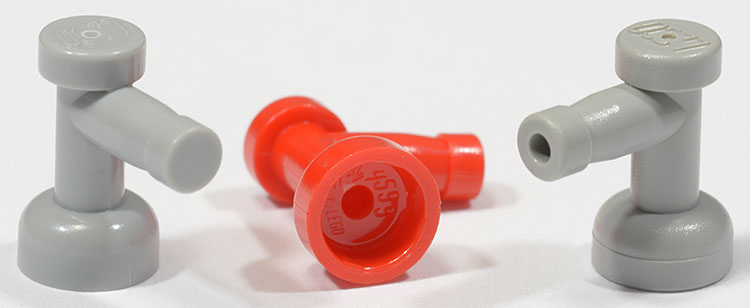
Left and center, 4599 without the spout hole used in this set. Right 4599 with spout hole.
Summary
There are some interesting build points in this set, and a few fussy bits, but overall a fun and engaging build. As a sit-on-the-shelf to-be-admired set, it is fine and gets style points for the wacky aesthetics and clever accoutrements. As a play set there are a lot of things falling off and falling out and something or other constantly needs tending. The up-down movement of the big fork when the tank moves is fun and the combination of the tread clatter punctuated by the periodic fork clank sounds decidedly tank-like.
Given the option of Pigsy’s Tank versus Pigsy’s Truck, I overall slightly favor the truck. Although aesthetically less cool-looking, the truck offers more play options. The truck can be a peaceful food truck or it can be in battle mode. The tank by contrast is always in tank mode. The truck isn’t constantly falling apart. Both sets offer villains. The food drop drone, which is a play feature in the tank set, requires quite a bit of force to loosen as noted earlier. All in all, the truck offers less frustration than the tank.
Disclaimer
My thanks to LEGO for providing the review set. The opinions expressed here are mine, and anyone is welcome to share or oppose them.
33489


